Solar dyeing – Hypericum

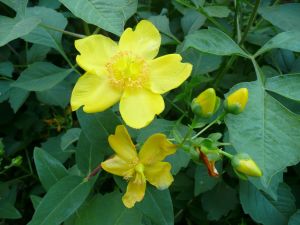
For one of my first solar dyeing experiments, I used St Johns Wort, Hypericum, from the garden. My plant is one of the many varieties of Hypericum.

St Johns Wort flower

On 6 January I placed the buds, leaves and flowers separately in three glass jars, filled with tap water (Oxford bore) and placed a weight on the top to keep the unmordanted cotton cloths submerged.

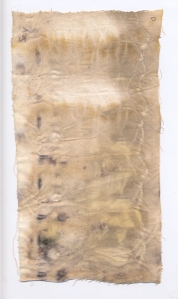
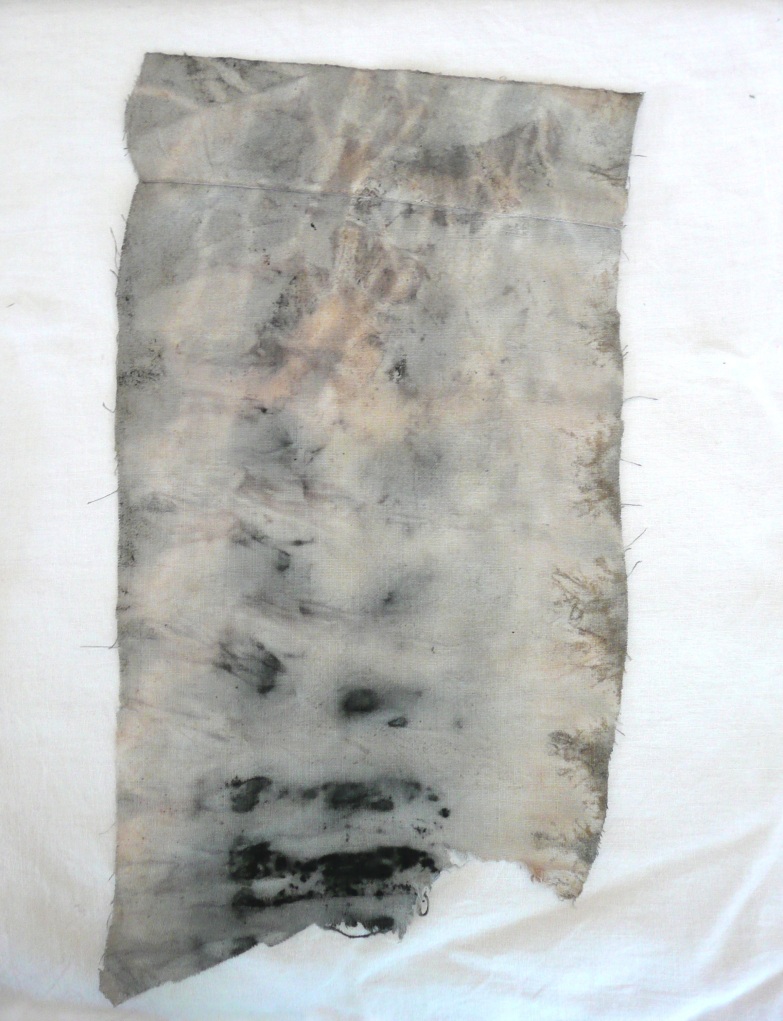
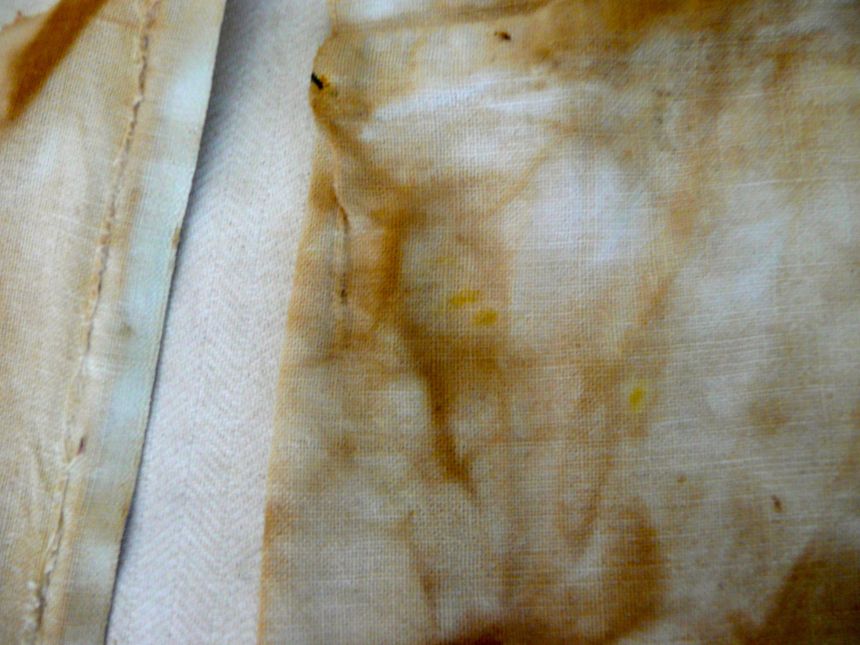
The following image is the dyed, scrunched up cotton from the jar that contained buds and two stones, one of which must have had a generous amount of iron in it as it introduced a black colour.

Hypericum buds

The resulting green, blue and black was very nice to see.  The cotton from this and the next jar was removed on 17 January.

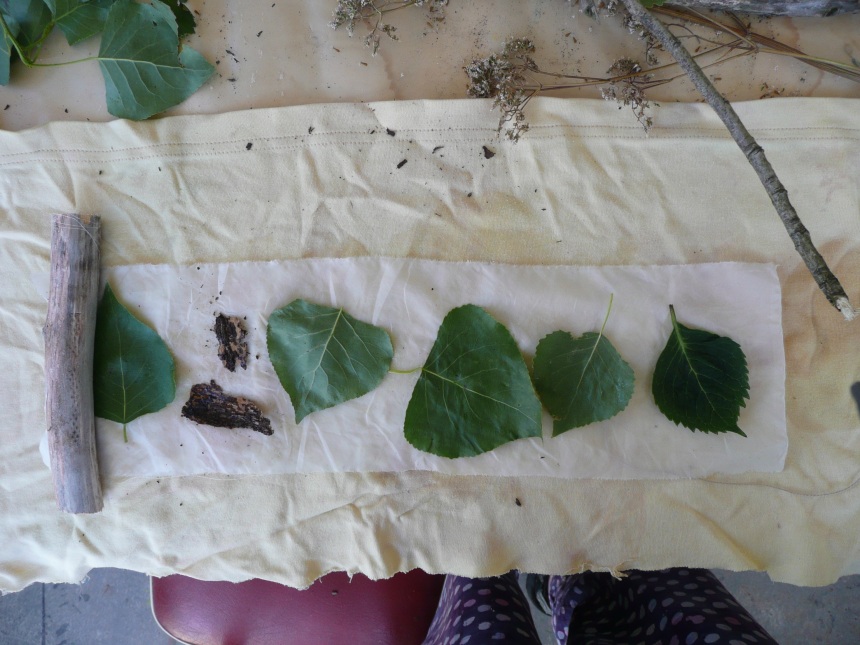
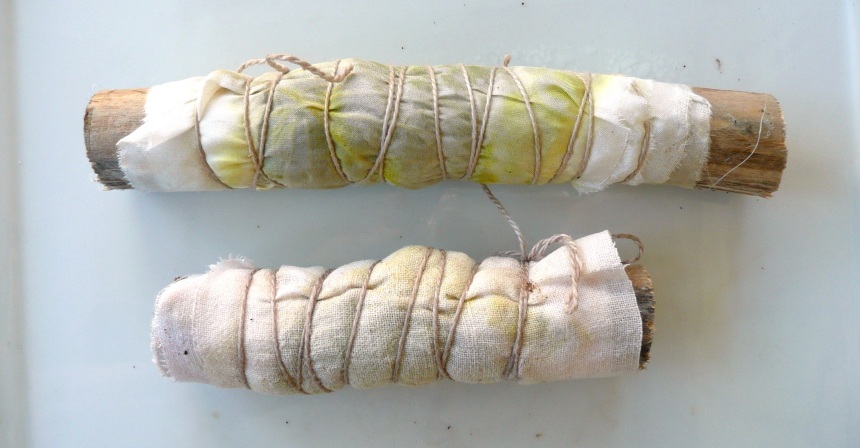
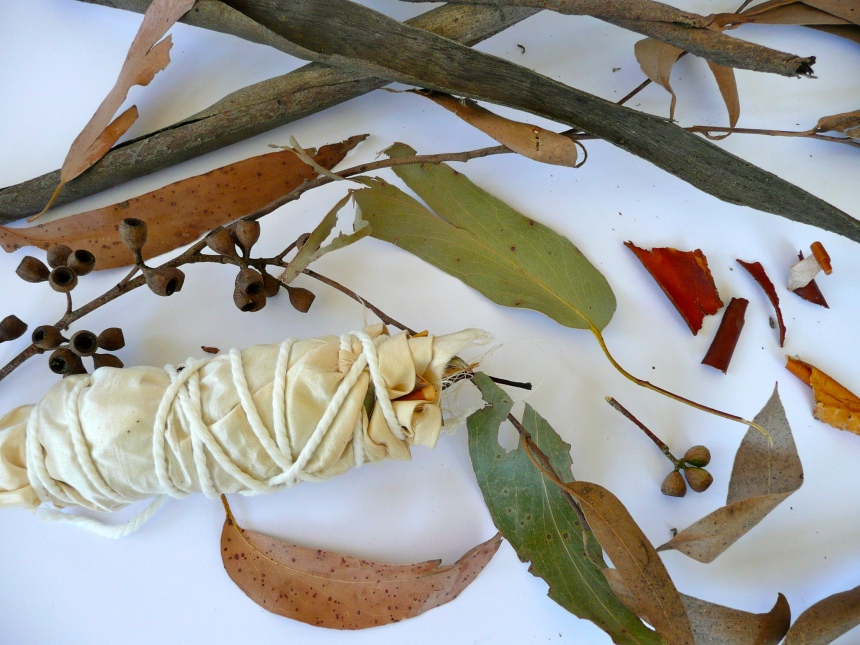
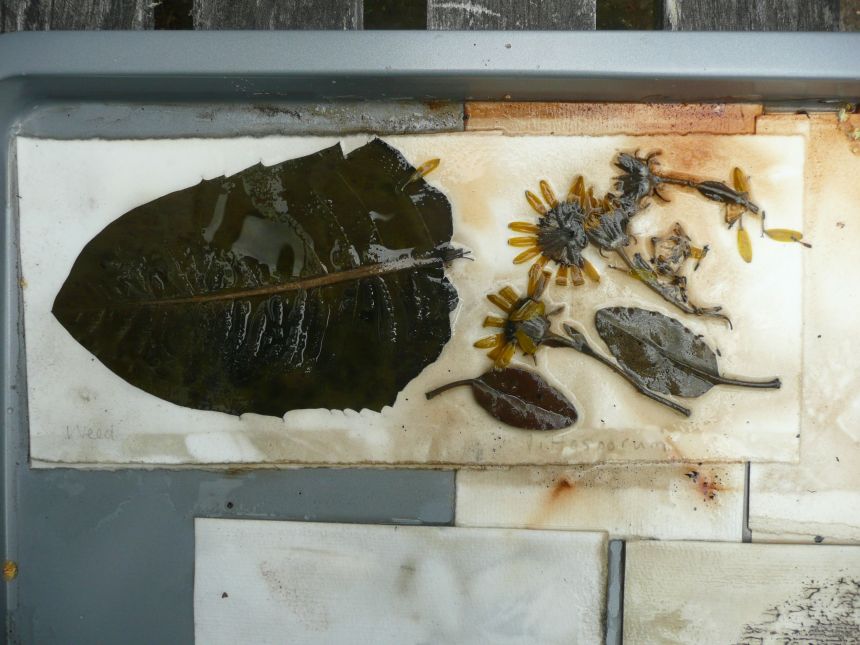
The jar with the chopped up hypericum leaves contained a Waimakariri river stone to weigh down the leaves and three folded and tied cotton bundles with different contents.  In the photograph below, the top scrap of cotton was folded on its own.  The lower scrap enclosed more hypericum leaves and some Acacia melanoxylon bark.  The leaves in this bundle came through as a pale green-yellow, just visible in the image.  The thin strip on the right is 300 gsm Fabriano paper, folded and placed in the jar with the bundles.

Hypericum leaves

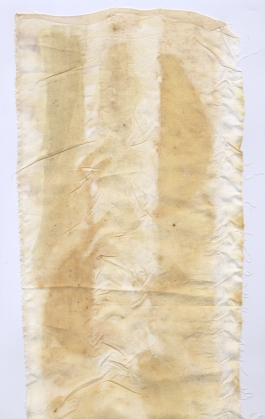
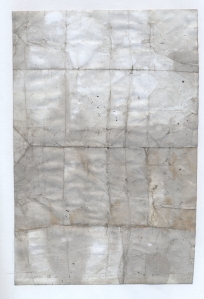
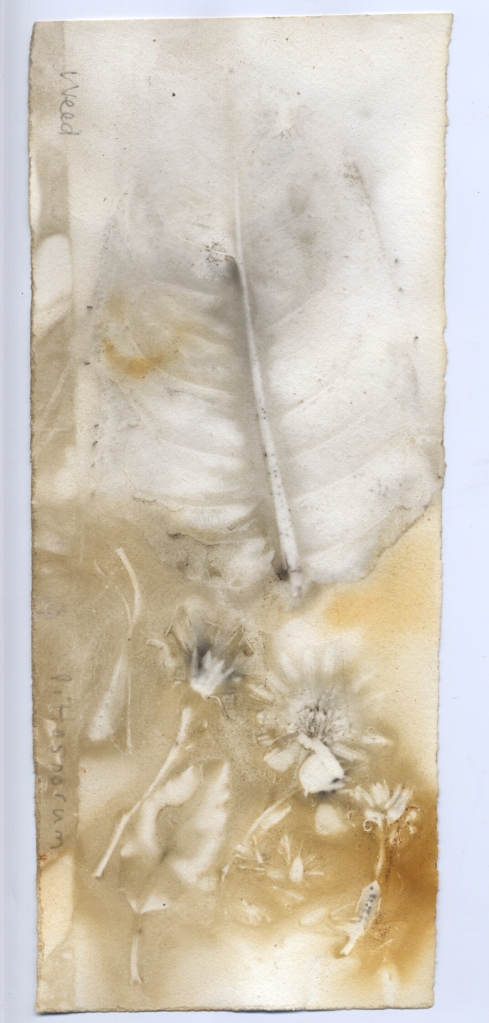
The third bundle containing flower buds is below.  The yellow buds did not seem to change the colour; I do not know where the grey marks came from!  Interesting that the iron caused such a different colour to appear in the first jar.

Hypericum

The third jar containing hypericum flowers and a piece of wire that I thought was copper was left until 28 January when I removed the cotton.  Some brighter traces of yellow appear, perhaps through contact with the wire.

Hypericum copper

On 19 January I started to record my solar dyeing tests and to date I have 35 of them.  No wonder I have not had a chance  to sit down at the computer.  The weather has been hot and mostly dry for about three weeks,  even now at 5.51 pm it is 27 degrees C in the studio (built as a greenhouse).  I recorded 47 degrees C one day on the shelf by the windows were I place my solar dye jars.  The garden is full of flowers and I could certainly never need to go out further afield in search of material for dyeing. I hardly know where to start.  I would prefer to concentrate on New Zealand native plants and have solar dyed with Harakeke the New Zealand flax plant – Phormium cookianum; Griselinea littorals; Hebe; and Wineberry – Aristotelia serrata.

I have been reading Richard Mabey’s book Weeds; How Vagabond Plants Gatecrashed Civilisation and Changed the Way We Think About Nature, published in 2010.  Chance and serendipity are rife here at the moment – I found this book in the library by chance – and I was also concurrently very curious about a weed that was new to me.  I eventually found this plant on the internet by using the search terms ‘tiny white flower weed’.  The plant is called Galinsoga parviflora and has the common names of Gallant Soldier or Potato Weed.  Well, it is growing in the vegie patch and appeared last season – near the potatoes.  Then I discover from the Contents that Mabey’s book  has a chapter entitled Gallant-soldier!   It so happens that this plant, a member of the daisy family, arrived at Kew Gardens in 1793 from Peru and was named after the ‘splendidly ennobled’ Spanish botanist Don Mariano Martinez de Galinsoga.  This plant has the tiny-est flower I have ever seen.  It escaped Kew Gardens in the 1860s and eventually found its way to my garden.

Another serendipitous moment arrived when I read in this book that in 1748 ‘a celebrated [British agricultural] improver,  William Ellis, who farmed at Little Gaddesden in the Chilterns […] was experimenting with different methods of weed control and pasture management’.  Ellis used clover as an effective way of controlling weeds. This nitrogenous crop could be ploughed in so was also a great cost saver as hand weeding would not be required.  I expect my ancestors from Little Gaddesden took to straw-plaiting to supplement their incomes, no longer being required to weed the Corn (wheat) fields.  Actually, we have also used clover as a weed suppressant – we have a bricked area that we despaired of – after two years hand weeding between the  bricks we once tried the chemical way but not really wanting to do this gave that idea up pretty fast (and it didn’t work really for the weeds came back quickly).  We finally decided to just mow it!  It works wonderfully, and is a haven for the bees as the clover is taking over.

Much to my comfort, Mabey also talks about Hypericum perforatum.  “Each leaf is covered in tiny transparent dots (the perforations of the Latin name…) and held up against the sky the sun’s rays prick through, like dapple in a springtime wood.”  A good connection with embroidery there…

This is miles away from eco-print and solar dyeing… and the dye from Galinsoga is a pale straw colour.

(Mis)Adventures in Eco Print 3

At last I seem to be getting somewhere with this colour transfer…

For this experiment I decided to try some other plants from the garden. I noticed that a hydrangea leaf when soaked in hot water even for a short time produced a lovely yellow. I collected some poplar leaves and small branches as the recent gales tore off a large branch from one of the shelter trees. We had to spend some time cutting up the large branch, and tidying up our neighbours’ paddock. So I thought to commemorate this, I would try the poplar leaves and twigs in a steamed eco-print.

Poplar branches

I modified my steaming process by using folded chicken wire in the bottom of the pot, which meant the lid fitted properly and so prevented too much steam escaping. The bundles were cotton with rice and alum mordant enclosing a poplar twig, bark and leaf, and silk soaked in alum enclosing poplar twig, bark and leaves plus one hydrangea leaf.

P1170125

P1170124

P1170157
Yellow dye was visible on the silk once the steaming started, but very little on the cotton bundle, so that colour must not have come from the hydrangea leaf.

Here is the dyed silk cloth unwound.

P1170160

And a close up of the imprint.

Poplar print

The cotton bundle was a little disappointing, plenty of yellow and a pale tan colour plus some nice marks left by the (previously used) cotton thread for tying. I think the yellow must have come from the lichen on the bark. The poplar leaf is only just visible at the foot of the fabric, the green leaf point just to the left of the piece of cotton thread.

Poplar cotton

(Mis)Adventures in Eucalyptus Eco Printing (2)

Testing eucalyptus on silk and cotton again.

Eucalyptus leaves

Last week I collected some more dried, fallen, eucalyptus leaves from the same tree as before.  You can see what beautiful colours these dried leaves have.  The green leaf on the left by the twig was a fresh leaf blown down by the recent north-west gales.  These leaves were placed on dampened, un-mordanted silk and rolled up in close contact with the cloth.  The eucalyptus twig formed the core of the bundle which was bound with cotton knitting yarn.

I made three more silk bundles with eucalyptus leaves, the smallest one was rolled up on itself with no eucalyptus twig in the centre. Two cotton bundles were also steamed.  I used some more of the cotton fabric as in the first tests, but this time it was mordanted with soy milk.  One of these cotton bundles contained only a small stem of daphne leaves and pink-red flower buds.

eco  bundles

I used the colander as a steamer basket with the pot lid to cover.  I steamed the bundles for one hour as this basket arrangement was not very air tight.  At one point the water nearly dried up, and I think the temperature in the pot became too hot as the silk fabric on the outer layer along one side of the largest bundle is stiff and ‘fused’ together.  One cotton bundle also showed signs of heat damage as well.

I finally managed to get more colour on the fabric pieces!  Still not what I would have expected, as is shown by the large silk bundle pictured below (left).

Lge silk bundle

This is the small silk bundle. Colour from the leaves and bark has been taken up by the silk quite well.

Silk e eucalyptus

This is the soy mordanted cotton fabric.  The bundle contents were daphne leaves and flower buds, and an eucalyptus twig core.  The cotton has absorbed quite a lot of colour.

Daphne on cotton

The following day I had another go… A post to come soon.

(Mis)Adventures with Eucalyptus eco prints

Plunging in with eucalyptus and silk.

In early December 2012, I started to try using eucaplytus leaves on silk and cotton fabric.  I went down the road to where a gum tree planted by Mrs White in the late 19th century towers above all other trees.  I collected dried, fallen leaves and fresh-when-cut leaves; see pods; bark; twigs from the prunings by the tree frog machine that took place a fortnight earlier.  Using India Flint’s method on page 264 of her book Second Skin, I rolled up in the silk the leaves etc around a bark covered twig for the core of the bundle of fabric.

First silk bundle

In a stainless steel pot I simmered the following for 30 minutes:

One bundle of leaves, bark twig, seed pods all tied up with a polyester piping cord.  An extra piece of eucalyptus bark; extra eucalyptus leaves; coil of aluminium wire 1 mm dia x 170 mm long; a piece of aluminium foil 80 mm x 200 mm; a used tea bag; tap water from kitchen, with a top up from laundry tap as necessary (untreated Oxford town bore water, no chlorine).

I was a bit nervous nothing would happen.  I was correct!  Well, something did happen, but not what I desired.  This is typical art progress!

After 30 minutes I turned off the heat and left it until the next day.  Without  removing all the cord, I had a peek to see what was happening when the bundle was cool.

First silk bundle

Apart from the resist created by the cord and plant material, very little colour came through from the eucalyptus, the whole piece being dominated by the dye water, as far as I understand.  I also wondered if this material was, in fact, silk.  I have had it for about twenty years and it was an old piece when I was given it.

Undaunted, you might say, and buoyed up by India Flint’s Eco Colour, I researched and read the internet – more very useful information from Alice Fox in the UK,  Wendy Feldberg in Canada and Cassandra Tondro in the USA  – thanks SO much for this.  I re-read the information to sort it all out in my mind into an ordered format so that I could at least intend experimenting in a reasoned fashion and record the tests in my workbook.  I made ash water from the wood burning stove ash, and then got jars of copper, alum, rhubarb and iron water underway.

The ash water had been strained through an old cotton pillow case, so I thought I would put this mordanted fabric in a hot dye and used the left-over silk bundle eucalyptus brew.  This still contained the leaves, aluminium foil and bark, and I also put in some Sequoiadendron giganteum bark from the garden as well (another tree planted early on in Oxford’s history) and a small dash of the rust & vinegar water I had used in my earlier paper experiments (just for good measure).

The cotton bundle contained an old rusty nail as core, lemon balm leaves and  one eucalyptus leaf at the end – all tied up with the cord previously used.

Eucalyptus cotton iron

I also put in a sheet of paper, concertina folded, enclosing another eucalyptus leaf, and held together with two rusting bulldog clips. Later I added another folded sheet of ordinary printing paper.

Euc thread Bond

Euc fold

As the experts will know, the water got very black!  I did not record how long I left the contents heating, but must have been about under an hour.

The results:  the cotton dyed fabric is above showing the black marks from the nail, and I think the eucalyptus leaf is showing at the top where I laid it across the hemmed fabric.  The two paper experiments are the smaller images – the bulldog clip marks are seen in the left hand image.

Hapa-zome on paper

Hapa-zome  is a Japanese word meaning ‘leaf dye’ and was given to a technique for transferring plant image and colour on to fabric by beating the colour into the material  (as mentioned by India Flint in her book Eco Colour).  Here I have transferred it directly into my workbook (acid free 110gsm cartridge paper).  The plant juices managed to go right through three pages of the workbook, the first page being the one receiving the hammer hits, while this page shown below being the one in the middle and where I laid the flowers and leaves  – you cover the plant with a card or paper while beating.  It’s quite a violent process, I thought; I did not really enjoy it – but there was a hot nor’wester wind blowing that day.  The reds turned to a purple after a while.  The pansy flower is the most successful print with mostly true colour.  The red begonia flower and leaves were bursting with colour, but that turned to purple, pink and blue eventually, the green leaf juice remaining green.  A great exercise, with instant results!  Definitely worth persevering with. Different papers may produce a different colour result.

Hapa-zome workbook page

Plant prints on paper

As it is 1st January 2013, and I am having a ‘holiday’ today, thought I would start the year with a post. These are some of my recent experiments on printing plant images and colours on paper (360 gsm watercolour paper).

I used diluted vinegar and a few pieces of rusty iron and layered plants and paper, weighted it all down with some of my rock collection and w a i t e d. I made sure the paper was damp – well quite wet really!

Here are the before and after images.  The before being before I took the leaves and flowers off the paper. The first two images show part of a dock leaf and pittosporum flowers and leaves. Not much transfer of plant colour.

Dock leaf and pittosporum leaves and flowers

Dock leaf and pittosporum flowers

The next two images are of lemon balm leaves, aquilegia flowers and another unidentified leaf (plant has a beautiful blue flower ‘cone’  see below).  The plant material was pressed between a folded piece of paper.  Some of the plant colour from the aquilegia has transferred to the paper (see the left hand impression).  These are, to me, ghosting images, formed by the plant material resisting the water which has been coloured by the rust and the dust off the stones weighing the paper down.  They are delicate images and I was really pleased with them as some of my first attempts.  I now have India Flint’s book, Eco Colour, so now that the Christmas season is over I will be able to concentrate on eco printing – well, in between all the other household duties…  And, my freezer has found a new raison d’être!

I wish everyone a bountiful and successful 2013.

Lemon balm leaves, aquilegia flowers

Lemon balm and  aquilegia

Now follows an image of the blue flowered bush – if anyone knows what it is, please let me know!  I used one of the pointed leaves.

Blue flowered plant

Botanical Pigments

Exploring pigments from plants… ephemeral colours, like the blooms or leaves themselves.

Have attempted to transfer plant colours to paper.  The paper I used was acid free Fabriano Artistico, 300 gsm, as well as other types of paper.  The orange gazania petals made no impression, but the small pansies, the snapdragons, the black nemophila, and the elderberry leaf all left a mark of colour behind. Of course the rust worked, as did the onion skins, the black mould on the runner bean pod and the coffee… Here below are some of the results:

Here is another page of colour taken from red snapdragon and  blue pansy flowers and a lemon balm leaf along with other unrecorded plants.  The paper here was the inside of the cover of a pad of Bockingford acid and lignin free 300 gsm paper, so this cover sheet it may be acid free as well?

Snapdragon, pansies, lemon balm