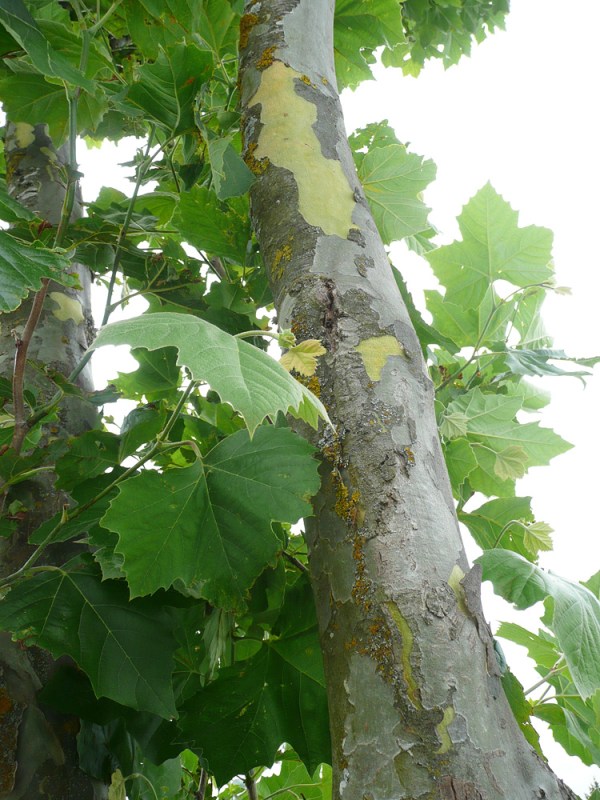
I went out to find the tree – it is what I know as a London Plane tree – and it seems to be known under various botanical names and I won’t bother to list them. Glad that little problem sorted… See previous post.
Earth pigments, paint, painting, printmaking, eco colour and visual arts; Canterbury, South Island, New Zealand
Welcome to my website, which shows the variety of art I have chosen to do, much of which is based on my use of local rock pigments and colours from plants.
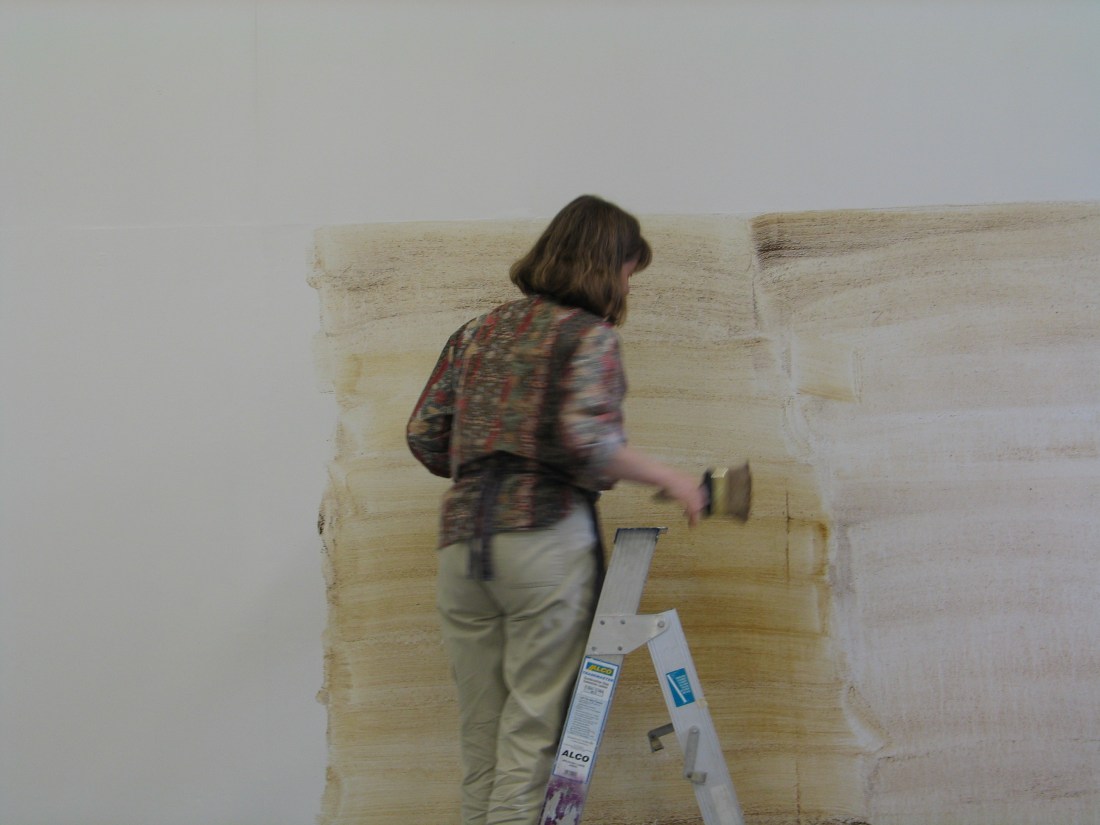
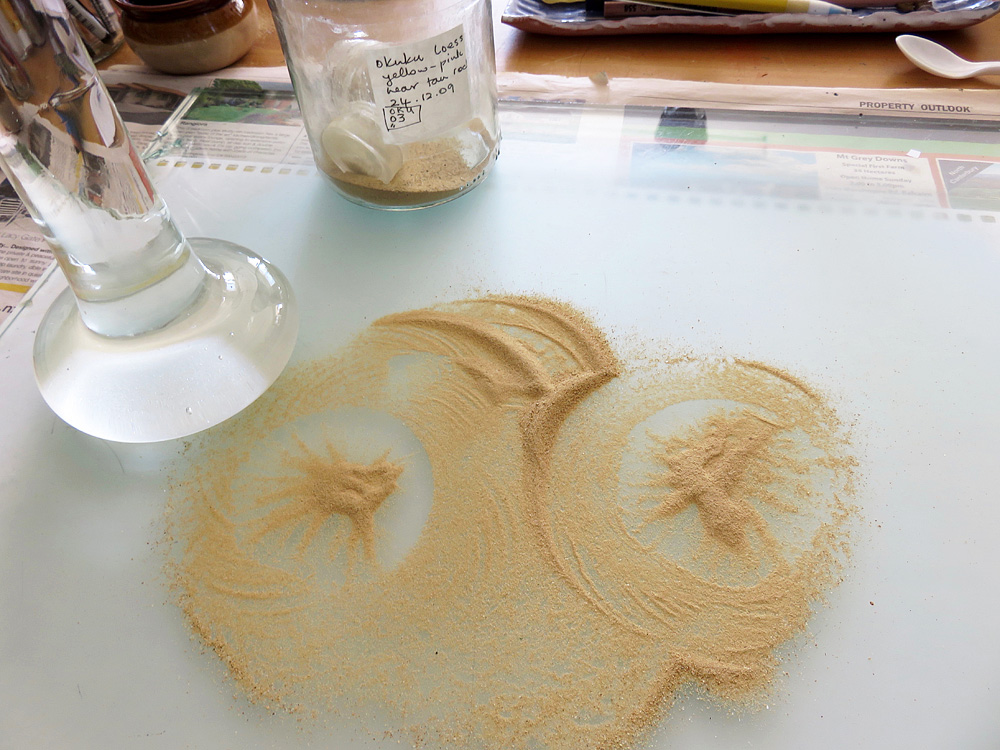
This interest in pigments started when researching my subject – an eroding hillside, and I realised the colours revealed could be used to make paint. I followed my intuition at first, knowing the art of Richard Long who in the UK used Avon River mud on gallery walls. I crushed and heated the clay and mixed with water and even acrylic primal, and applied to paper and canvas. Eventually I was laying the clay over the studio wall. It was during the next years study that I investigated watercolour binders for the rock colours.
Having worked at setting up and running a certified organic orchard in Paparimu near Hunua, south of Auckland, sustainability and environmental concern played a big part in my choice to use local rock and plant pigments. While I find rock beside road cuttings and on rivers and beaches, I feel quite aware that this is not a never-ending resource. You only need a small pebble, size of a walnut shell, and a tablespoon of ground pigment to give a few years supply of watercolour paint. Even the binder ingredients can be sourced in New Zealand. I notice the rain transporting the coloured clays down to the rivers and the sea. Here in Canterbury, the rocks continually coming down the braided rivers are necessary to prevent the erosion of the land by the sea.

Volcanic clays, Banks Peninsula
Canterbury pigments provided me with a method of discovering more about the topography, landscape and history of an area that I had only previously known as a visitor.
Locally-found pigments obviously speak about place, however, what they show is not so immediately apparent to the casual observer. Most of the colours are underground and only revealed by the natural forces, erosion or when roadworks cut through the land’s surface.
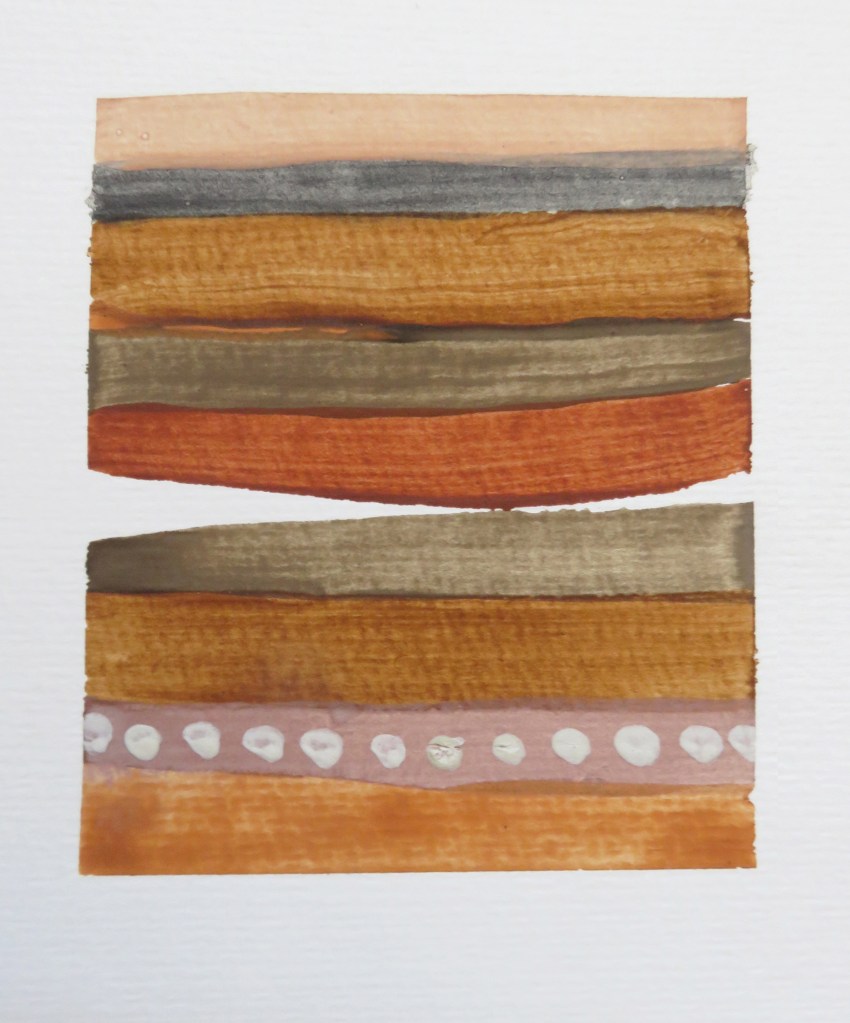
While the artworks speak about place, they also demonstrate the distinctive qualities of these local pigments. Natural earth pigments, because they are unrefined, make a paint that is full of texture and colour variation which is unique to the place of origin. The colours within a rock emerge during the grinding process, yielding a colour that has a brilliance and a character all of its own.
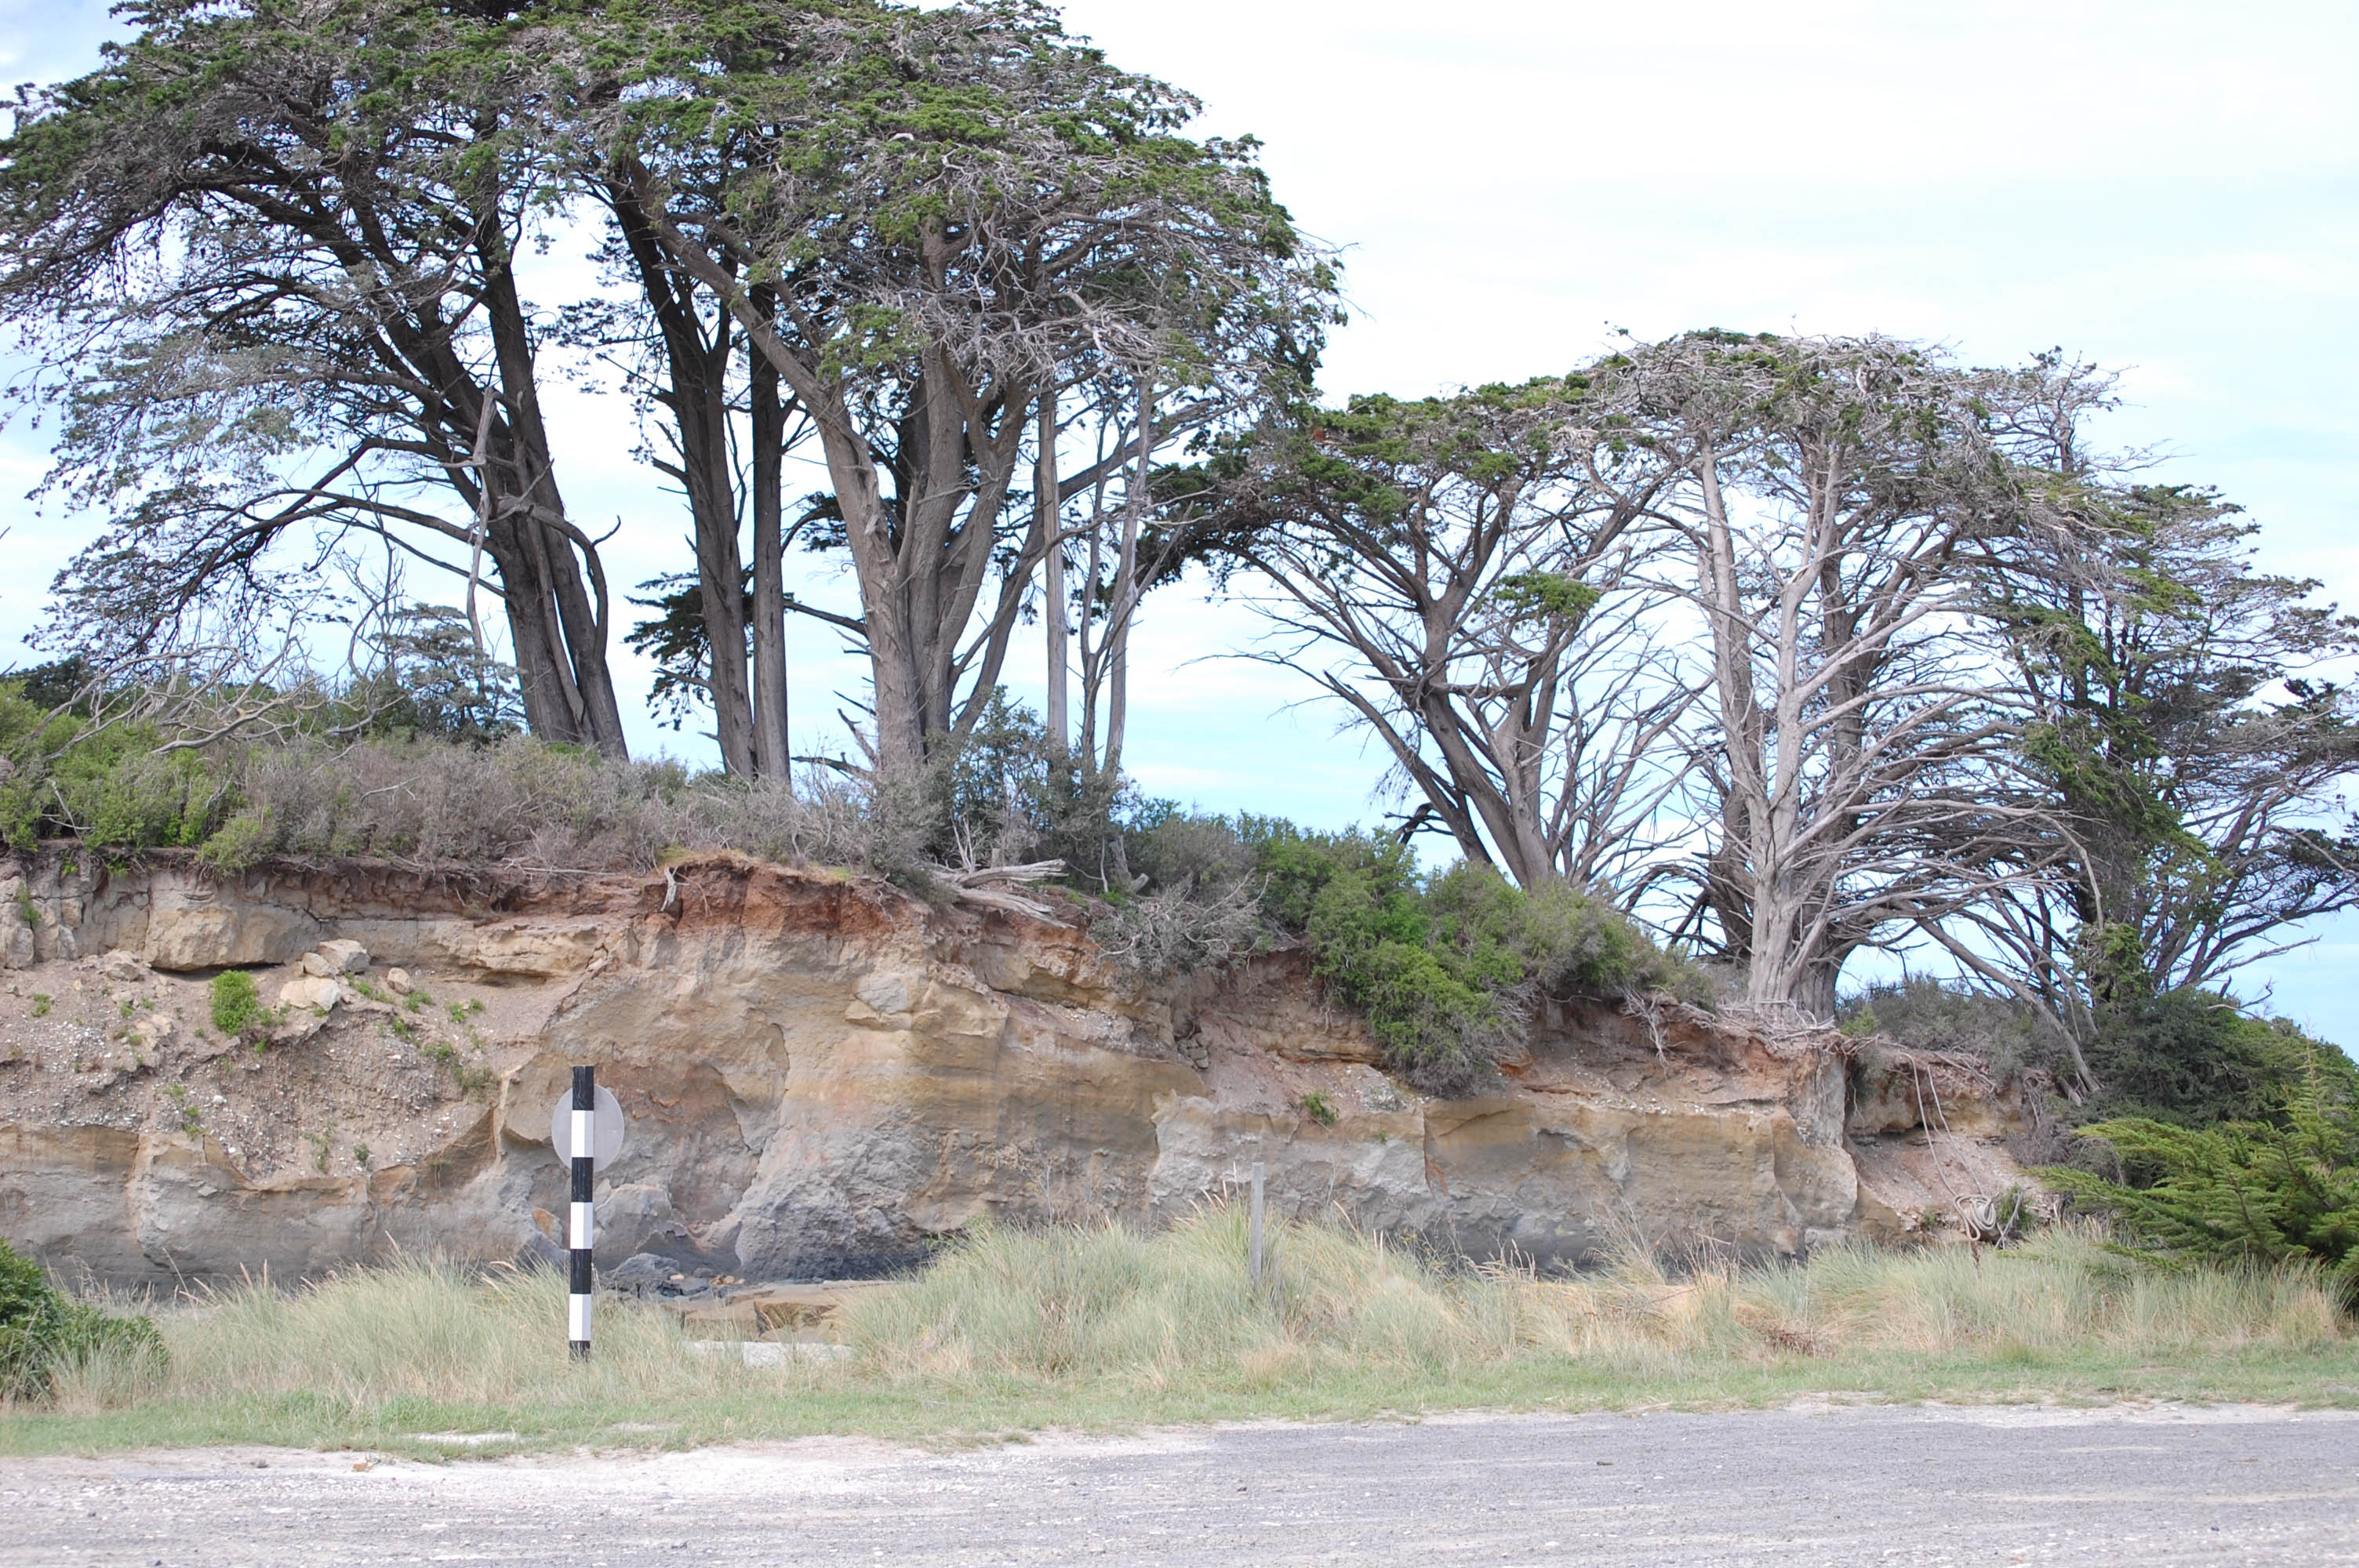
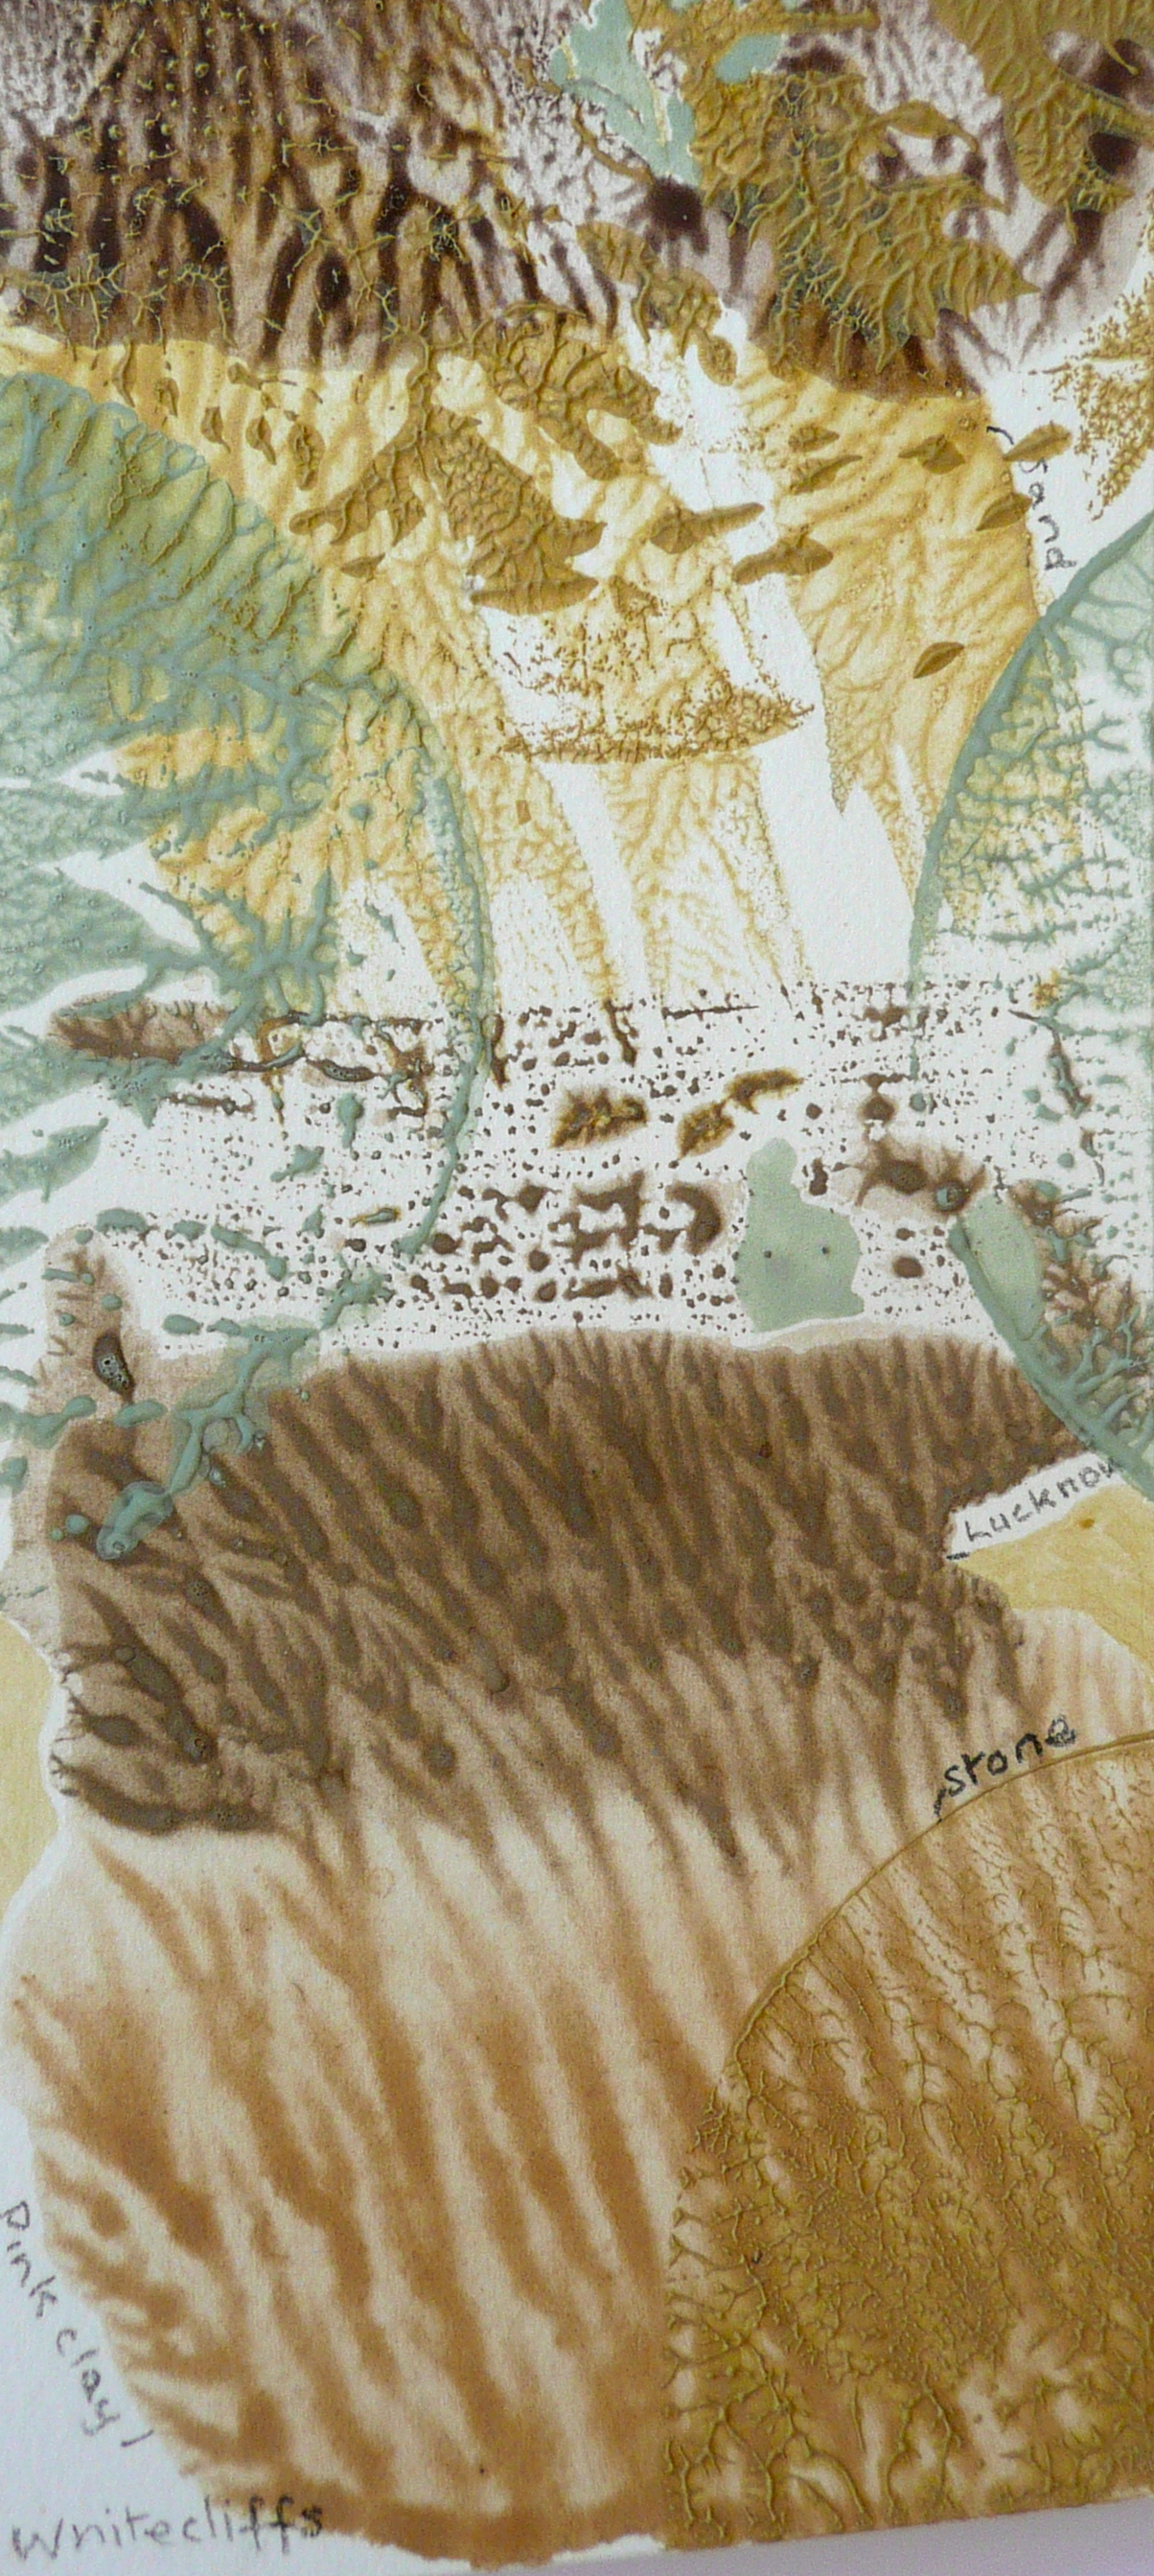
Above; Motunau rock layers
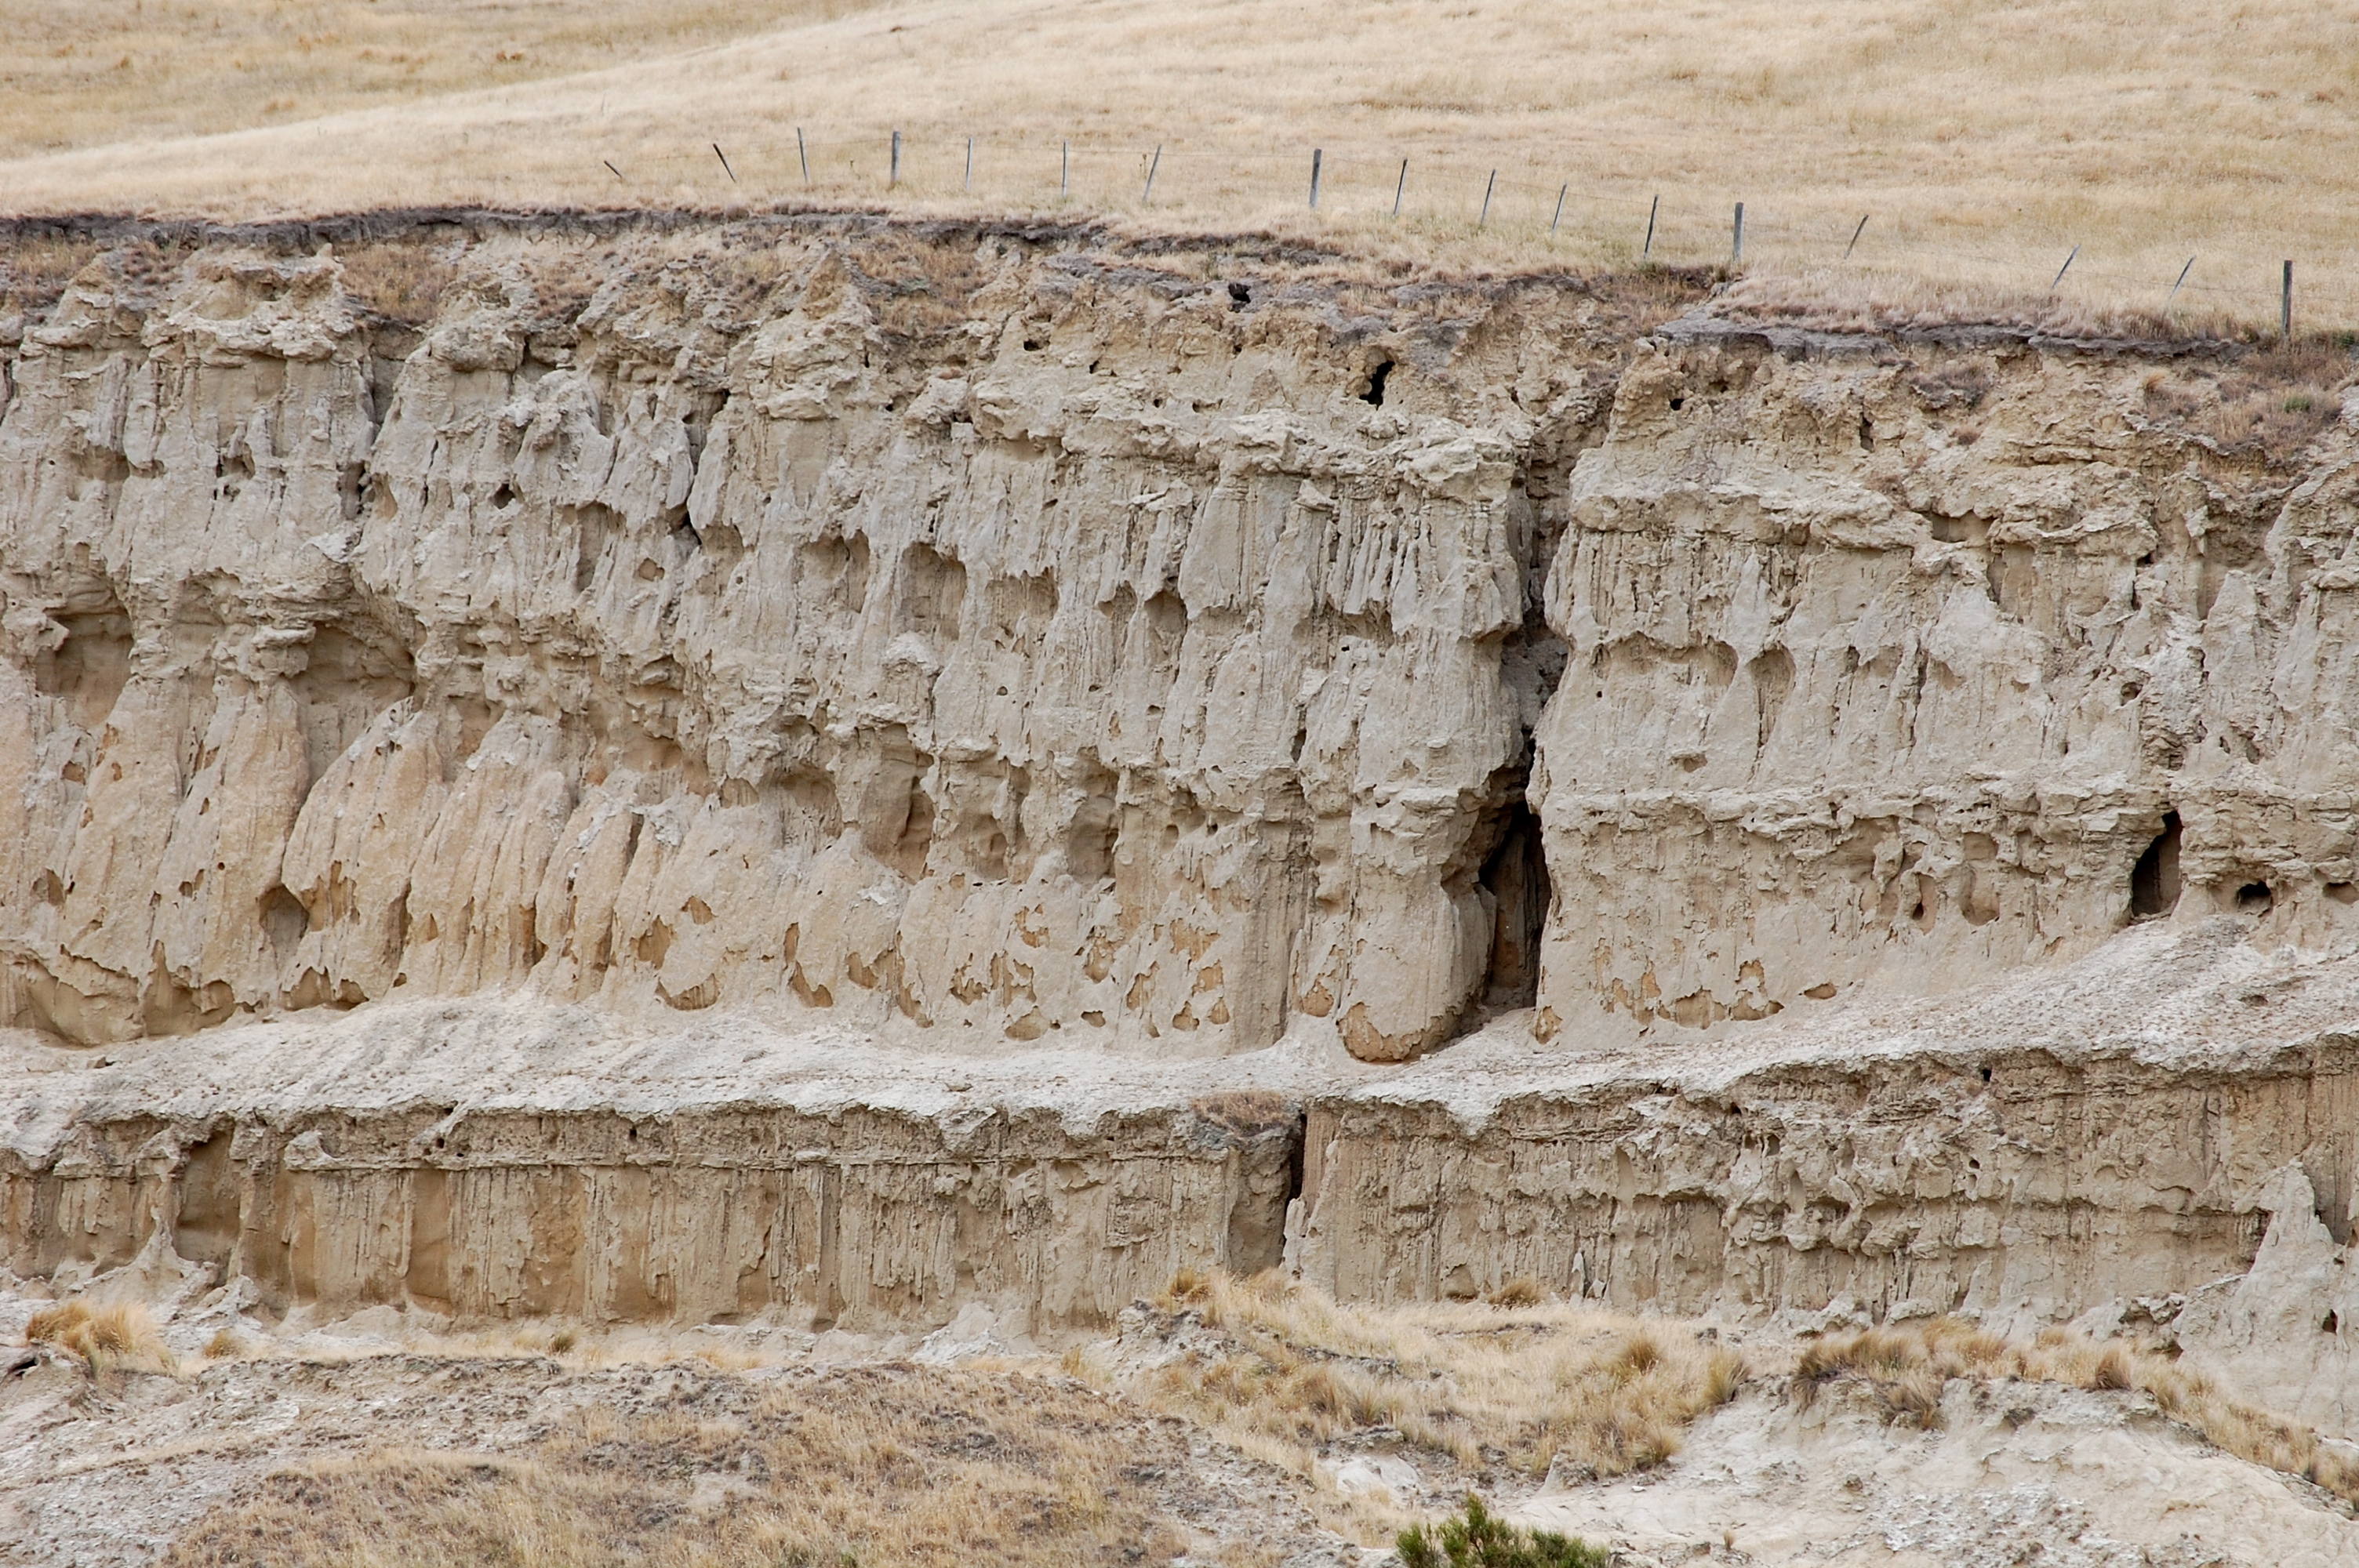
Below; Loess, shown here near Banks Peninsula. This is rock that covers the land, accumulating over the millennia, from windblown particles of rock dust. It can erode in fascinating ways.

In researching the topography and history of the Canterbury landscape, I was intrigued by the imagery suggested by lines imposed on land. This is shown concretely, as roads, railways, fence lines, shelter belts, drains, canals. It is shown abstractly as partition lines drawn up on a map and the blocks and grids denoting divisions or boundaries of town or country. This imagery became the basis for the development of my earth pigment paintings.
All images copyright © Celia Wilson 2009-2023,
all rights reserved; may not be reproduced without prior permission.
Selection of work including paintings, bookbinding, printmaking, paint tests.

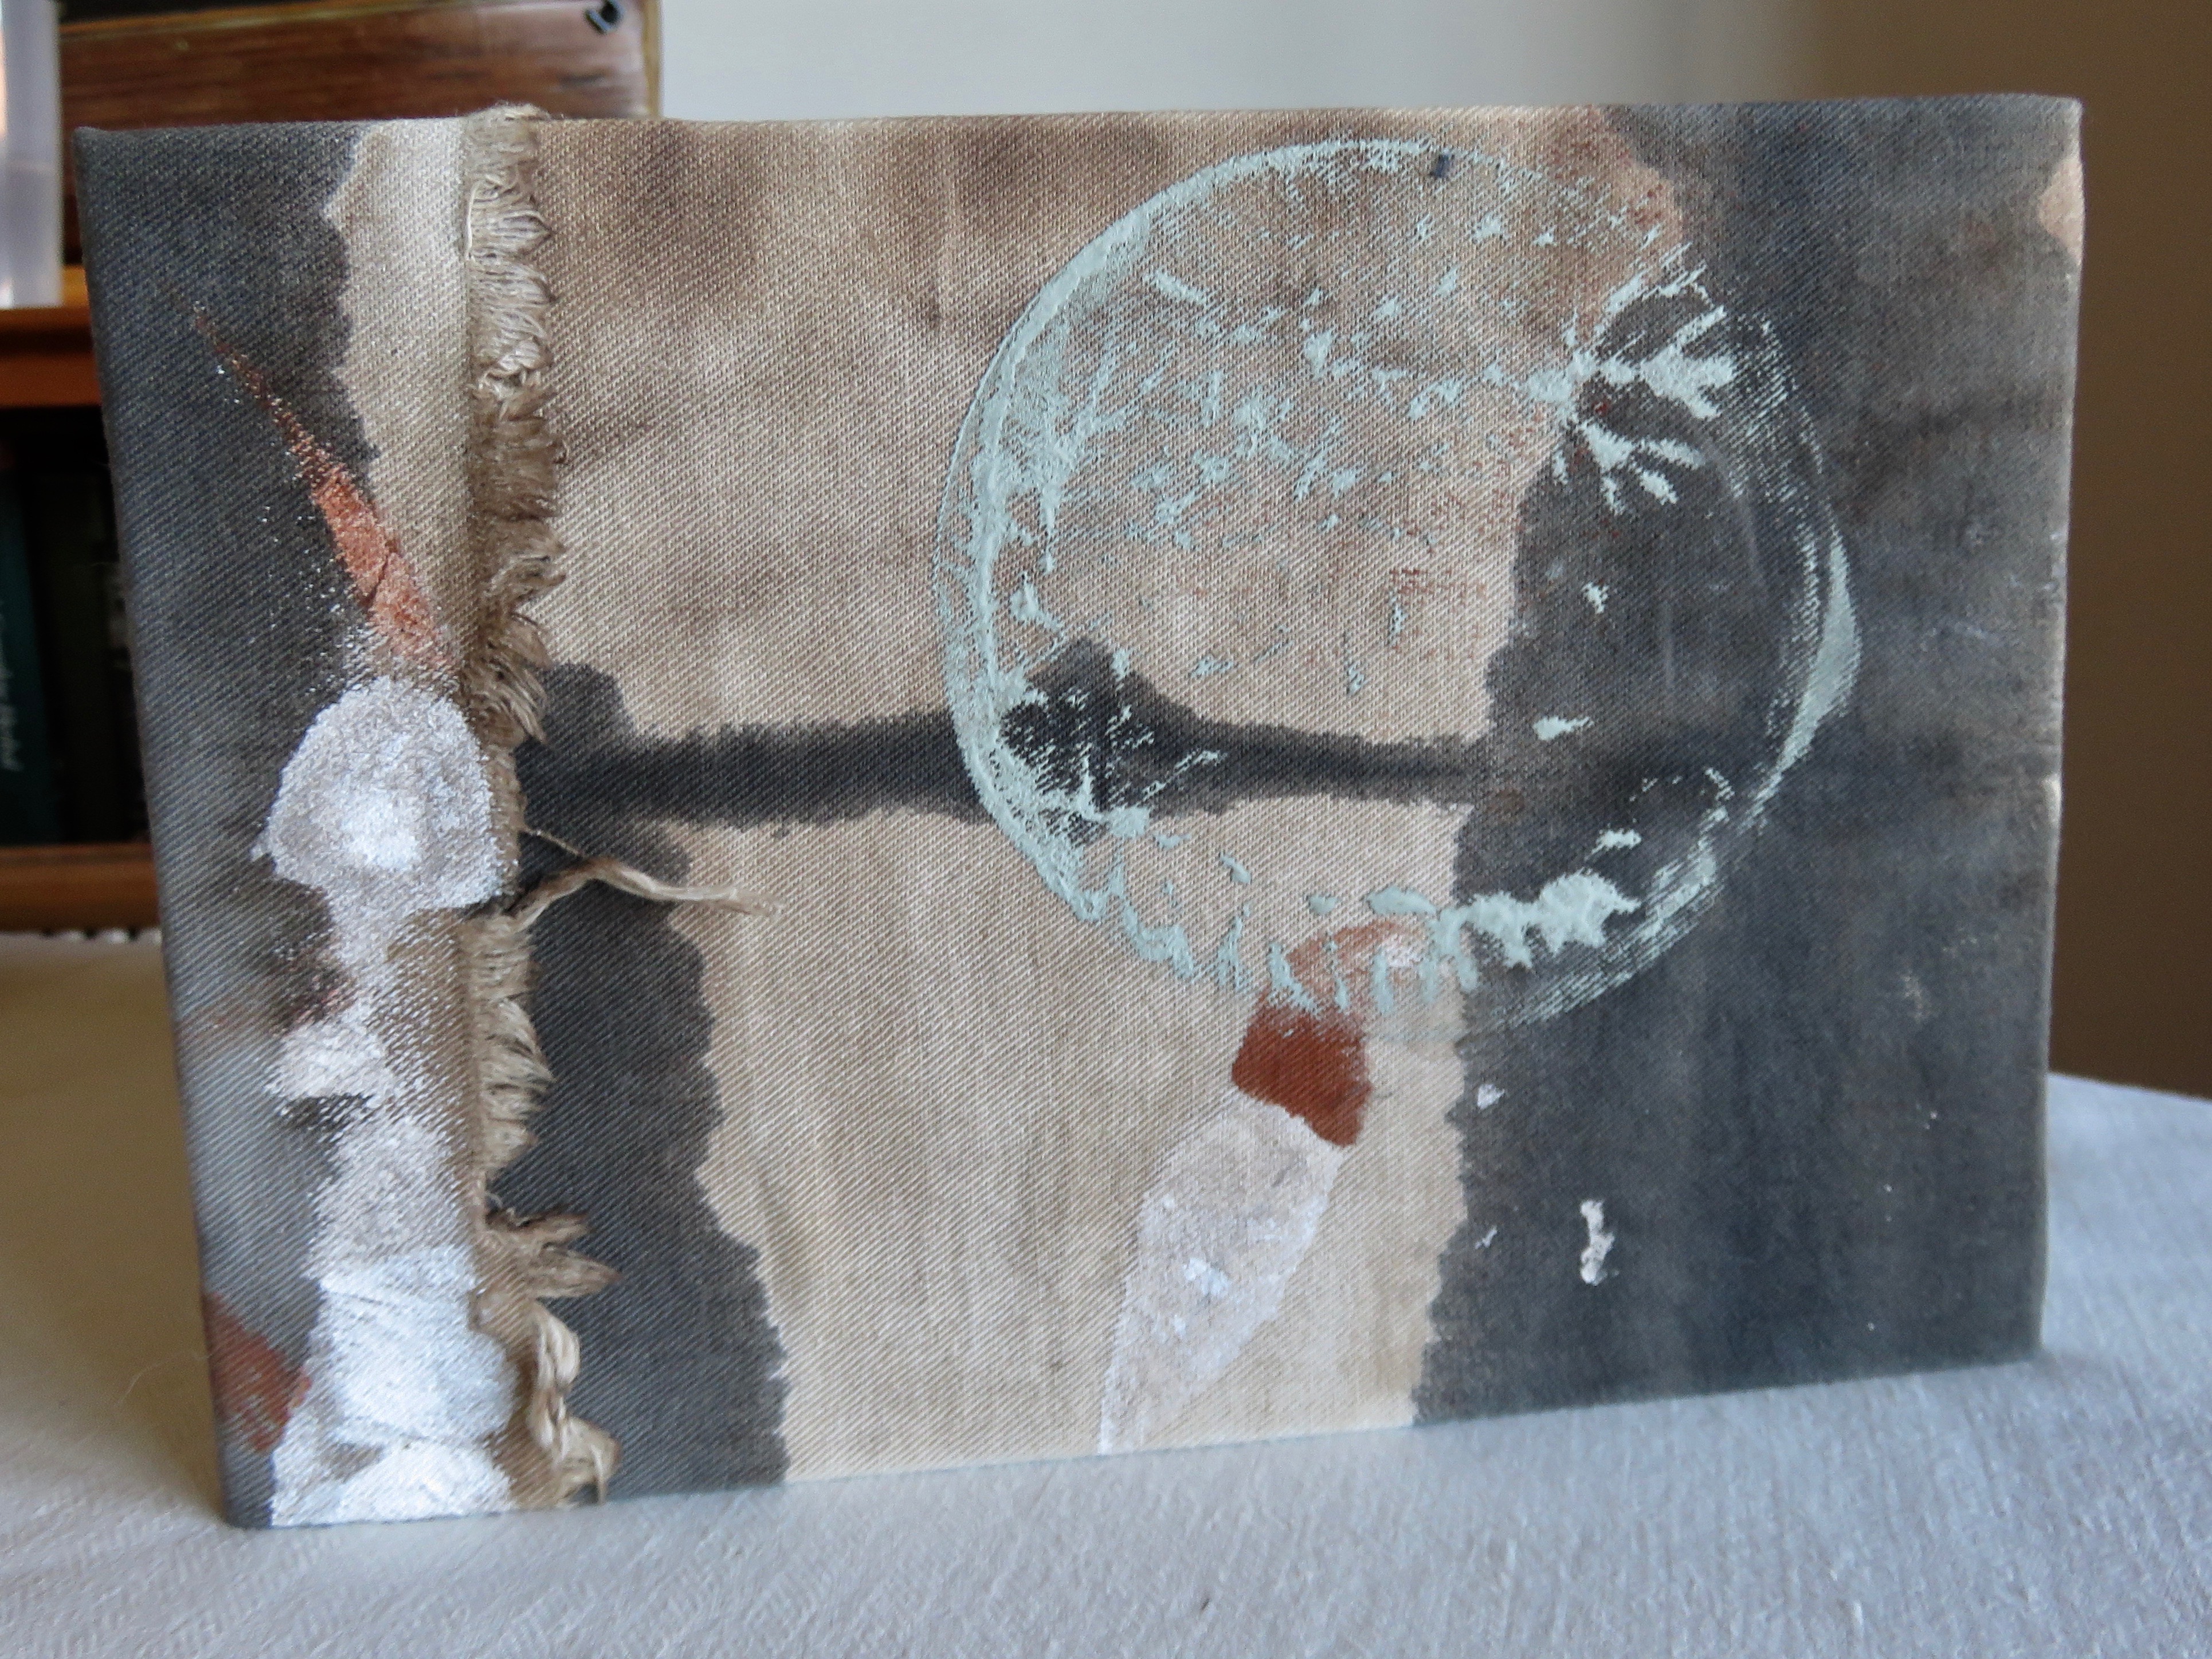
Various local pigments, on paper, book cloth and a print.
Celia Wilson
Artist
Biography
2004 – 2007 Elam School of Fine Arts, The University of Auckland. Bachelor of Fine Arts
2008 School of Fine Arts, University of Canterbury. BFA Honours (Painting)
New Zealand citizen by descent, permanently living in New Zealand from 1986, after many years moving between the UK, Australia and New Zealand.
Since 2007 I have been researching the availability and the historical and current uses of earth, mineral and plant pigments in New Zealand, mainly those of Canterbury, Banks Peninsula, Hurunui, and Otago, with the cataloguing and recording of colours being the methodology. These colours I use through painting, printing, book binding, and papermaking with the intention of showing pigments as colours found at a location.
With my pigments I usually make watercolour paint with gum arabic and honey as the main binder ingredients. I also use colours obtained from plants – roots, leaves and flowers – from gardens in Oxford. I have experimented with sustainable colour via solar dyeing and the steam printing of plant colour on to paper (‘ecoprinting’).
I find the watercolour medium brings out the characteristics of the rock pigment particles – some are opaque, some are transparent – and, as the pigment is unrefined, there are often hidden colours which can be revealed as the particles diffuse and settle into place on the paper.
In hand-ground paint the larger and irregular particles, plus the additional minerals or chemical substances embedded at molecular level, have the effect of reflecting a wider part of the spectrum. It has been shown that this creates a more intense colour than a synthetic colour which reflects a narrower part of the spectrum. The use of natural plant dyes is an eco-friendly practice, the dyes are safe for body contact, while the colours are beautifully unsophisticated and harmonised with nature. The uniqueness of each batch of colour is also a characteristic I value.
My interest in nature stems from a curiosity of how land is formed, and how humanity has changed both the land and its biota. A practical involvement with the land in Paparimu, near Hunua, (since 1989) has included the design, establishment and running of a certified organic orchard for ten years until 2007. I am now living in Oxford, North Canterbury and volunteer at the Arts in Oxford Gallery helping with exhibition installation.
Selected exhibitions and workshops
2020 Christchurch City Art Gallery, Paint Making Workshop for Adults, 26 October
Open House, on Fridays/Saturdays/Sundays between 17 July to 13 September, Arts in Oxford Gallery. Seven printmakers working in the gallery’s main exhibition space to encourage and provide broader connections between artists/creatives and communities. This to be achieved by inviting visitors to view and discuss works in progress with the artists, watch demonstrations of techniques, and inviting other artists to attend and join-in on a casual basis. Printmakers are Kathy Anderson, Jo Ernsten, Casey Macaulay, Ruth Stanton McLeod, Kris Waldin, Tessa Warburton, Celia Wilson.
2019 Canterbury Colours Workshops for Adults and Children, Turanga, Christchurch City Library, 13 January
Oxford Papermaking Group, showcase exhibition of handmade paper and how it can be used, 27 July to 11 August, Arts in Oxford Gallery.
2018 Locality, group exhibition exploring location, materiality & positioning with Mark Adams, Tony Bond, Mike Boot, Cheryl Lucas, Elfi Spiewack and Tessa Warburton. 9 June – 10 July, Arts in Oxford.
Paintmaking Workshop, 23 June, Arts in Oxford Gallery.
2017 From the Rivers to the Shore, 10 June – 18 July, group exhibition curated by Celia Walker, Arts in Oxford Gallery.
#TheFlockWorkshops, in connection with BRaid, 30 May – 16 June.
Sanctuary, group exhibition for Artists Against Slavery, Arts in Oxford Gallery, 28 October – 29 November.
2016 Accumulative, group show with Ruth Killoran, Ruth McLeod, Rachel McRobb and Kris Waldin, Arts in Oxford Gallery, 8 October – 2 November.
Paintmaking Workshop, 23 October, Arts in Oxford Gallery.
2015 Kidsfest, Artists Book Cover and Bookmaking Workshop with Tessa Warburton on 15 and 16 July, Arts In Oxford Gallery.
Hot Off the Press, group printmaking exhibition with Gaby Reade, Heather Maxwell, Ruth Stanton McLeod and Sue Alexander, July/August, Arts in Oxford Gallery.
Paintmaking Workshop, 1 November, 2015, Arts in Oxford Gallery.
2014 Kidsfest, 5 – 23 July, 2014. Paint making Workshop on 15 July. Arts in Oxford Gallery.
2013 Colours from a Landscape. Solo exhibition. Dunedin Botanic Gardens, in association with The Blue Oyster Gallery, Dunedin.
2012 Colour of Distance. Group exhibition with Helga Goran, Kim Lowe, Jocelyn Mills and Cristina Silaghi. Papakura Art Gallery. 3 March to 7 April, 2012.
Sense of Place. Group exhibition with Helga Goran, Kim Lowe and Cristina Silaghi. Hastings City Art Gallery. 28 July to 9 September, 2012.
Land | Scape. Group exhibition curated by Tracey Williams. Papakura Art Gallery.
2010 Colours from the Earth. Solo exhibition. The Chamber Gallery, Rangiora, 2 May to 2 June.
Forms of Attention. Group exhibition with Helga Goran, Kim Lowe and Cristina Silaghi. The Arts in
Oxford Gallery, Oxford. 24 October to 21 November, 2010.
2008 Postgraduate Conference, 10 October, 2008, School of Fine Arts, University of Canterbury.
Presented Out of the Ground, a talk on my use of Canterbury pigments and their place in my artworks.
Publications
“Studio Work”, Oculus, Postgraduate Journal for Visual Arts Research, University of Canterbury Department of Art History and Theory, 1, (2009): 56-57.
Forms of Attention. Catalogue to accompany exhibition at Arts in Oxford Gallery, 2010.
Colour of Distance. Catalogue to accompany exhibition at Papakura Art Gallery, 2012.
Experiencing Distance: Creative Explorations. Contribution to educational supplement to exhibition Papakura Art Gallery, 2012.
Sense of Place: Distances: Passages, Conjunctions. Catalogue to accompany exhibition at Hastings City Art Gallery, 2012.
Fragile Paths, Proximities and Distancesin “Dwelling and Sharing: Places in Experience”. Educational supplement to Sense of Placeexhibition Hastings City Art Gallery, 2012.
Tessa Laird, From the I-Land.Publication to accompany the group exhibition LAND| SCAPE, Papakura Art Gallery, curated by Tracey Williams, 2012.
“Canterbury Colours”, Turkey Red Journal, Vol 22, Issue 2, Spring 2018
Collections
The James Wallace Arts Trust <www.wallaceartstrust.org.nz>
Private collections in the United Kingdom, New Zealand and China.
I went out to find the tree – it is what I know as a London Plane tree – and it seems to be known under various botanical names and I won’t bother to list them. Glad that little problem sorted… See previous post.
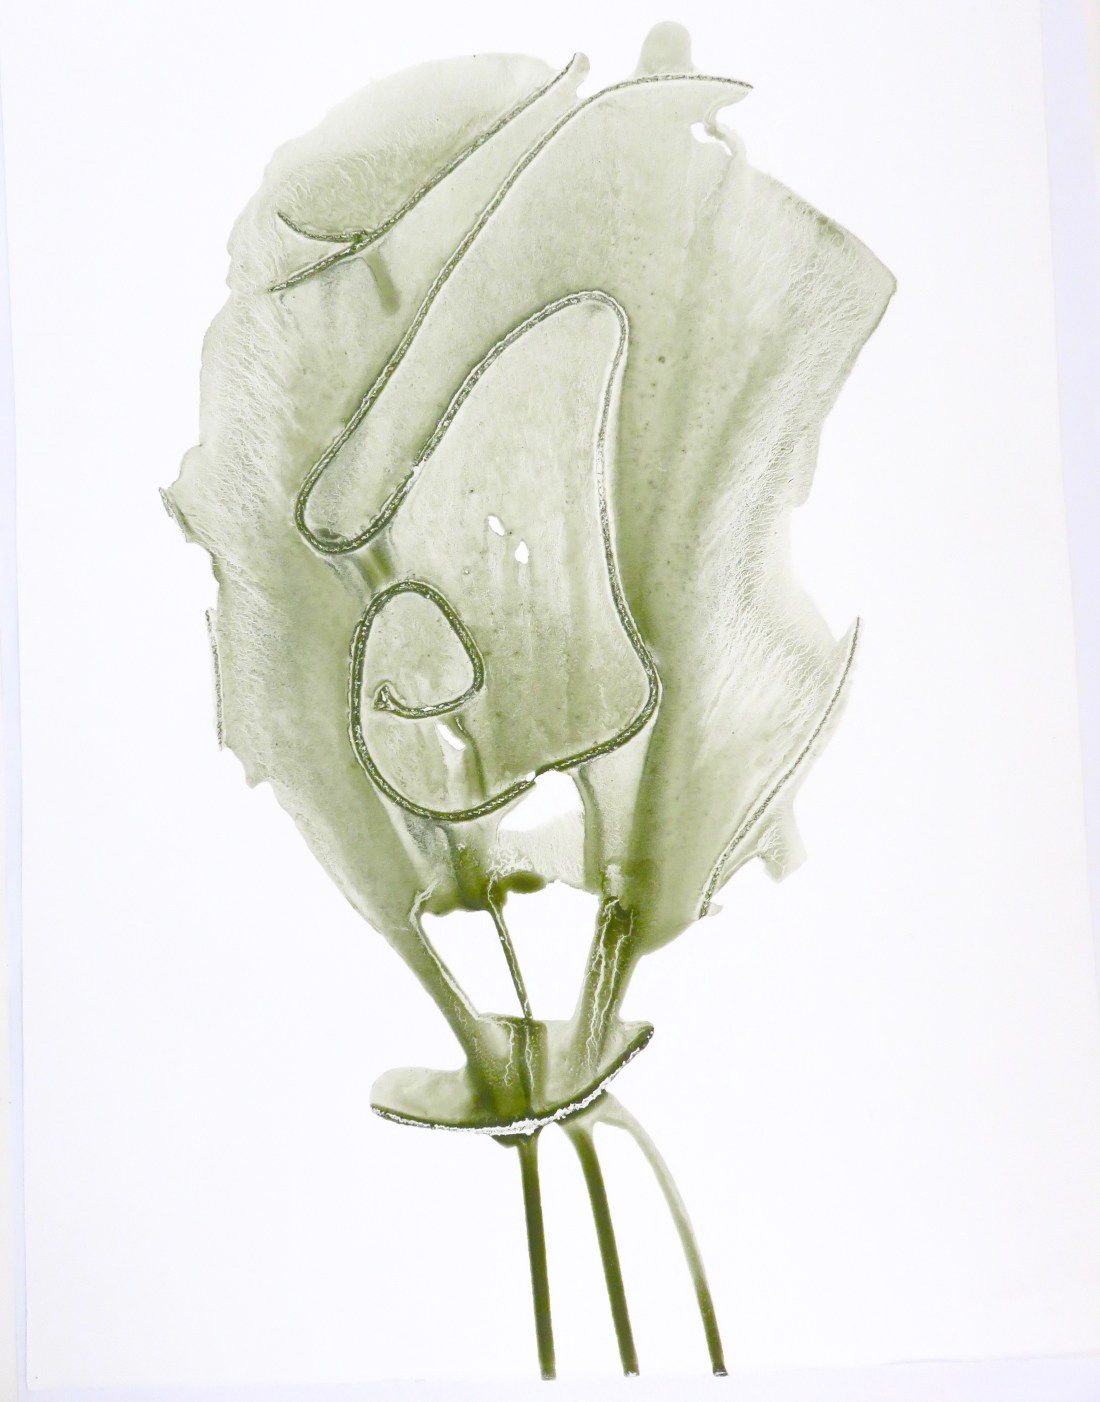
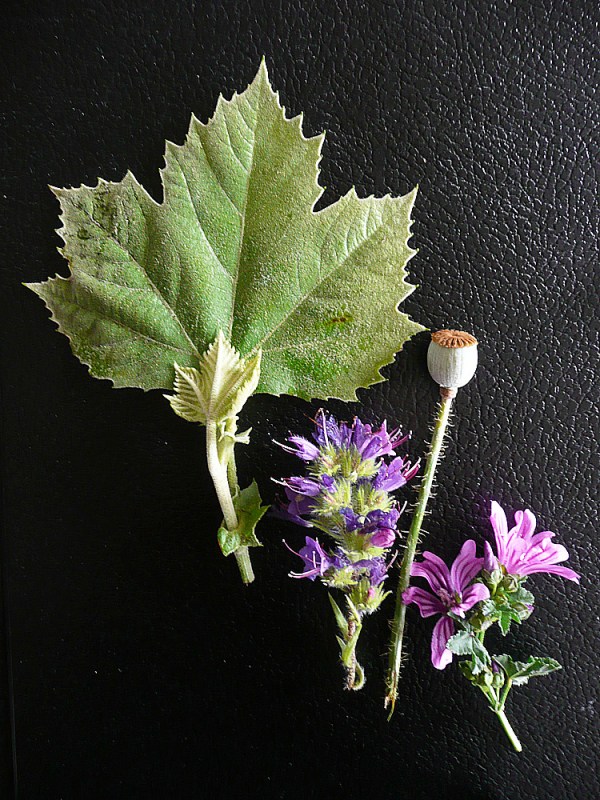
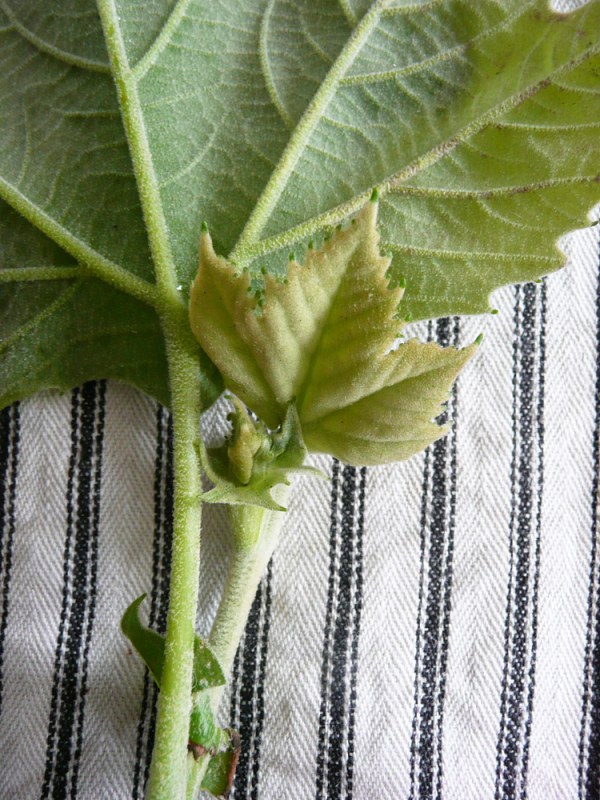
On a walk yesterday I found a windblown leaf, and later picked some leaves and flowers from the garden. I am not sure at all what species of tree the leaf is from. It is difficult to define, mainly because it is immature. However, I think it may be a Platanus (plane, sycamore) as suggested by the stem and leaf vein structure. To memorialise this arrested development I made prints from the leaves.
I made a few nature prints, on paper and cloth. The first print is from the inked plate (with the leaf removed after passing the two through the press). I dropped the inked plate on the floor which accounts for the wiggly marks and scratches. Liked the effect!
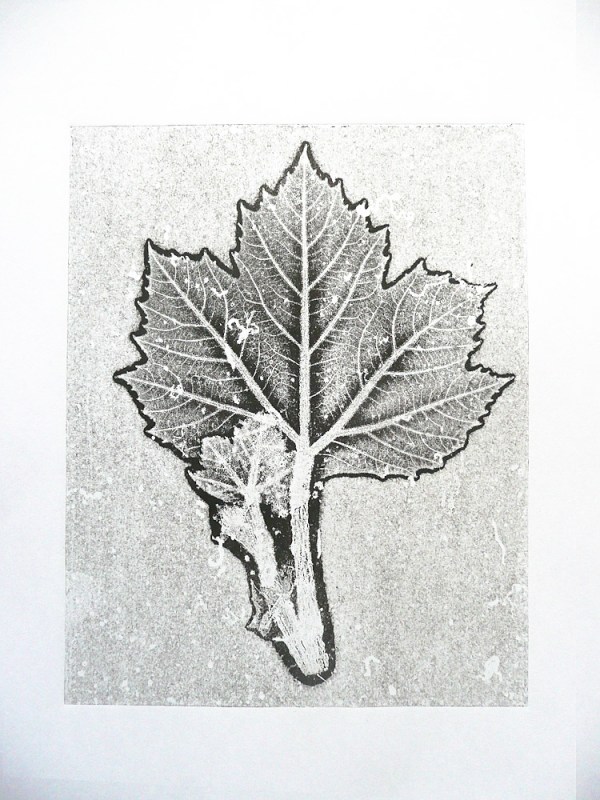
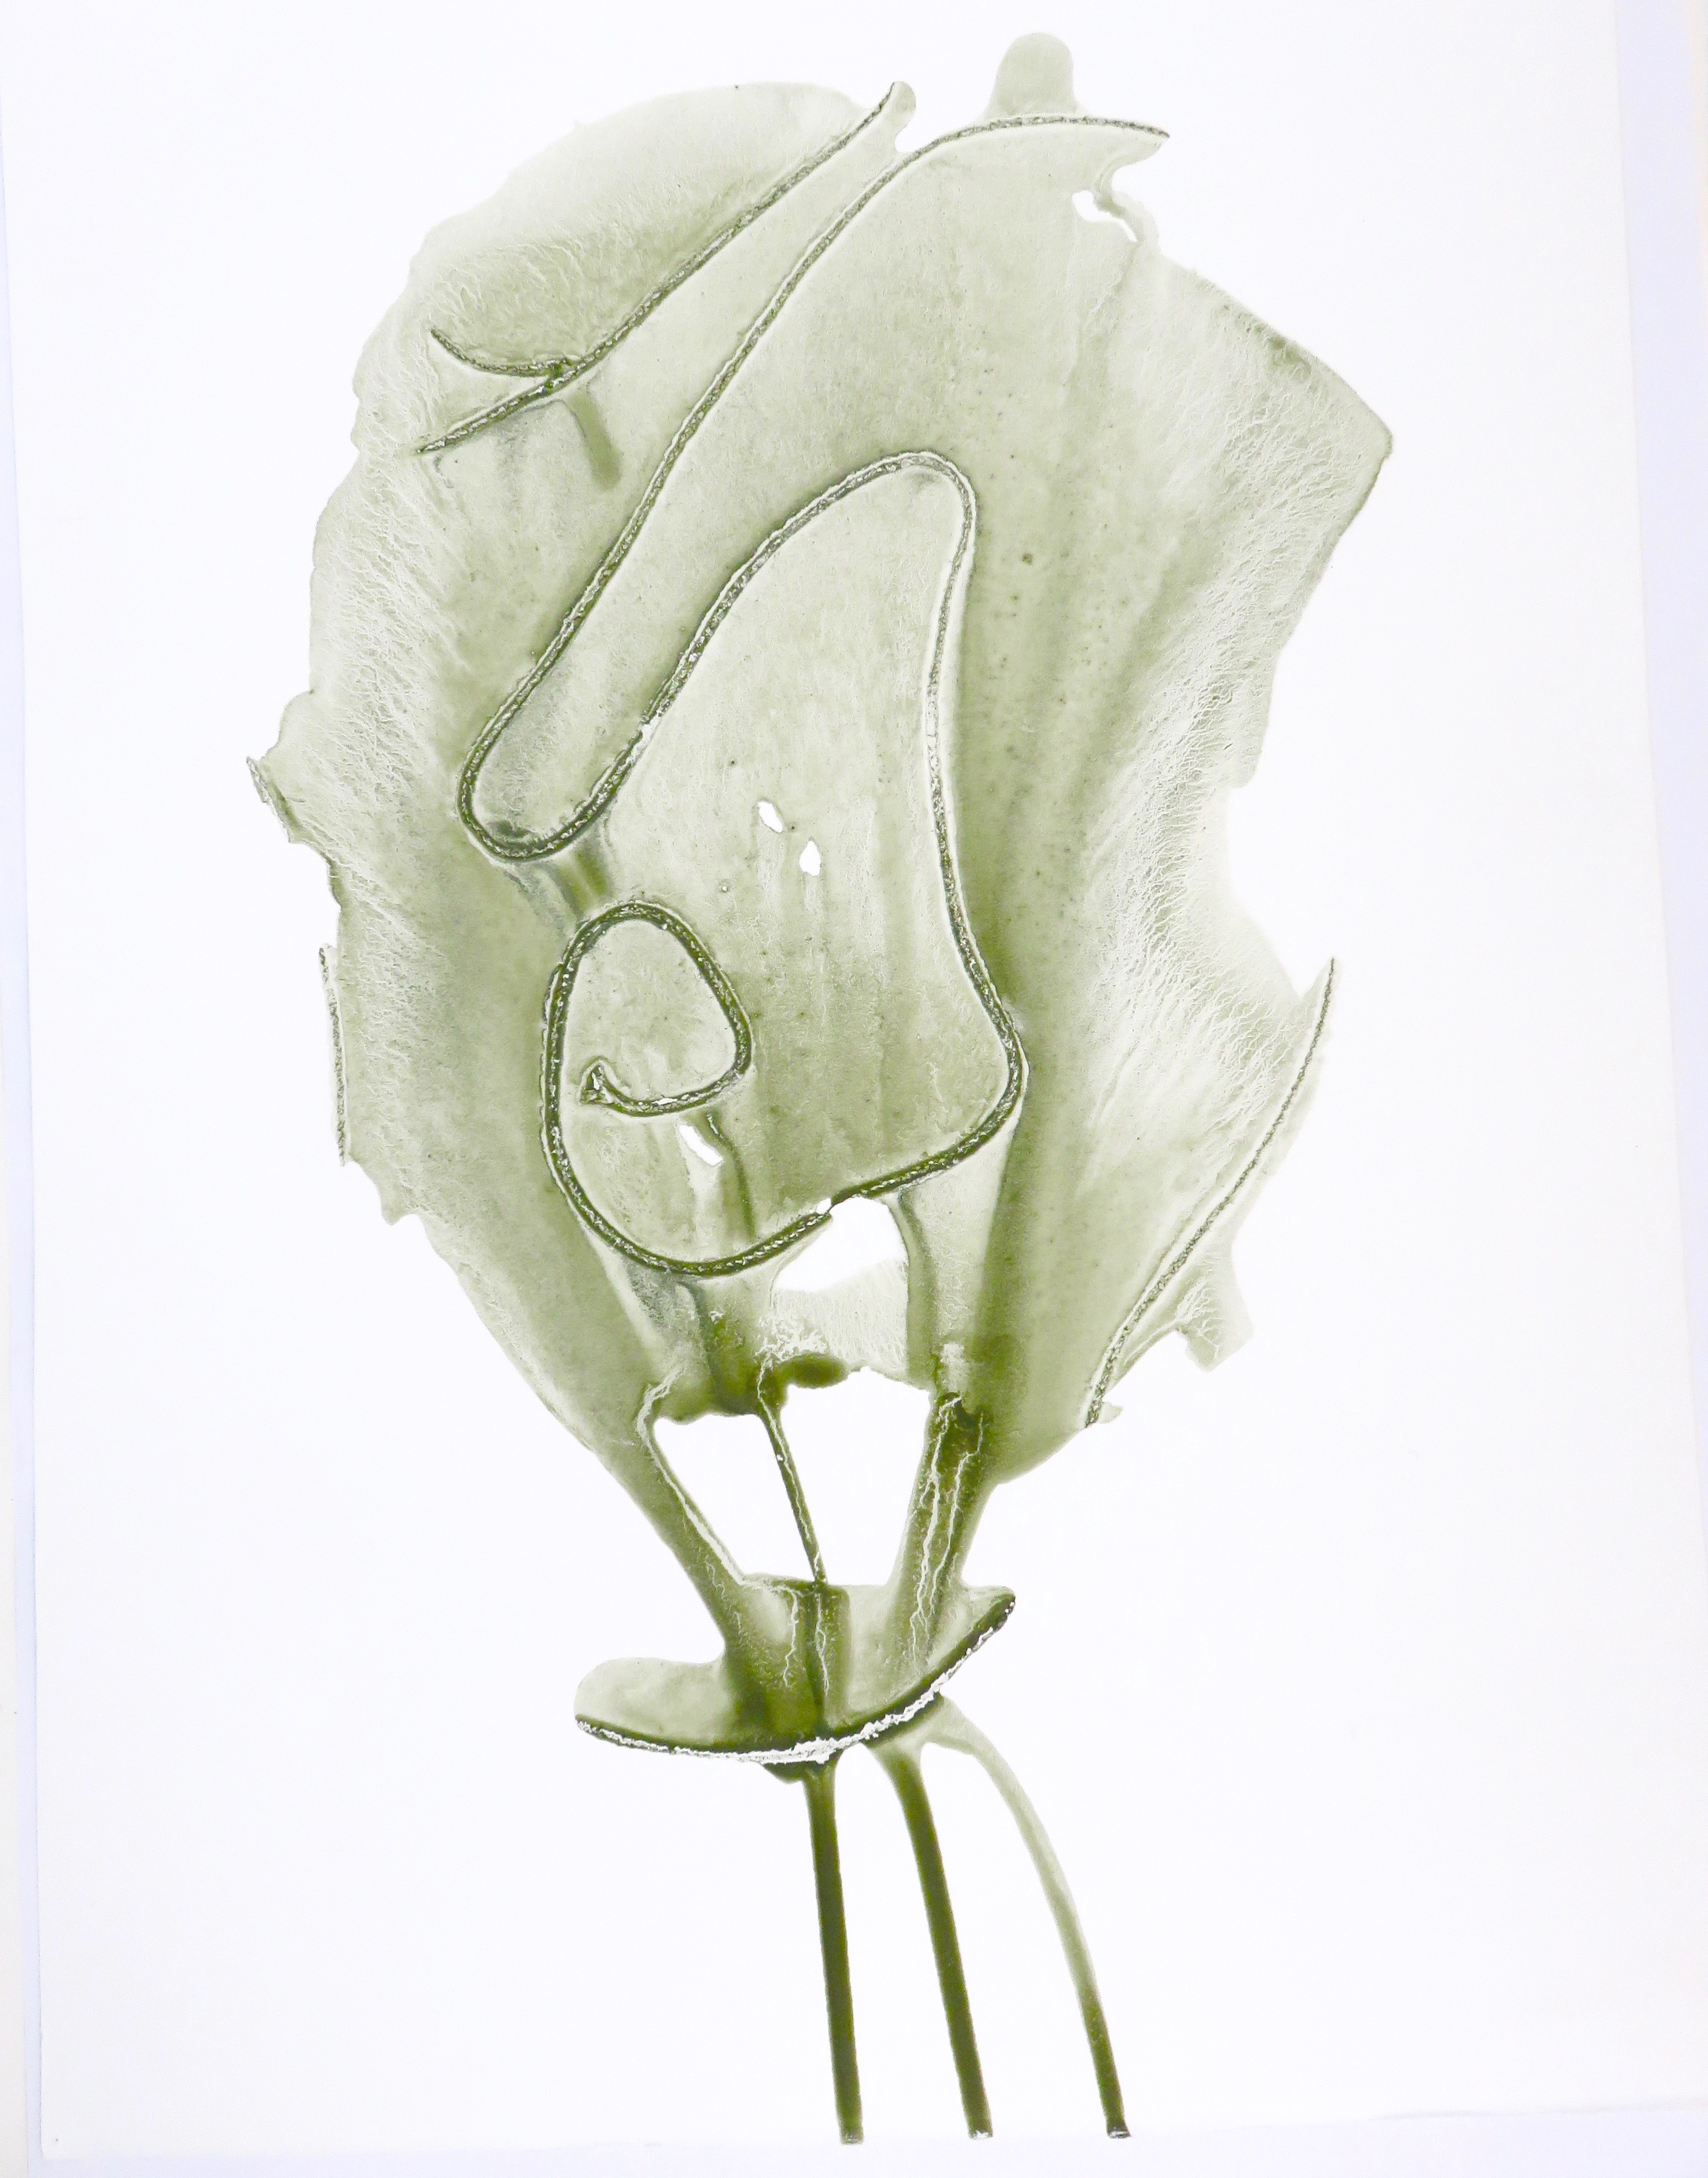
This print below, taken directly off the leaf alone, is particularly interesting, delicate.
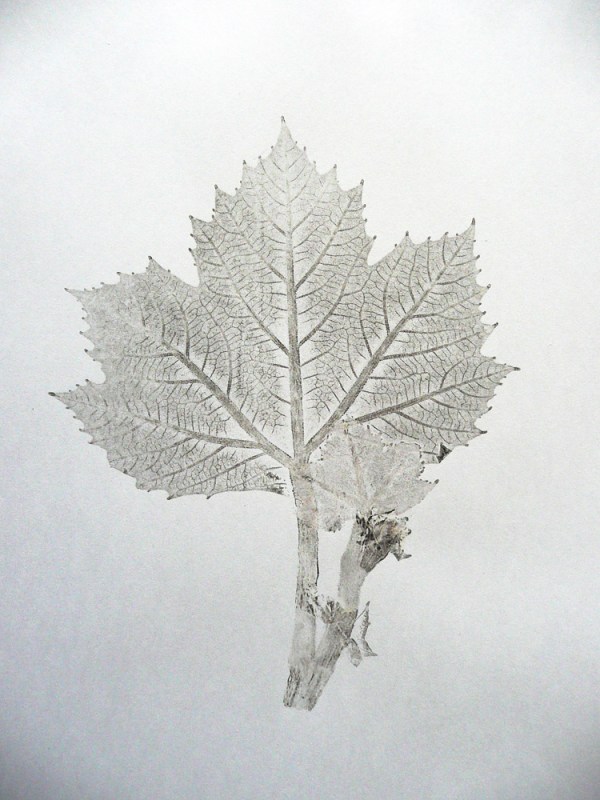
This print is made on damp 300 gsm paper 
Here is a small selection of the process – when the leaf was thick it caused creases in the paper and some areas did not print so well.
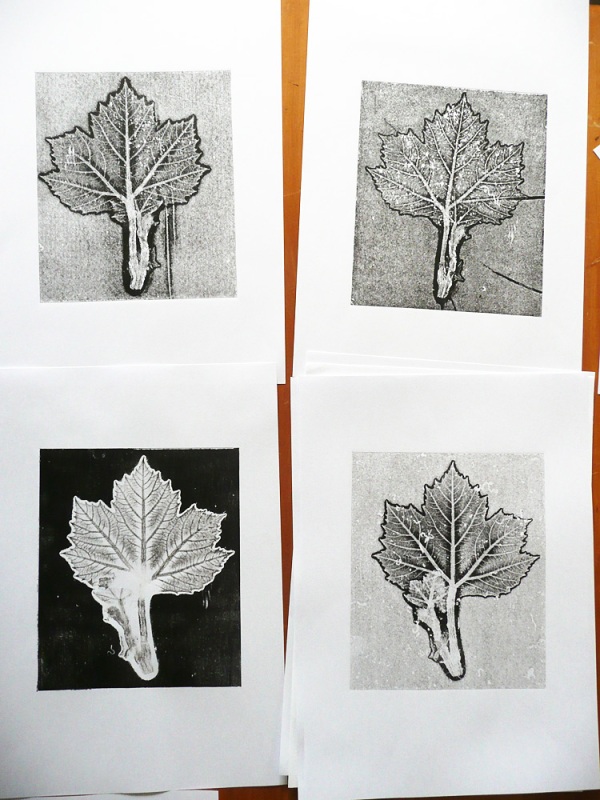
I have been busy… Here I have printed on cloth; works very well. The impression on the right was hand done with the roller and not put through the press, unlike the other one on the left. I am getting confident with using the etching press.

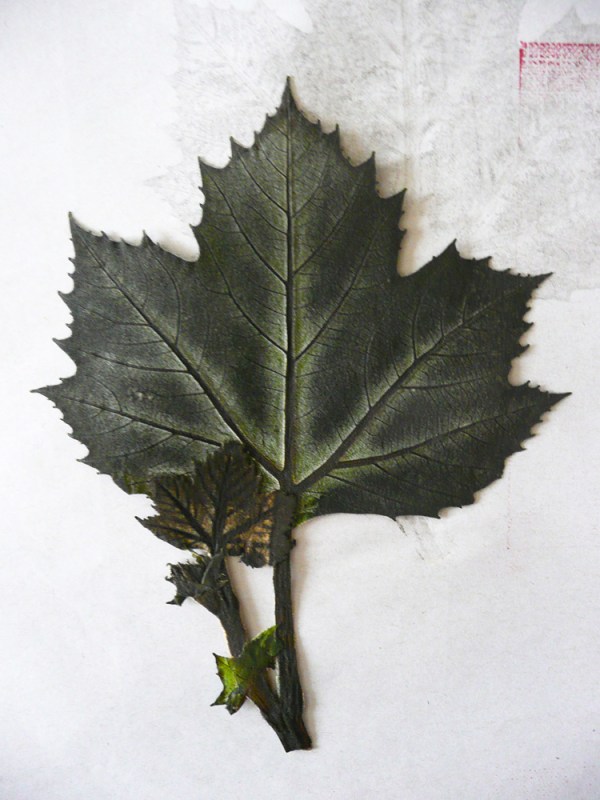
Finally, the most beautiful object of all, the actual leaves, with a trace of the ink still on them. It shows the underside of the leaves. I used Akua black ink, and many of the prints were printed on dry digital/inkjet A4 paper.
To end, here is a textile work I have started in response to following Spirit Cloth. I have printed on to cloth a mallow leaf and an image off a piece of old wallpaper.
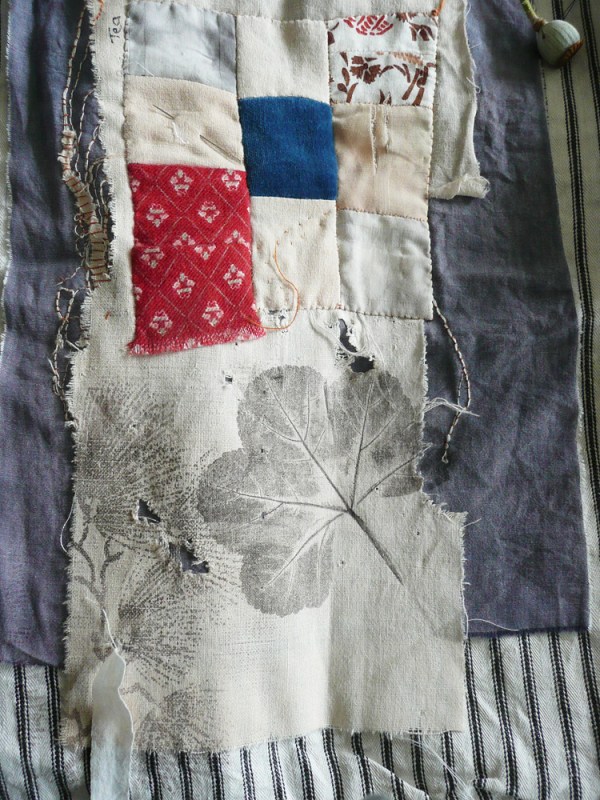
Being a Jill of all trades, I was prompted to have another go with metal and tannin by an article in Wendy Feldberg’s blog Threadborne. I am switching from researching, to seed collecting, to sewing up clothes and soft furnishings, to printing, to photography, to collecting more rocks for pigments, to drawing and back again with great rapidity at the moment. So this dip into dyeing is yet another experiment. Making the invisible visible through chance.
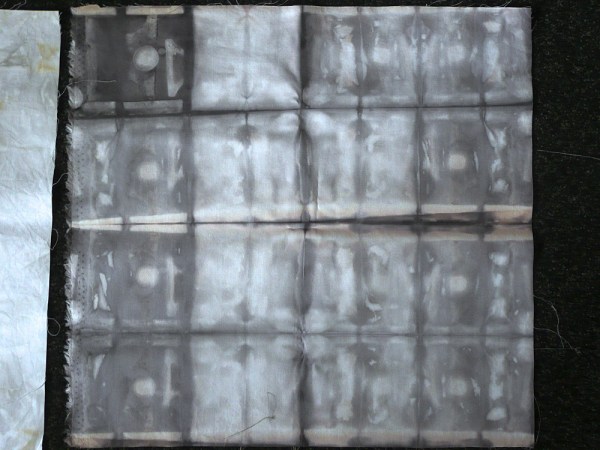
My intention for this project was to get some pieces of cloth that I could use in my art work. I had one bath with just the tea and tea bags, and the other with the metal and tannin. I tried to combine the two dyes, moving some bundles from the tea to the metal bath and leaving part of the bundle above the dye so it was just dipped into the liquid.
The results from the dye session were good, better than expected. It was a simple process compared to other dye sessions I have done that took much more of my time – or I should say – my presence, watching and checking. I used some new squares of light weight cotton with a glazed surface on one side, together with some old sheeting and clothing. The glazed side accepted the ‘dye’ the same as the unglazed side. I am thinking I might try printing on this fabric…
Cloths were rolled or folded, then bundled, clipped and tied. I actually had two dyeing sessions, refreshing the initial brew with more tea, tea bags and vinegar. The metal was rusty scraps, coins, bulldog clips, an old metal zip, and some aluminium foil (don’t think that did anything) all in a plastic ice cream 1 litre tub. Once out of these cold dye baths – one was overnight, the second one day – the cloths were rinsed, then left for a short while in salty water, then washed with Ecostore hand wash liquid soap that sits in the laundry. I was very lazy, but really I only had machine washing powder as the other option. And I felt the hand wash liquid would be softer on the dye. Anyway, it worked fine.
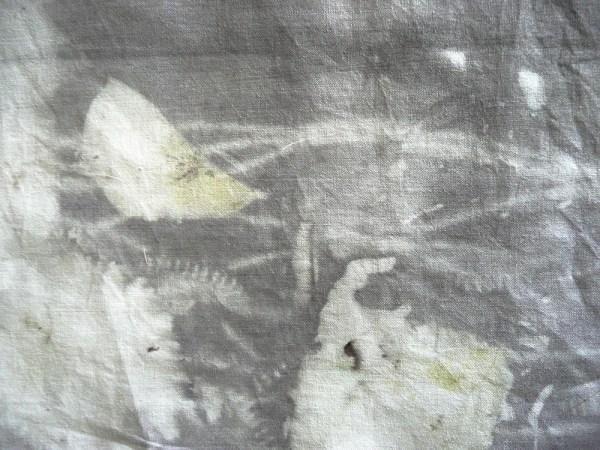
After drying, the cloths were ironed – once flattened the magic really became apparent. I included some pink rose petals and leaves in one bundle. The petals left a pale green colour, and there is a mysterious very pale pink – cannot image where that came from, but it may have been a label that was attached to the plastic mesh bag as it was not from the rose petals. I included the bag hoping to get an impression of the grid, but that didn’t happen. I also folded a piece of acid free office computer paper and put that in the second dye bath.


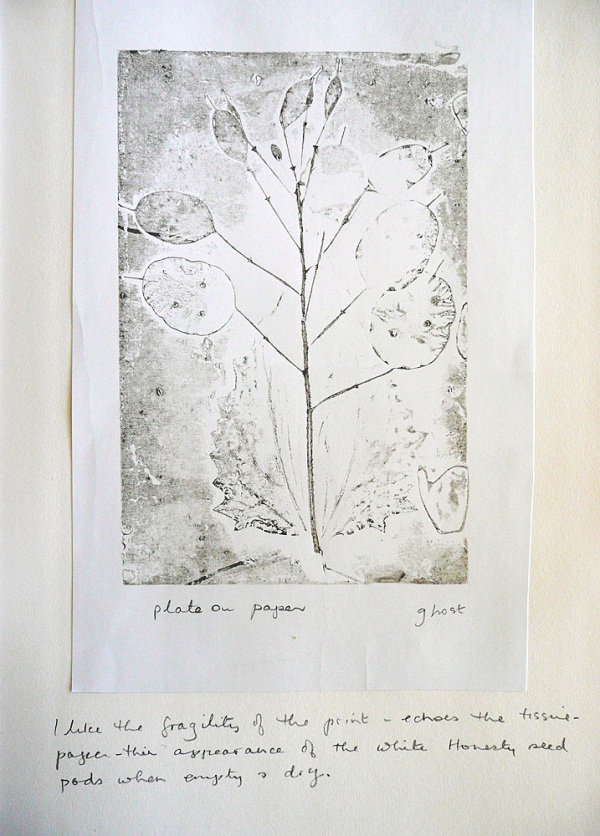
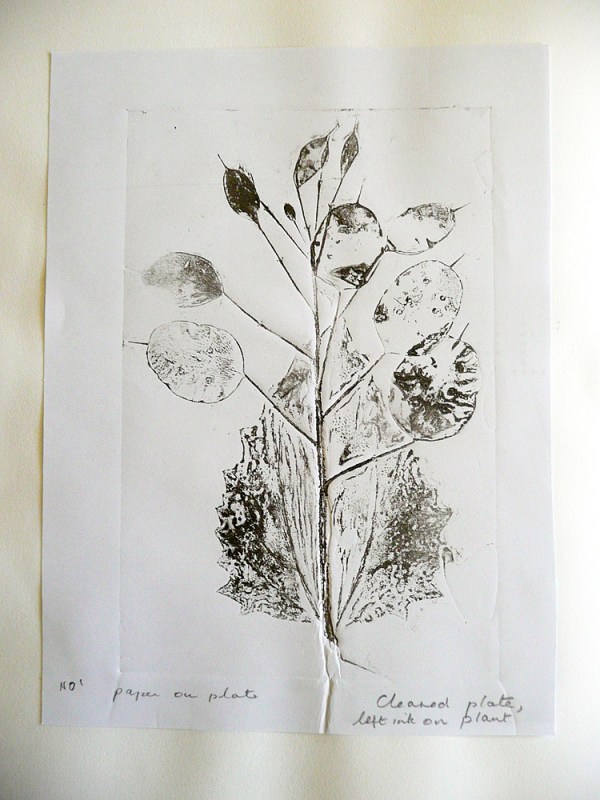
Seeds and seed pods are really quite beautiful, make good subjects for art and design. This is a collagraph plate that I made ‘last year!’ in December from dried seed pods of the Honesty plant (Lunaria annua, aka Money Plant) and one of the plant’s leaves. I had kept the dried specimen from 2012, so it has lasted well. I glued the dried plant material onto a piece of mat board and coated front and back of the board in two layers of polyurethane varnish – but it still had a little warp. This did not make any difference when the plate was printed. (Or so it seemed to me…) A small piece of the leaf had already broken away in the past, but apart from an interesting phenomenon that appeared when I inked the plate (the layers of varnish came away from three of the seed pods) the plate has held up well through its various inkings and cleanings. The photo here is what it looks like, cleaned, after an afternoon’s printing with Akua water based ink.

This is a ghost print (i.e. second print from an inked plate) from one of the initial printings.
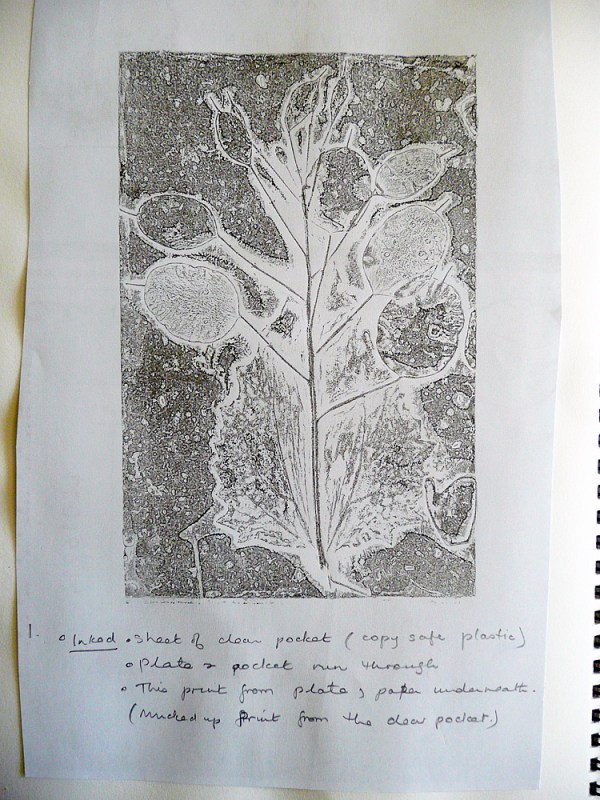
The next two images are of a print made by inking up a piece of plastic, sending the plate and the plastic through the press, and then taking a print off the plate. The plastic creates an interesting background with plenty of unexpected results which is one of the reasons I enjoy printing.
Finally, here is a the result of selectively cleaning the inked plate, so that only the raised parts of the collagraph will print. Still have a lot to learn! At least I now know that placing the paper on top of the plate creates an embossed image. The digital ink jet paper is dry and probably causes the creasing. I really enjoy using Akua ink as it is easier to clean up and I do not like using turps! The ‘black’ ink (actually a combination of colours, more a dark grey) creates an image that almost could be a photocopy.
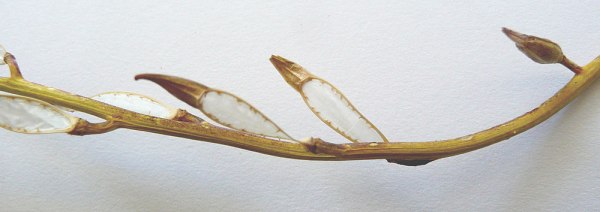
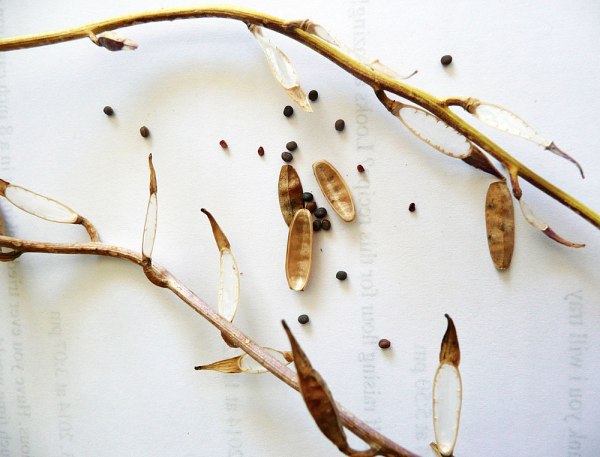
I have been collecting Rocket (Eruca sativa) seeds from the veggie bed. Really quite fascinating, and I notice that the membrane between the two halves of the seed pod is similar to that found in dried Honesty plants. I would like to find Lunaria rediviva a perennial ‘cousin’ of Honesty which has yet another variation on this form with more elongated pods. [Just found out that they are all members of the Mustard family (Brassicaceae)!]
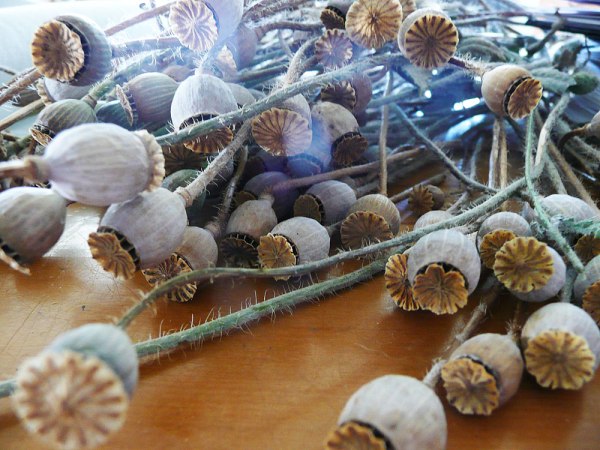
Finally, poppy seed pods from the garden.
A few prints, one produced at home, and the others at printing group.
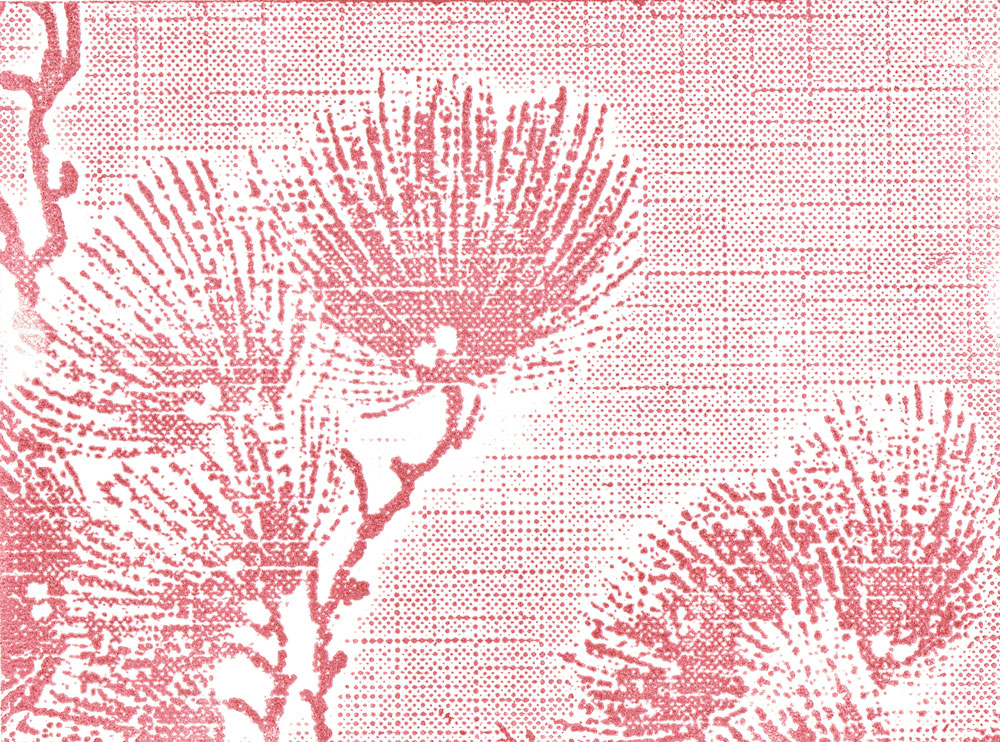
This print is produced with Akua inks, on a smooth card, and I used my printer at home. The print is taken directly off some old wallpaper that came from my parents house. The original illustration of what I think may be a conifer is pale green, but here I used red and it suggests the NZ Christmas tree – Pohutukawa! I used this print to make Christmas cards for family and friends.
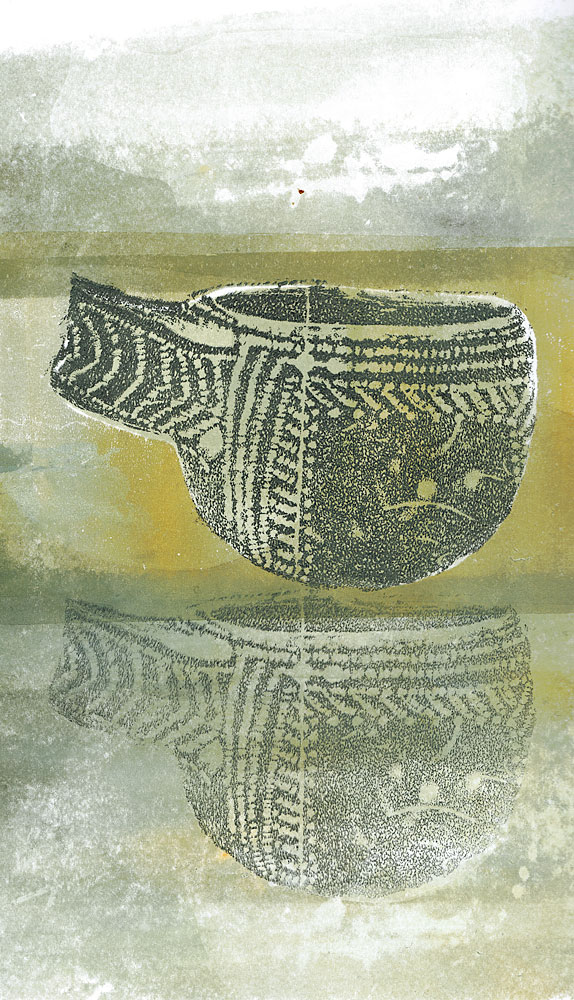
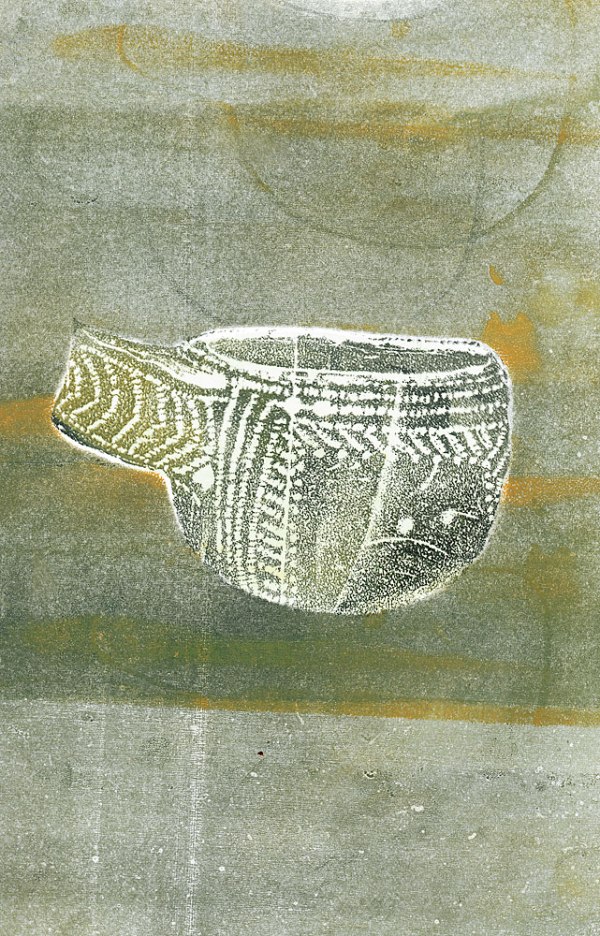
I’ve always had an interest in pottery, probably because of the glazes, but I really like the shapes of vessels and I am also presently researching cardial ware pottery. The next two images are of prints I made using a piece of flat, smooth polystyrene packaging that came with food from the supermarket (nice to recycle!). I traced the outline, cut the shape out and used a pointed etching tool to impress the marks. I am still learning, so it is helpful to have an image I can work up on a block quickly, then be able to concentrate on the printing process itself. I used two small pieces of polystyrene joined with masking tape at the back, and the marks and pits on the surface of the polystyrene helped to suggest the surface of clay pottery ware – as you can see below. I really think these printing block are artworks in their own right.
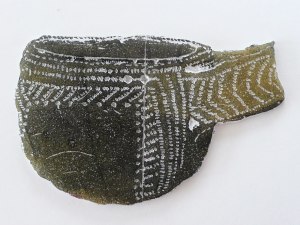
I found the cardial ware pottery image by Joanbanjo on Wikimedia Commons. The neolithic pot is described as decorated impressed ware, from the Cova de l’Or de Beniarrés, (5000 – 4200 BC) in the Museu de Prehistòria de València. I used water based printing ink and dry paper for these works.
By Joanbanjo (Own work) [CC BY-SA 3.0 (http://creativecommons.org/licenses/by-sa/3.0)%5D, via Wikimedia Commons from Wikimedia Commons
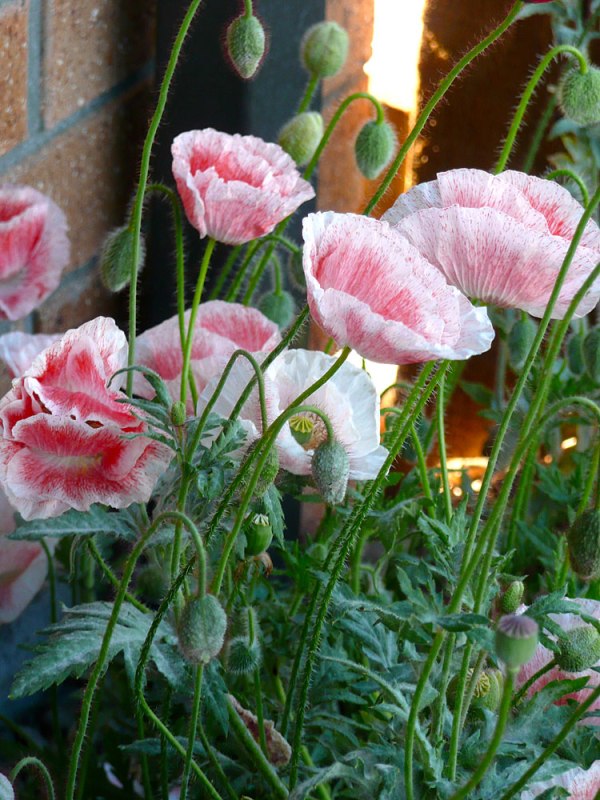
Finally from the garden, a photo of poppies for 2014 – red for love and tinged with white for peace.
I wish everybody a safe and bountiful 2015!
I am starting out on a printmaking journey. I have a new press, new inks and new paper, so lots of experimentation and not a lot of resolved or finished work just yet. I do enjoy the discovery of new ideas and methods. I have been been printing with two good friends, Ruth Stanton McLeod, printmaker and Sue Alexander, jeweller and printmaker, for about two years now, but it is quite daunting doing it all by yourself!
So, to encourage my artist into action, I thought I would post a few prints for scrutiny by the wider world – a sort of critique session.
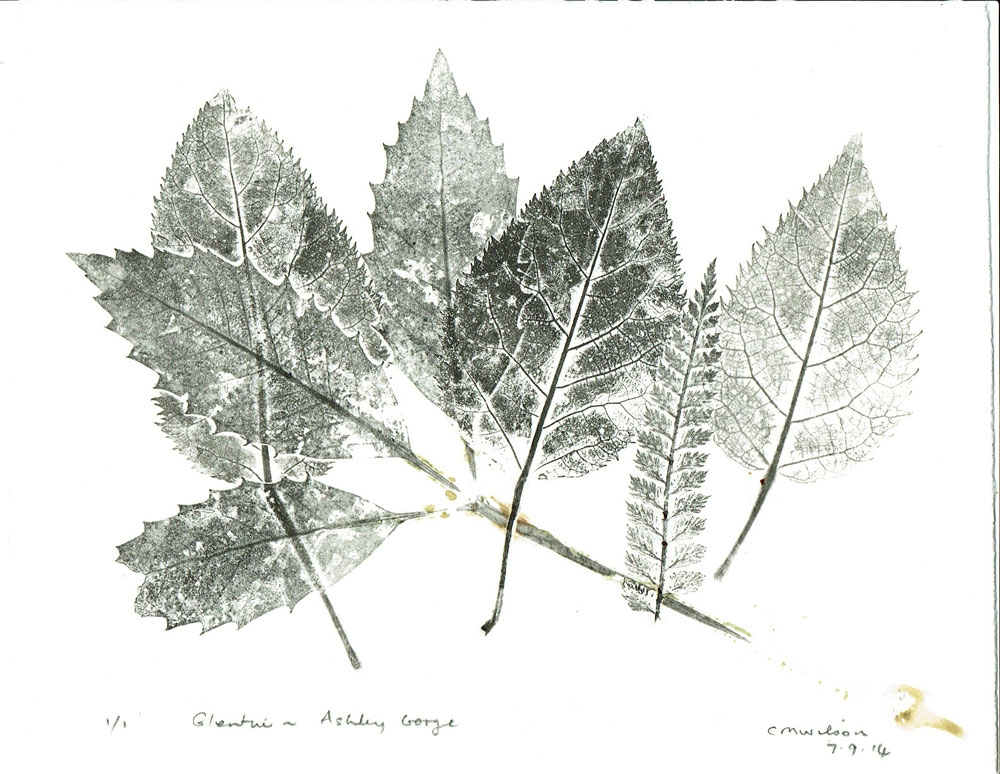
I had an ‘artist’s date’ in September when I visited Glentui Valley to walk a Department of Conservation bush track, with the idea that if fallen leaves presented themselves to me during the walk I could collect them up and take prints – eco prints on paper or nature prints perhaps.
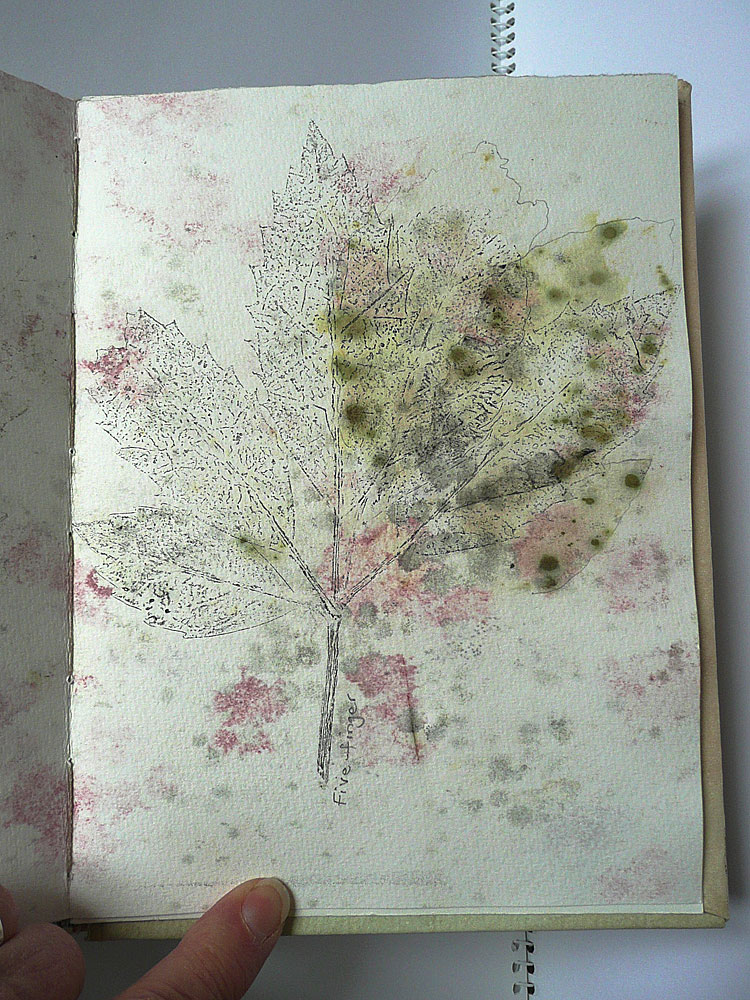
The leaves in the nature print below are three finely veined makomako or wineberry leaves (Aristotelia serrata), a small fern and a whauwhaupaku (five-finger Pseudopanax arboreus) with only three leaflets, it had lost the other two. I like the way the plant juice pressed out from the whau has contributed to the print – even providing its signature. The print was made with water-based ink, and if I had used oil-based ink I could have coloured the leaves with my watercolour paints. The paper was dry Tiepolo, 290 gsm, the ink was Flint. I have also just started to print on a ‘premium digital ink jet’ paper, 100 gsm, which is acid free but not sure if that alone gives it art archival status. With oil- and water-based ink you get a really nice print on the smooth ink jet paper, and it dries well. Good for tests!
 I also used the leaves collected at Glentui for a paper steam – some images needed further work. I added in colourful plants from the garden, to take advantage of the spring flowers.
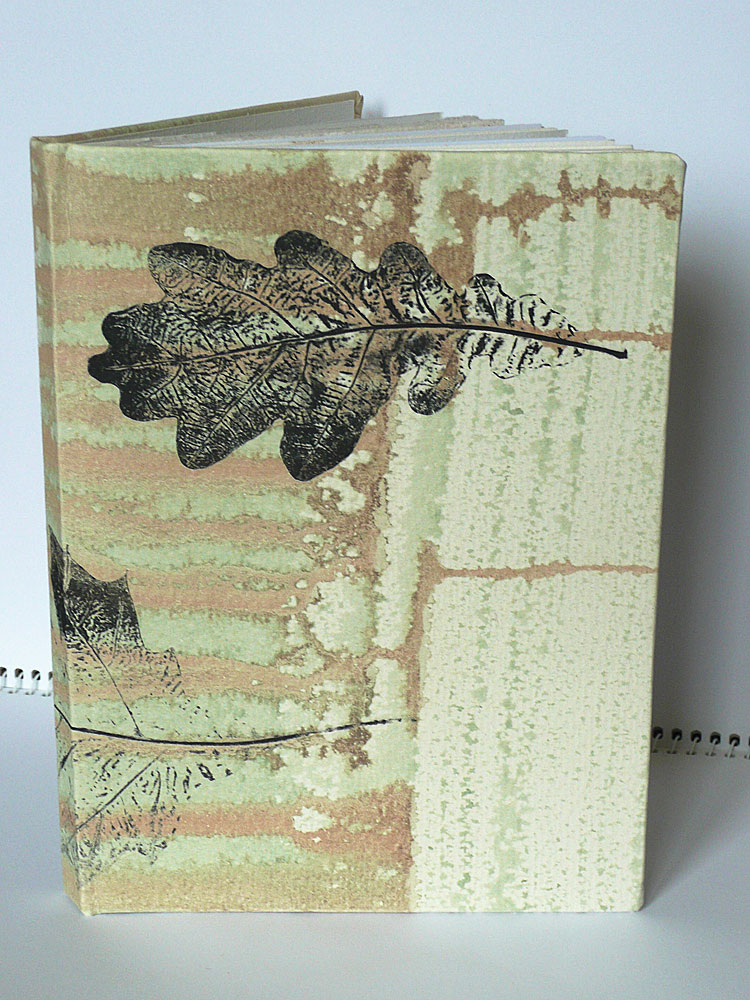
Eventually, these images were made into a book which I have just completed. The book’s cover is paper from a much earlier nature printing session when leaf prints were applied onto a sheet of paper coloured by earth pigments (Waikari green and an oxide brown-red watercolour). The nature prints in the book were made using oil-based ink, and were added on top of the steamed ecoprints.
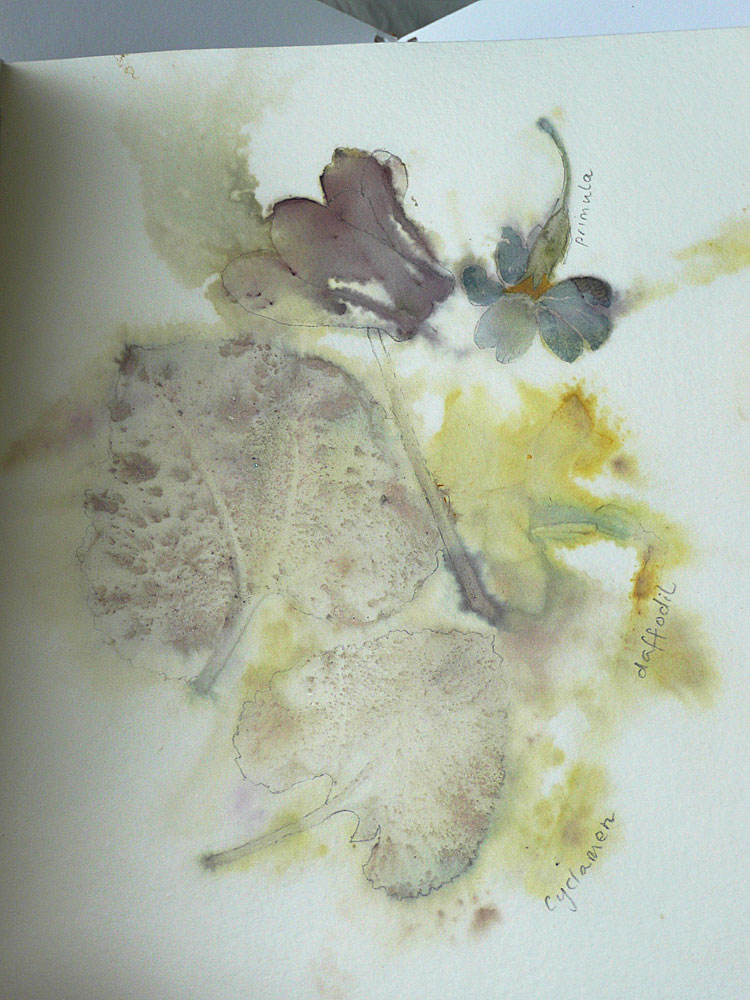
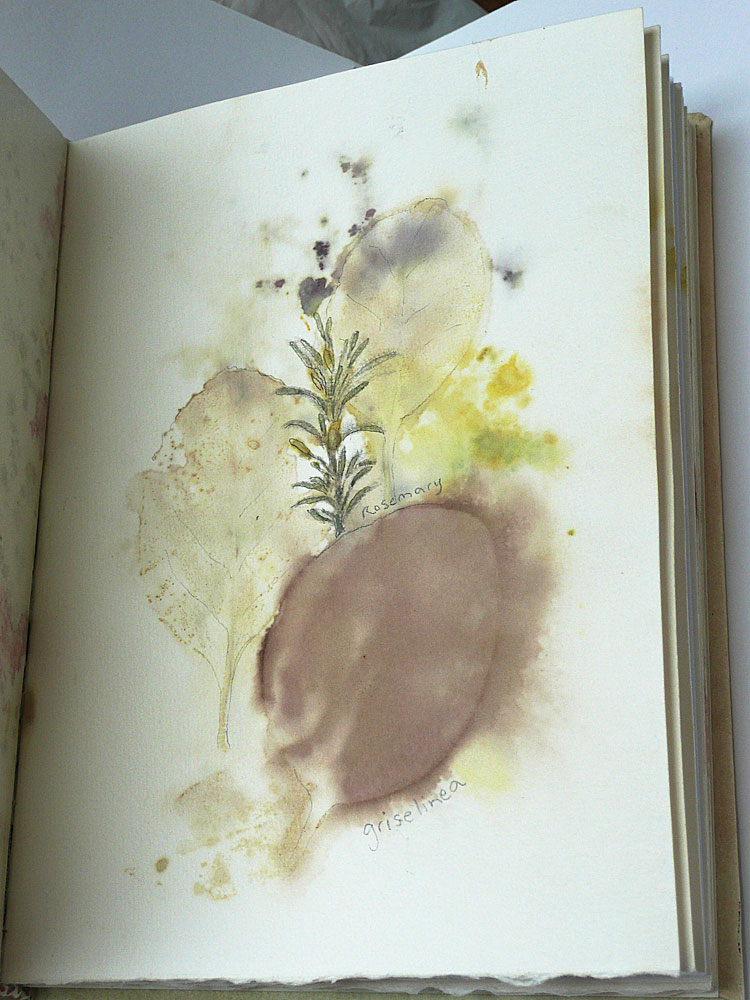
As an experiment for this book, I applied the Waikari green paint to the black beech leaves, a Winsor & Newton blue watercolour to the primula flower petals and above them a touch of Indian Yellow, and pencil outlines were used to define some other leaves and flowers. However, the pink and grey marks on some of the sheets of paper occurred as I left the damp paper between plastic for a few days… Mould, ie! There is also a lot of colour transfer from the plants themselves through to the adjacent pages of the stack as it was being steamed.
The last page shown here, of two wineberry leaves, is a steam of leaves I had previously used in a nature print – hence the black impressions appearing within the colours of the leaves.
A good way to record a walk and the progress in using my new etching press!


It is now August, and I started this post in March… Time passes. It now feels like home. Seeds of a new beginning – seed pods of Wharariki, the New Zealand mountain flax plant.
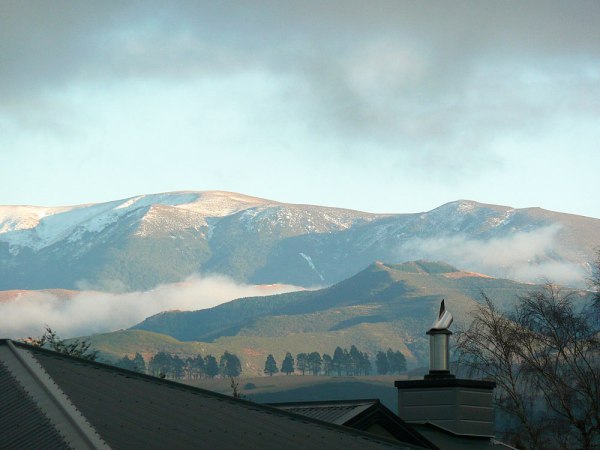
Oxford in the early morning sunlight – Mt Oxford hills seen from the town.
At the beginning of 2014, a ‘sudden rush of blood to the head’ started a process that before you would have believed it possible landed us in another house in the same town within a month. It does not feel like a home yet, but we are settling our nerves now, coming out of the upheaval. People wonder why we did it, but the old place, gorgeous as it was, needed younger, stronger custodians than we could give. We thought it would take months to sell, but it happened almost immediately. I really miss the plants and the beautiful views; trying not to think too much about it. However, I’m finding new curiosities and opportunities and living in the town will possibly force us out to the wild places that we neglected. We really had a semi-wild place in the garden to keep us occupied.
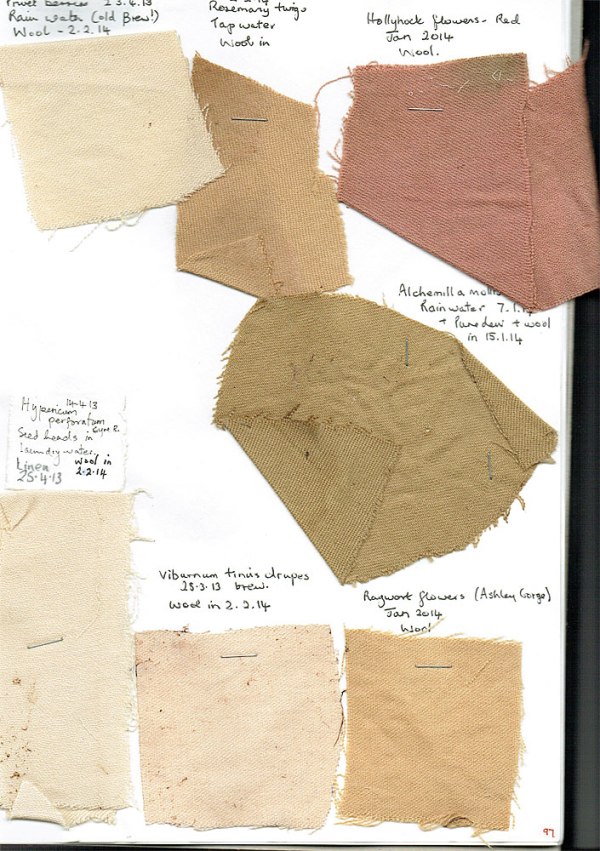
Before we departed I managed to do a few solar dyes. Some of the colours from last summer were still in their dye pots, so I popped in swatches of woven wool – Viburnum tinus, Privet berries, and Hypericum perforatum seed heads. I also tried Rosemary twigs – lovely smell!
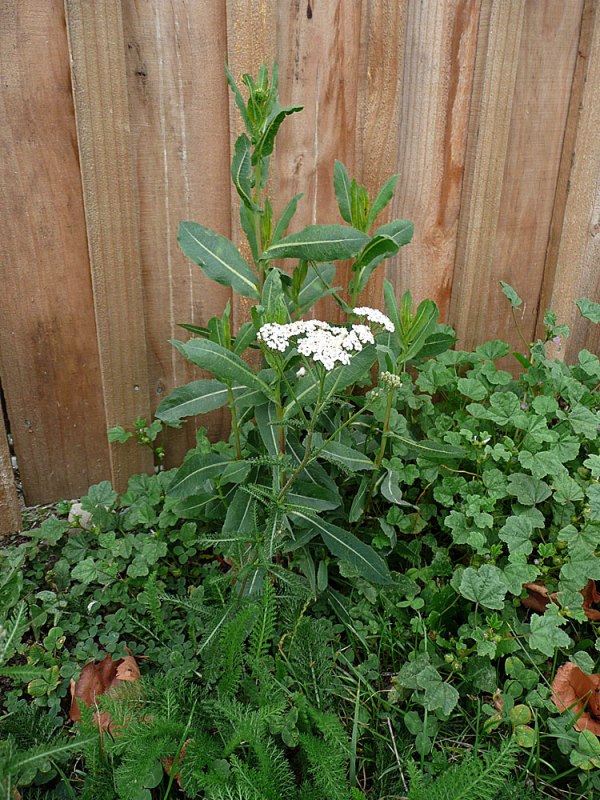
In early January I started a solar dye with flowers and another with leaves of Alchemilla mollis – the flower dye is below with a painted sample of the dye directly on the page.

In the dye jars, the yellow colour appeared almost immediately but I got a stronger colour from the Alchemilla flowers.
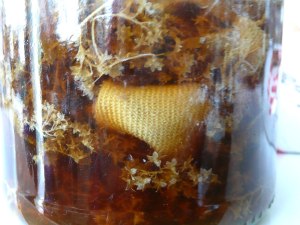
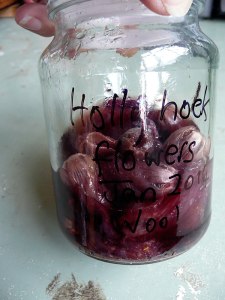
Another solar jar was gradually receiving – over a fortnight – red hollyhock flowers that fell off the plant. Previously I have steamed the hollyhock flower heads onto silk, and the colour was a bright pink, quite different to the result on wool.
The dried swatches as in my test book:
One of the last photos I took at the old house. Althea that I grew from seeds. Will start again.

Snow in ‘summer’ along with high winds! This is the view that greeted us a few days after we moved house. Very dramatic welcome…

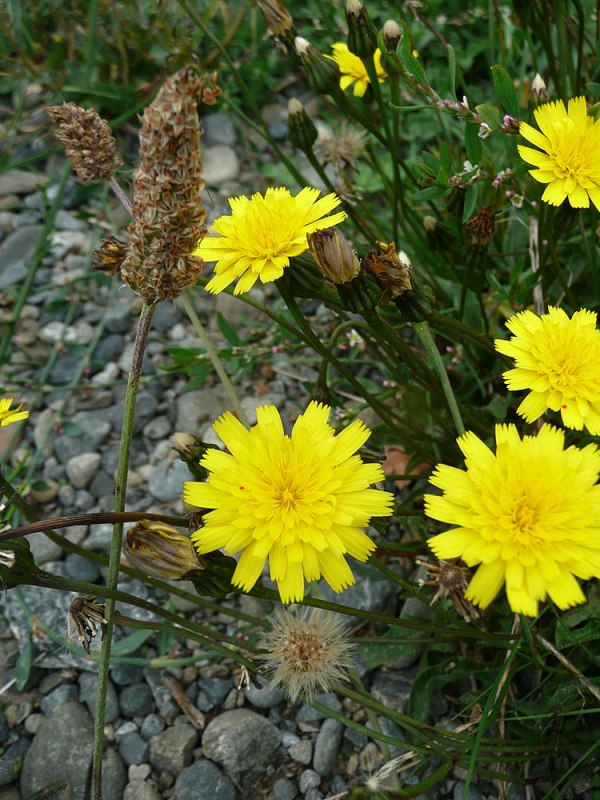
Our new house is just over one year old, like a doll’s house, and we have a garage full of stuff to be sorted, given away or reallocated somewhere. There is a lovely patch of weeds down the road – some old friends and some new rather ferocious looking ones too!

This knotweed is an old friend – and a walk in the park led me to some knotweed – Polygonum aviculare it may be – from which I have obtained a yellow. So there are possibilities. The knotweed below was growing by the footpath. I have brought some of the prostrate polygonum from the old garden.


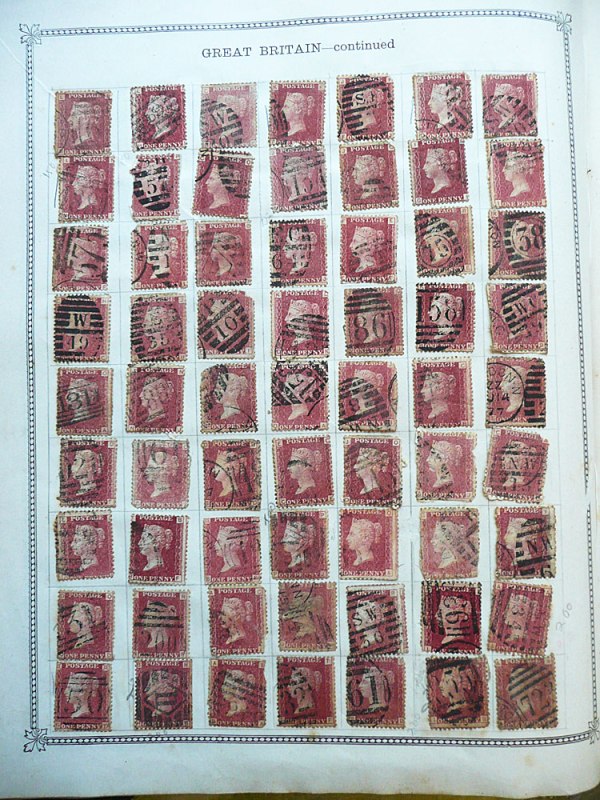
Finally, a sentimental note. A move like this presents your belongings to you in a different light. You find things you had forgotten, and other possessions take on a new life. I happened to look through two Stanley Gibbons stamp albums that belonged to my father. The books are large and heavy, and lots of the stamps are missing, but not on this page, however. Towards the back of the book, this 15-year-old listed the number of stamps he had collected: on 10 March 1929 he had 1315. I read this on the 10 March 2014.
Scientific Process Art!
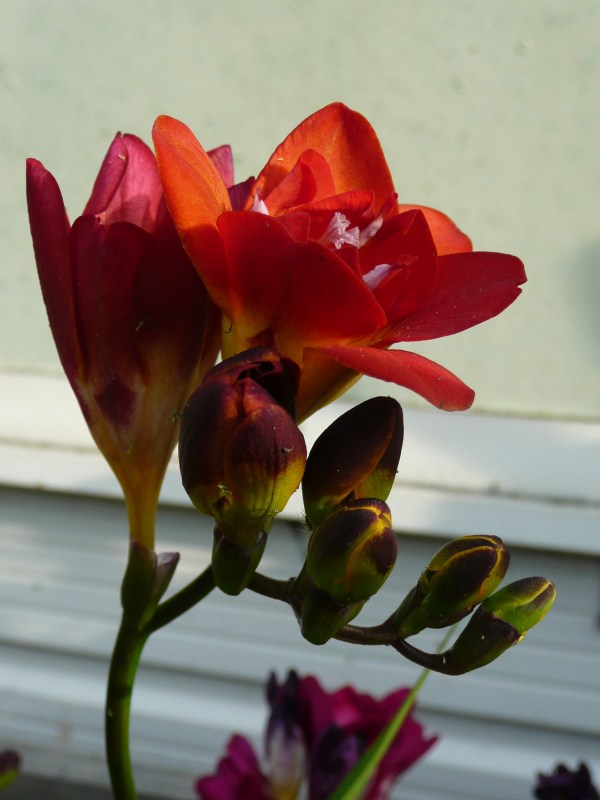
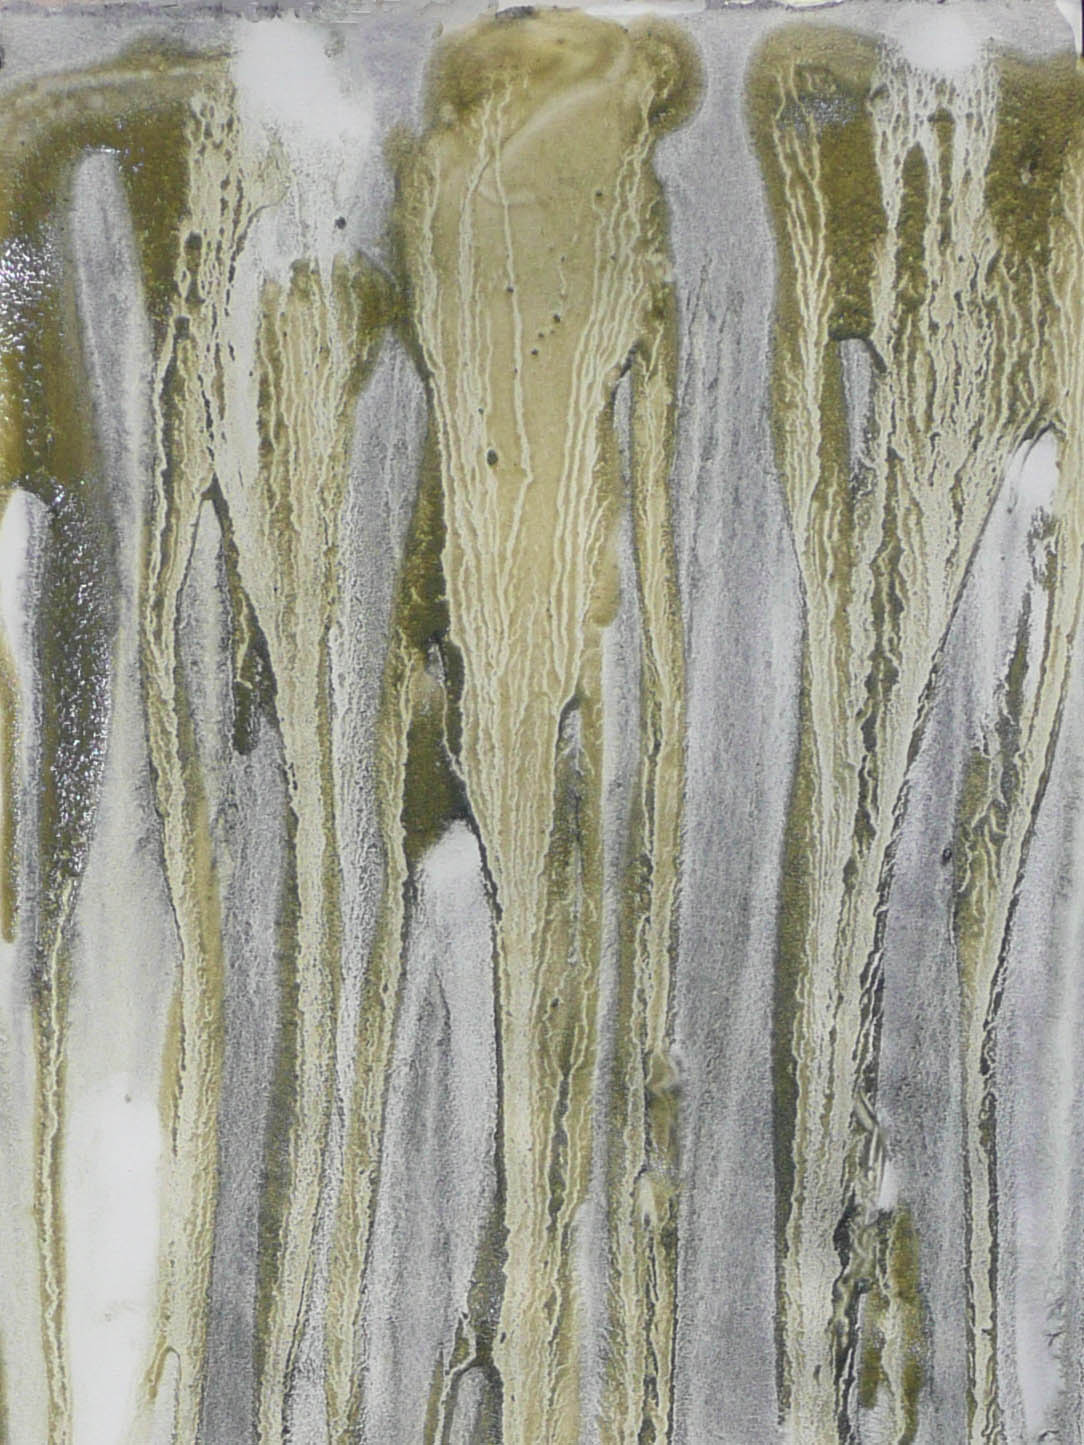
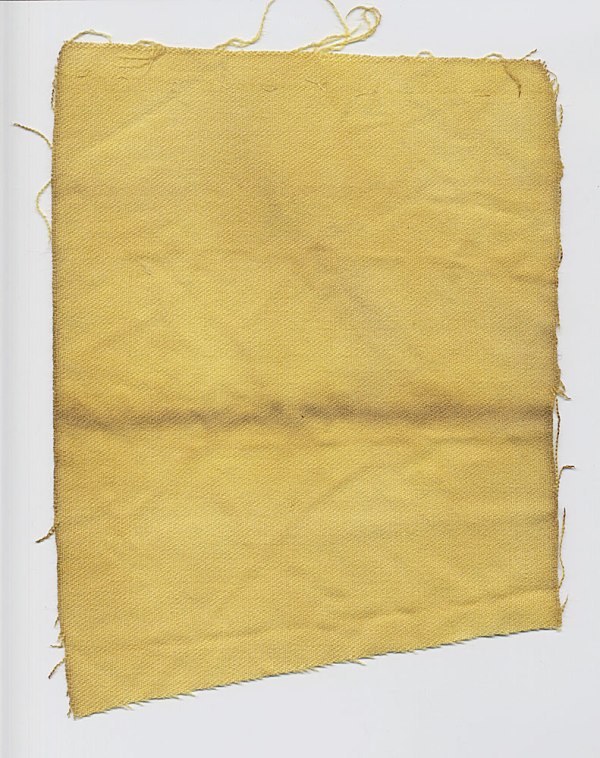
In November, when I was clearing the dead spring bulb foliage, I kept a few dried flowers from some of the freesias we had grown this year. The thought crossed my mind – I wonder if they will provide colour as the dried flowers were still orange-yellow. As you can see the freesia flower was a deeply coloured red. Below is a photo of the solar dye in progress. The colour appeared almost immediately. You can see that the stalk was still green, just the petals were dry and papery. Inserted in the jar was a piece of unmordanted folded woollen fabric.

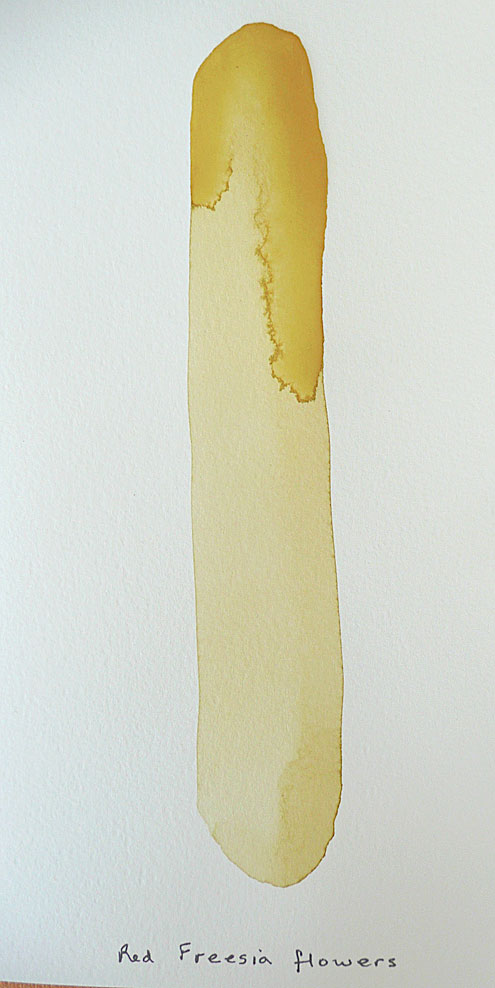
The colour on the woollen fabric was rather dull, and seemed to attract a brown coloration on the fold. I noticed this also occurring at the edges of the colour when applied to paper.
Time for this has been scarce recently, so I thought I should try to get another post in before 2014.
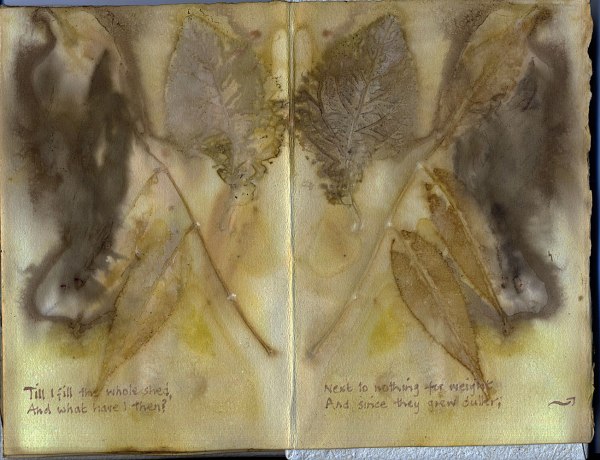
Some of my eco prints on paper have been made into artists books. This one is a ten-page ‘concertina’ book. It is a little difficult to present these books; however, here is a scan of the cover and the last page…
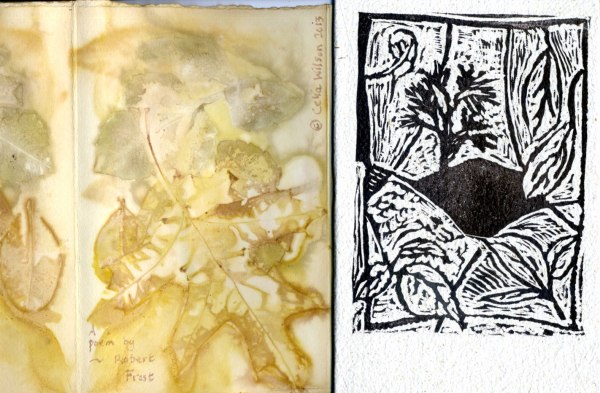
The cover image is printed onto handmade paper by Mark Lander. The wood-block type of print (using a plastic block and a Dremel tool) was made in 2012. The pages each have a line from the poem by Robert Frost – Gathering Leaves – and I have written these words with ink from Harakeke, the New Zealand flax plant. The autumn leaves all come from our garden here in Oxford, and are a collection of prunus, oak, sycamore, cotinus, acer, pin oak and ash leaves – the coloured deciduous leaves all providing good elements for transfer to the paper which was dipped in alum first. The dark brown on the pages below is provided by a piece of harakeke seed pod.
