Spring leaves, nature prints and patchwork

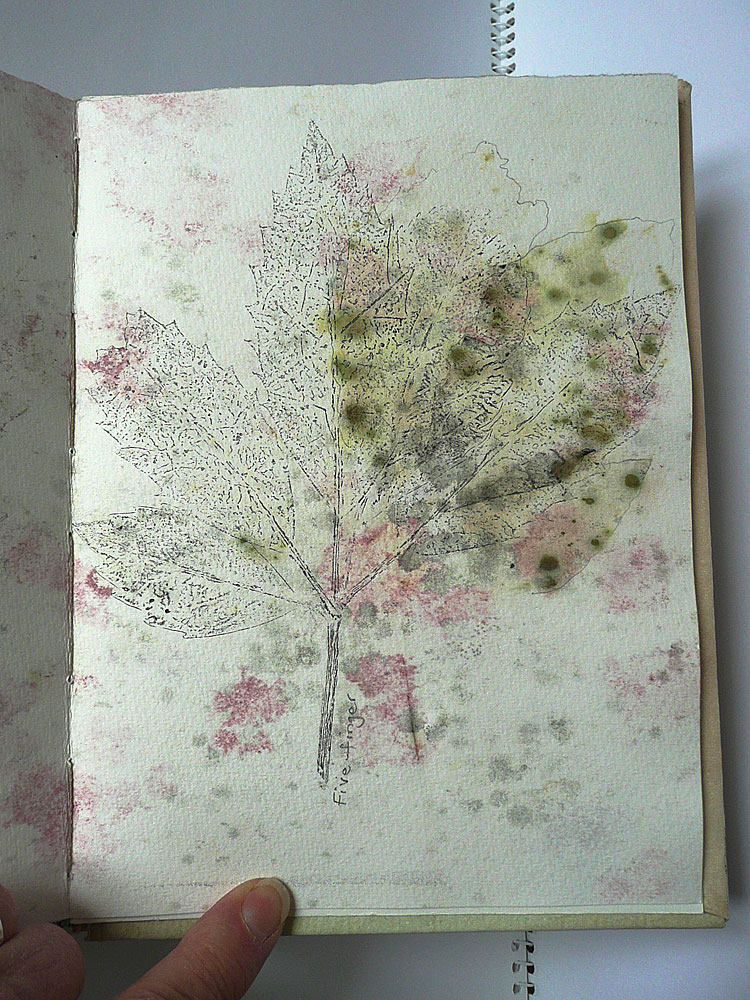
On a walk yesterday I found a windblown leaf, and later picked some leaves and flowers from the garden.  I am not sure at all what species of tree the leaf is from.  It is difficult to define, mainly because it is immature.  However, I think it may be a Platanus  (plane, sycamore) as suggested by the stem and leaf vein structure.  To memorialise this arrested development I made prints from the leaves.

Leaf1

Leaf2  

I made a few nature prints, on paper and cloth.  The first print is from the inked plate (with the leaf removed after passing the two through the press).  I dropped the inked plate on the floor which accounts for the wiggly marks and scratches.  Liked the effect!

Leaf5  

This print below, taken directly off the leaf alone, is particularly interesting, delicate.  

Leaf4  

This print is made on damp 300 gsm paper   Leaf3  

Here is a small selection of the process – when the leaf was thick it caused creases in the paper and some areas did not print so well.  

Leaf7  

I have been busy…  Here I have printed on cloth; works very well.  The impression on the right was hand done with the roller and not put through the press, unlike the other one on the left.  I am getting confident with using the etching press.  

Leaf8  

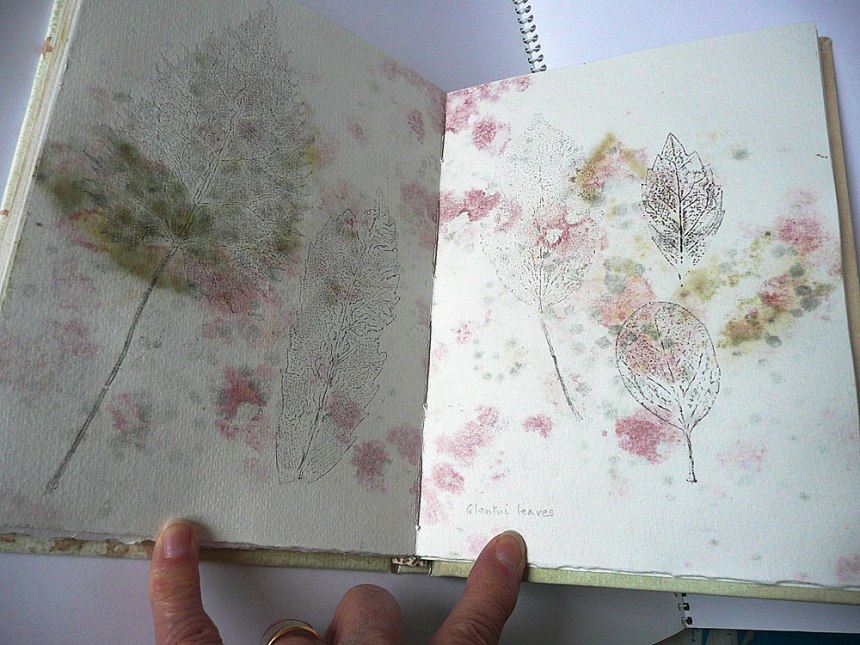
Finally, the most beautiful object of all, the actual leaves, with a trace of the ink still on them. It shows the underside of the leaves.  I used Akua black ink, and many of the prints were printed on dry digital/inkjet A4 paper.  

Leaf9  

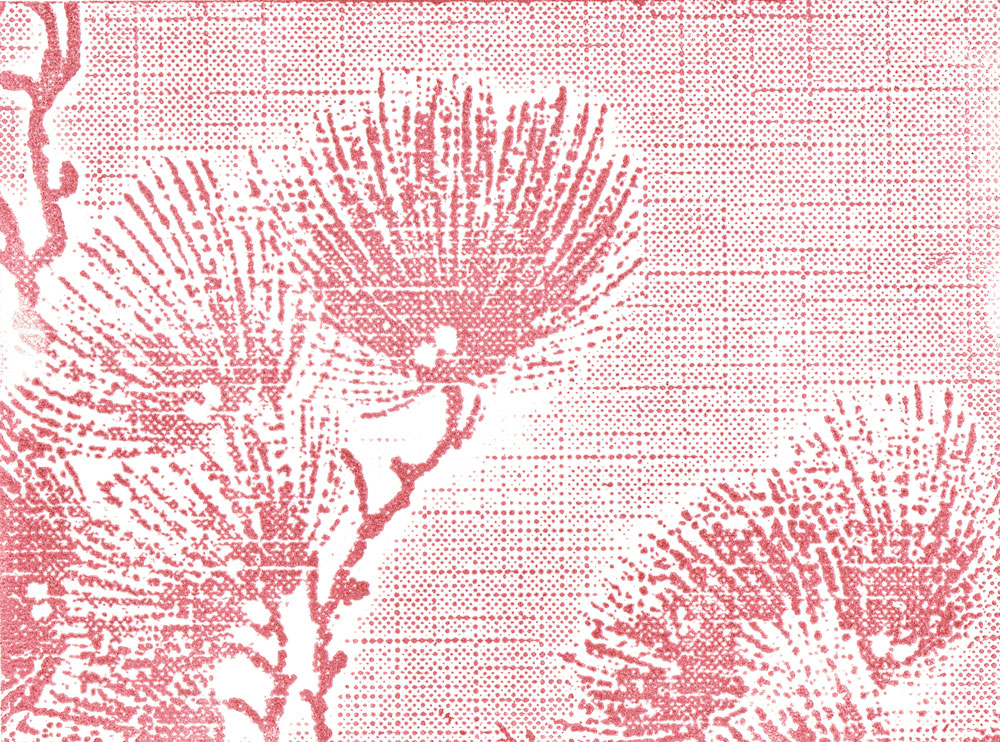
To end, here is a textile work I have started in response to following Spirit Cloth. I have printed on to cloth a mallow leaf and an image off a piece of old wallpaper.

Leaf6

January 2015 printing – Seeds and Seed Pods

Seeds and seed pods are really quite beautiful, make good subjects for art and design.  This is a collagraph plate that I made ‘last year!’ in December from dried seed pods of the Honesty plant (Lunaria annua, aka Money Plant) and one of the plant’s leaves.  I had kept the dried specimen from 2012, so it has lasted well.  I glued the dried plant material onto a piece of mat board and coated front and back of the board in two layers of polyurethane varnish –  but it still had a little warp.  This did not make any difference when the plate was printed.  (Or so it seemed to me…)  A small piece of the leaf had already broken away in the past, but apart from an interesting phenomenon that appeared when I inked the plate (the layers of varnish came away from three of the seed pods) the plate has held up well through its various inkings and cleanings.  The photo here is what it looks like, cleaned, after an afternoon’s printing with Akua water based ink.


Cineraria-plate


This is a ghost print (i.e. second print from an inked plate) from one of the initial printings.


HonestyP3


The next two images are of a print made by inking up a piece of plastic, sending the plate and the plastic through the press, and then taking a print off the plate.  The plastic creates an interesting background with plenty of unexpected results which is one of the reasons I enjoy printing.


HonestyP2


Finally, here is a the result of selectively cleaning the inked plate, so that only the raised parts of the collagraph will print.  Still have a lot to learn!  At least I now know that placing the paper on top of the plate creates an embossed image.  The digital ink jet paper is dry and probably causes the creasing.  I really enjoy using Akua ink as it is easier to clean up and I do not like using turps!  The ‘black’ ink (actually a combination of colours, more a dark grey) creates an image that almost could be a photocopy.


Honesty-P1


I have been collecting Rocket (Eruca sativa) seeds from the veggie bed.  Really quite fascinating, and I notice that the membrane between the two halves of the seed pod is similar to that found in dried Honesty plants.  I would like to find Lunaria rediviva a perennial ‘cousin’ of Honesty which has yet another variation on this form with more elongated pods.  [Just found out that they are all members of the Mustard family (Brassicaceae)!]


Rocket-seed-pod narrow

Rocket-seed-pods

Finally, poppy seed pods from the garden.

Poppy-seed-pods

December prints

A few prints, one produced at home, and the others at printing group.

This print is produced with Akua inks, on a smooth card, and I used my printer at home.  The print is taken directly off some old wallpaper that came from my parents house.  The original illustration of what I think may be a conifer is pale green, but here I used red and it suggests the NZ Christmas tree – Pohutukawa!  I used this print to make Christmas cards for family and friends.

Christmas-print-web


I’ve always had an interest in pottery, probably because of the glazes, but I really like the shapes of vessels and I am also presently researching cardial ware pottery.  The next two images are of prints I made using a piece of flat, smooth polystyrene packaging that came with food from the supermarket (nice to recycle!).  I traced the outline, cut the shape out and used a pointed etching tool to impress the marks.  I am still learning, so it is helpful to have an image I can work up on a block quickly, then be able to concentrate on the printing process itself.  I used two small pieces of polystyrene joined with masking tape at the back, and the marks and pits on the surface of the polystyrene helped to suggest the surface of clay pottery ware – as you can see below.  I really think these printing block are artworks in their own right.

Cardial-ware-block

I found the cardial ware pottery image by Joanbanjo on Wikimedia Commons.  The neolithic pot is described as decorated impressed ware, from the Cova de l’Or de Beniarrés, (5000 – 4200 BC) in the Museu de Prehistòria de València.  I used water based printing ink and dry paper for these works.


Cardial-ware-Villanova2-print

Cardial-ware-Villanova-print
Credits:   http://commons.wikimedia.org/wiki/File%3AVas_amb_decoraci%C3%B3_impresa_cardial%2C_Cova_de_l’Or_de_Beniarr%C3%A9s%2C_Museu_de_Prehist%C3%B2ria_de_Val%C3%A8ncia.JPG

By Joanbanjo (Own work) [CC BY-SA 3.0 (http://creativecommons.org/licenses/by-sa/3.0)%5D, via Wikimedia Commons from Wikimedia Commons

Finally from the garden, a photo of poppies for 2014 – red for love and tinged with white for peace.

I wish everybody a safe and bountiful 2015!


Poppies-for-2014

Leaf Prints from Glentui Valley

I am starting out on a printmaking journey. I have a new press, new inks and new paper, so lots of experimentation and not a lot of resolved or finished work just yet. I do enjoy the discovery of new ideas and methods. I have been been printing with two good friends, Ruth Stanton McLeod, printmaker and Sue Alexander, jeweller and printmaker, for about two years now, but it is quite daunting doing it all by yourself!

So, to encourage my artist into action, I thought I would post a few prints for scrutiny by the wider world – a sort of critique session.

I had an ‘artist’s date’ in September when I visited Glentui Valley to walk a Department of Conservation bush track, with the idea that if fallen leaves presented themselves to me during the walk I could collect them up and take prints – eco prints on paper or nature prints perhaps.

The  leaves in the nature print below are three finely veined makomako or wineberry leaves (Aristotelia serrata), a small fern and a whauwhaupaku (five-finger Pseudopanax arboreus) with only three leaflets, it had lost the other two.  I like the way the plant juice pressed out from the whau has contributed to the print – even providing its signature.  The print was made with water-based ink, and if I had used oil-based ink I could have coloured the leaves with my watercolour paints.  The paper was dry Tiepolo, 290 gsm, the ink was Flint.  I have also just started to print on a ‘premium digital ink jet’ paper, 100 gsm, which is acid free but not sure if that alone gives it art archival status.  With oil- and water-based ink you get a really nice print on the smooth ink jet paper, and it dries well.  Good for tests!

Glentui-leaves
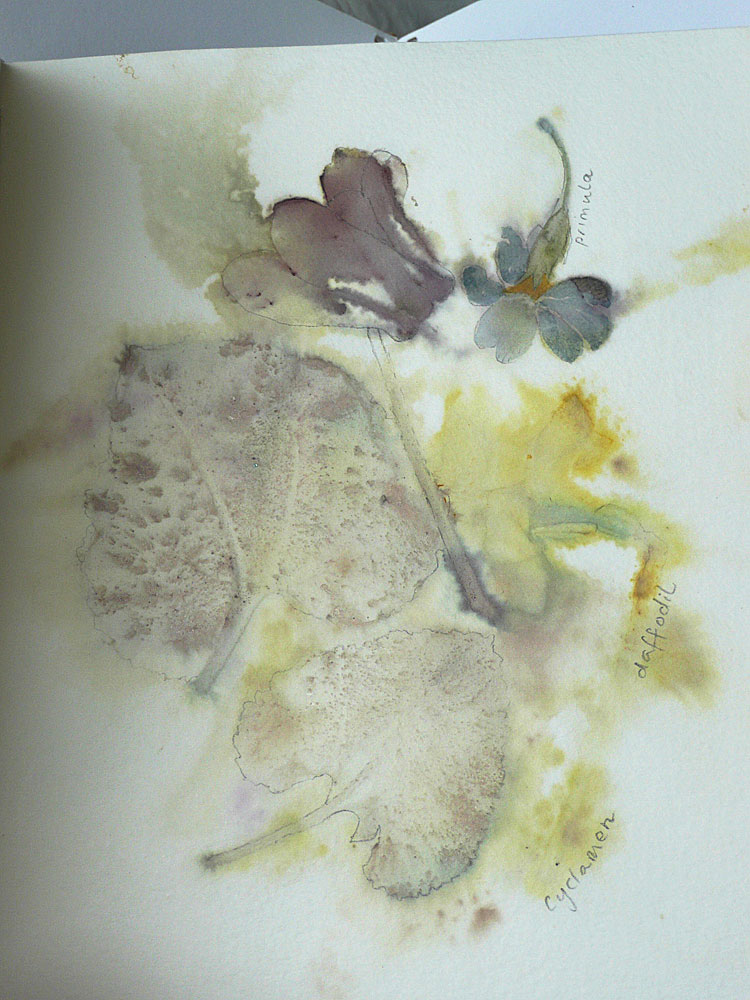
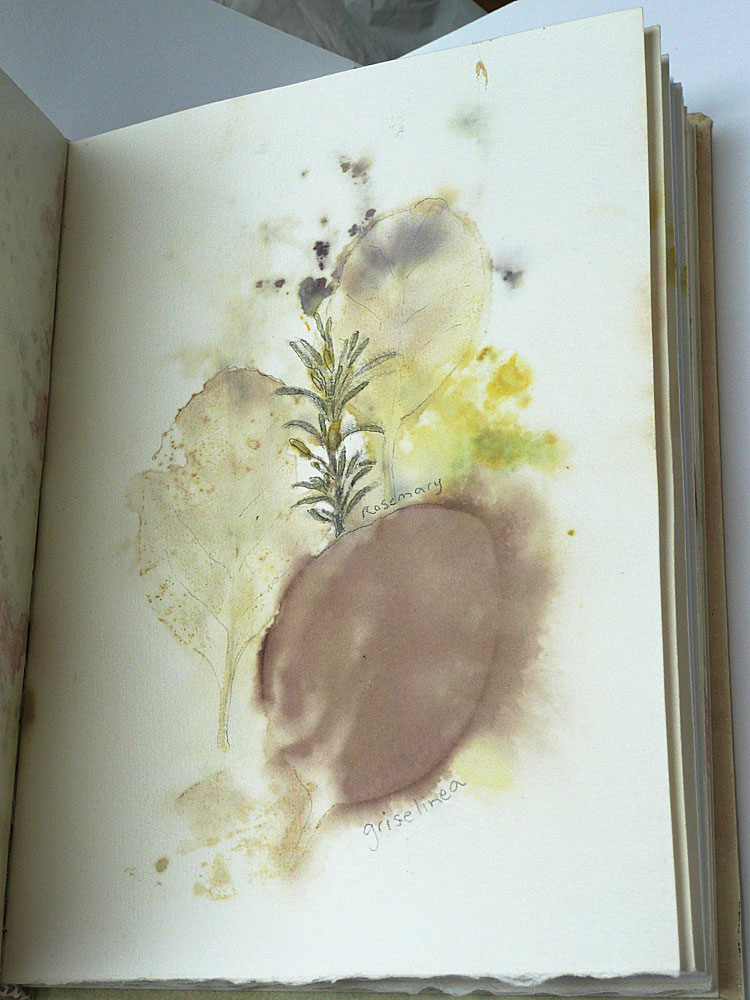
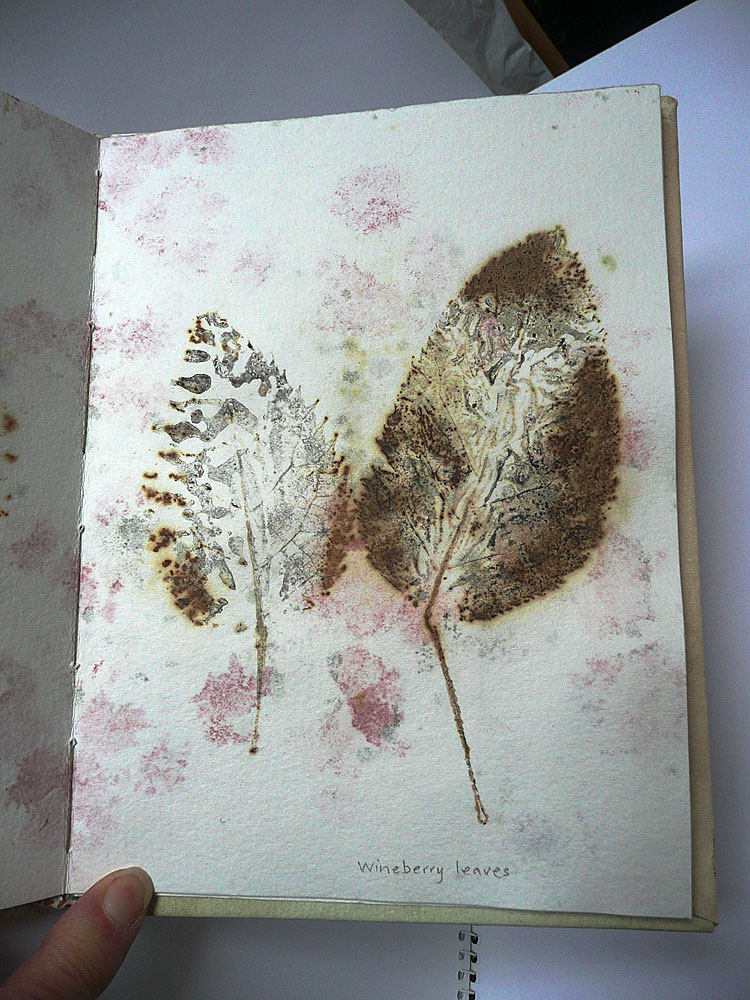
I also used the leaves collected at Glentui for a paper steam – some images needed further work.  I added in colourful plants from the garden,  to take advantage of the spring flowers.

Eventually, these images were made into a book which I have just completed.  The book’s cover is paper from a much earlier nature printing session when leaf prints were applied onto a sheet of paper coloured by earth pigments (Waikari green and an oxide brown-red watercolour).  The nature prints in the book were made using oil-based ink, and were added on top of the steamed ecoprints.

As an experiment for this book, I applied the Waikari green paint to the black beech leaves, a Winsor & Newton blue watercolour to the primula flower petals and above them a touch of Indian Yellow, and pencil outlines were used to define some other leaves and flowers.  However, the pink and grey marks on some of the sheets of paper occurred as I left the damp paper between plastic for a few days…  Mould, ie!  There is also a lot of colour transfer from the plants themselves through to the adjacent pages of the stack as it was being steamed.

The last page shown here, of two wineberry leaves, is a steam of leaves I had previously used in a nature print – hence the black impressions appearing within the colours of the leaves.

A good way to record a walk and the progress in using my new etching press!


Cover

Cover-black-beech Cover-cyclamen Cover-griselinia Cover-print-leaves Cover-whau Cover-wineberry


Colours from a Landscape

I am currently showing some pigment colour swatches at the Dunedin Botanic Gardens, and in October I am doing a workshop on making paint.   This exhibition was facilitated through the Blue Oyster Gallery in Dunedin.  Also included in the show are some natural pigments on paper – eco prints – and some raw pigment.  The two artworks on paper show colours from Waikari (green)  and Ashley Gorge (pink and green)  in North Canterbury.  Many thanks to Clare Fraser from the Dunedin Botanic Gardens who is in charge of the venue.  I think the colours look fantastic presented on black paper against the lovely red walls of the Information Centre!

The pigment swatches each show a colour found at a specific location which is named on the swatch.

Image

Appearing below are some of the photos I received from Jaime Hanton, Blue Oyster Gallery, Dunedin, who kindly photographed the show and installed the work for me :

Dunedin Botanics 1

Dunedin Botanics 2

Dunedin botanics 3

Dunedin Botantics 4

This is not my anticipated installation for this show as the initial selection was stolen.  My box was left on the pavement by the courier company and disappeared overnight.  The items in this box were some of those in the photograph shown in the display case, bottom left corner.  If, by any chance, they turn up, I would just love to have them back.  They represent five years research, experiment and recording.  I have given up hope of ever seeing them again, however, and will re-build as much of the information as I can…  Worse things happen, and I ‘count my blessings’.


P1160373


Dunedin Botanics 6

Shells were traditionally used for paint containers!

Autumn colours eco print

I have been trying to catch the autumn leaves before they all blow away!   This post was started a few weeks ago, and I have published others before getting round to finishing this one.

The leaves have been used for eco prints on paper and cloth. I have been using lots of different mordants to soak paper and cotton – alum, washing soda, copper, tannin, gelatine and acorns, both alone and in different combinations.

Here is a collage of the the result on various pieces of cotton fabric, pre soaked for a few days in tannin, alum and washing soda and iron water.  I added iron filings when I put the packages together – was a bit heavy handed – but which produced a beautiful result where they touched Cotinus coggygria leaves.  Leaves used were acer, cotinus, oak, acacia both fresh and frozen, and iris and rose petals.  The fabrics were folded or rolled and weighted down with ceramic tiles.

P1190719

A wood block depicting a pin oak leaf was printed on to Pescia cotton 300 gsm printmaking paper which was later soaked with the cotton fabric. I rolled this paper and some of the fabric in layers around a wood core, using Phormium tenax or harakeke roots in the final layer of cotton. The same leaves were used as in the cotton bundles above, except with the addition of iron filings, vinegar and some Hypericum solar dye bath to which had been added salt and vinegar for a wool and thread dye experiment. My usual over-enthusiasm…

I managed to cram all of this into the steamer – there is a new, larger setup now.

The Pescia paper print, overprinted with cotinus and iron filings at the top and various other leaves below, follows.

Pinoak-print

The reverse of this Pescia paper roll – showing an iris petal and rose petals still attached.

Pinoak-reverse

The winter flowering iris plant that grows in the garden.

Iris

Here the cotton has picked up the green of the iris petal.
Pinoakfabric1

I was delighted with the result on this pre-used cotton poplin type fabric.  A mixture of defined and watery images.  The bias binding has taken up the colour extremely well.  It is an unused, old roll and quite stiff, so I wonder if it is starched.

Pinoakfabric2

Here is another view.  The rusty red came from a pink rose petal.

Pinoakfabric3

Another view of the blue-black colour created by the iron filings.

Cotton-with-iron

Autumn Leaves on Paper and Cloth

I had the opportunity to collect leaves from a friend’s garden. She has the most wonderful collection of shrubs and trees, all good candidates for natural printing.  I made three separate bundles using paper from three different pre-steam soaks.

Pescia 300 gsm paper  was put in a brew of brown rain water and ivy branch and leaves which had collected in a rusty wheelbarrow. The paper was there for nearly three days. Secondly, and for the same amount of time, I placed Fabriano artistico 360 gsm paper, (synthetic) lining fabric and pre-used poplin cotton in another mordant – an alum and washing soda bath.

Thirdly, a piece of white paper was soaked in a rust bath.  As usual the planned method of preparation flew out the door when I then added a little of the rusty water from this water + vinegar and iron objects on to the lining fabric which was on top of the second soaking pile.

All the leaves were from the freezer. The full sheet of Pescia paper I folded to fit the steamer, as I wanted a large complete sheet for a project that is part of a forthcoming group show. Into the rolled paper and fabric from the alum bath, I put more of the same leaves and bound them up with unmordanted wide cotton bias binding at which point I introduced some dried harakeke roots (NZ flax plant, Phormium cultivars).  The image below shows these two  bundles in the steamer.

Darfield15

Below is the alum Fabriano paper on its cylindrical cardboard core again.  I make sure I roll the wet paper and leaves tightly when rolling up the bundle.  I do find the bias binding works well.

Darfield4

Unwinding this bundle.  It contained vine leaves, cotinus, acer, maple, sycamore and other deciduous leaves – I have to consult the owner about the more unusual plants…  The vine leaves were a glorious blend of reds, greys and black, so I was interested to see the quite stunning result – for me at least!

Darfield3

Another view of this bundle of two sheets of paper – it is the left hand side of the image above, the vine leaf removed.  Some of the vine leaf is still stuck to the paper.  It was removed when dry.

Darfield2

This is a further image of the still wet papers.

Darfield1

I particularly  like the shape of this leaf, which I think is from a tulip tree – Liriodendron.

Darfield6

Here is the lining fabric and the cotton bias binding from the rust paper print.  (If you sew, you will know what that is!)

Darfield5

All the above image are when the material was wet.   So today I photographed the dried and ironed fabric.  Immediately below is the lining fabric, and another image of the same piece.  When I iron the fabric I like to keep the embossing from the leaf veins.

Darfield7

Darfield8

The definition of the leaves is a lovely instance of chance – the darker areas behind the leaf giving the appearance of depth.

Finally, below is the cotton fabric from the alum and washing soda mordant bath: the leaf shapes not distinct.

Darfield9

The tannin bath print (two images below) was not so spectacular as the ones from the alum bath; but still quite subtle.  The definition on the printing paper – Pescia (56 x 76 cms | 22 x 30 inches) – is not so good, but I think there was not enough pressure on the package even though it was well weighted down.  I wonder if the one hour steam was too long, so I will experiment with a shorter one.  It is almost as if there is too much water accumulating between the sheets of paper.  I may have soaked the paper for too long as well.  I should try taking off the excess water by pressing between sheets of butchers paper before laying on the plant material (as you do when printing).  This image was taken when the paper was dry.

Darfield10

This is the ‘back’ below.  I do to know why it is so very mono-colour, but possibly the absence of the vine leaves explains this.  And the alum which always seems to give a yellow/green cast to the colour range.

Darfield11

Here are other papers from this steam.  This is the third bundle, bound with bias binding.  The outer paper was the rust print.

Darfield16

In the photo below, the paper with the oil based ink dry point (to the right)  was included in the tannin bath.  All papers are dry.

Darfield14

I have to say, my rust prints are very rusty.  For a couple of days nothing seems to happen, then there is more rust than I would like the next day.  This is what I mean.  This is the other side of the paper above – and the leaf print is very black!

Darfield13

The top sheet of paper here has some lovely, abstract detail.

Darfield12

This was an exciting outcome for me.  I just love this process.  Many thanks to Faye and Dave Marshall for providing the leaves.