Colours from a Landscape

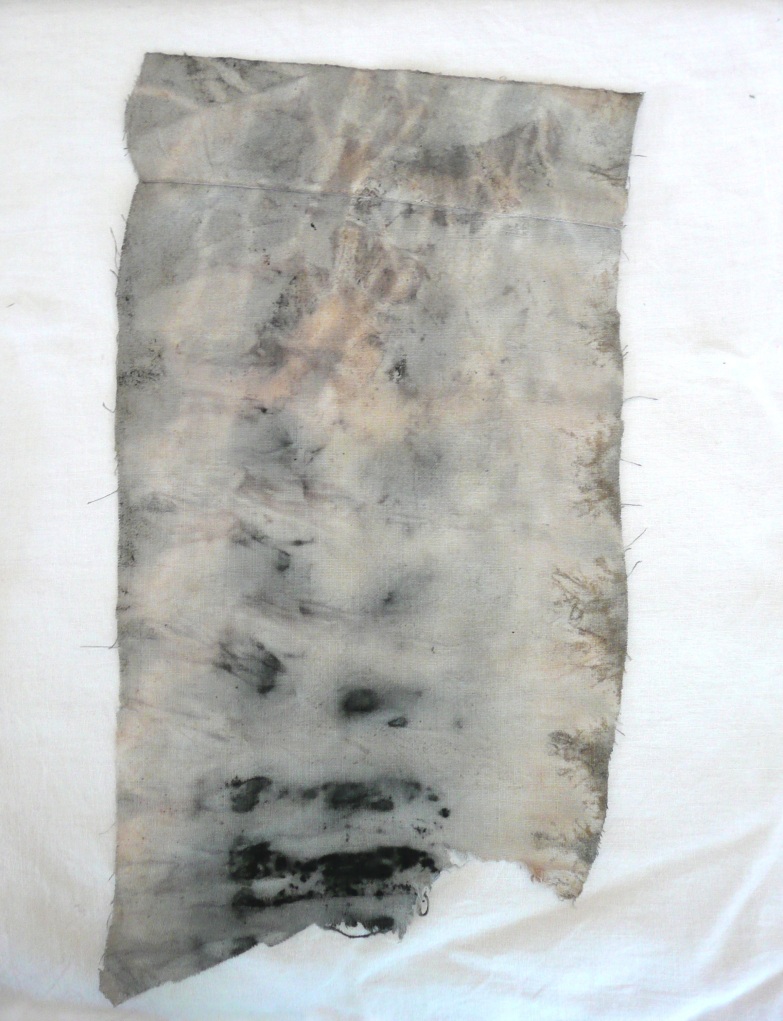
I am currently showing some pigment colour swatches at the Dunedin Botanic Gardens, and in October I am doing a workshop on making paint.   This exhibition was facilitated through the Blue Oyster Gallery in Dunedin.  Also included in the show are some natural pigments on paper – eco prints – and some raw pigment.  The two artworks on paper show colours from Waikari (green)  and Ashley Gorge (pink and green)  in North Canterbury.  Many thanks to Clare Fraser from the Dunedin Botanic Gardens who is in charge of the venue.  I think the colours look fantastic presented on black paper against the lovely red walls of the Information Centre!

The pigment swatches each show a colour found at a specific location which is named on the swatch.

Image

Appearing below are some of the photos I received from Jaime Hanton, Blue Oyster Gallery, Dunedin, who kindly photographed the show and installed the work for me :

Dunedin Botanics 1

Dunedin Botanics 2

Dunedin botanics 3

Dunedin Botantics 4

This is not my anticipated installation for this show as the initial selection was stolen.  My box was left on the pavement by the courier company and disappeared overnight.  The items in this box were some of those in the photograph shown in the display case, bottom left corner.  If, by any chance, they turn up, I would just love to have them back.  They represent five years research, experiment and recording.  I have given up hope of ever seeing them again, however, and will re-build as much of the information as I can…  Worse things happen, and I ‘count my blessings’.


P1160373


Dunedin Botanics 6

Shells were traditionally used for paint containers!

Autumn colours eco print

I have been trying to catch the autumn leaves before they all blow away!   This post was started a few weeks ago, and I have published others before getting round to finishing this one.

The leaves have been used for eco prints on paper and cloth. I have been using lots of different mordants to soak paper and cotton – alum, washing soda, copper, tannin, gelatine and acorns, both alone and in different combinations.

Here is a collage of the the result on various pieces of cotton fabric, pre soaked for a few days in tannin, alum and washing soda and iron water.  I added iron filings when I put the packages together – was a bit heavy handed – but which produced a beautiful result where they touched Cotinus coggygria leaves.  Leaves used were acer, cotinus, oak, acacia both fresh and frozen, and iris and rose petals.  The fabrics were folded or rolled and weighted down with ceramic tiles.

P1190719

A wood block depicting a pin oak leaf was printed on to Pescia cotton 300 gsm printmaking paper which was later soaked with the cotton fabric. I rolled this paper and some of the fabric in layers around a wood core, using Phormium tenax or harakeke roots in the final layer of cotton. The same leaves were used as in the cotton bundles above, except with the addition of iron filings, vinegar and some Hypericum solar dye bath to which had been added salt and vinegar for a wool and thread dye experiment. My usual over-enthusiasm…

I managed to cram all of this into the steamer – there is a new, larger setup now.

The Pescia paper print, overprinted with cotinus and iron filings at the top and various other leaves below, follows.

Pinoak-print

The reverse of this Pescia paper roll – showing an iris petal and rose petals still attached.

Pinoak-reverse

The winter flowering iris plant that grows in the garden.

Iris

Here the cotton has picked up the green of the iris petal.
Pinoakfabric1

I was delighted with the result on this pre-used cotton poplin type fabric.  A mixture of defined and watery images.  The bias binding has taken up the colour extremely well.  It is an unused, old roll and quite stiff, so I wonder if it is starched.

Pinoakfabric2

Here is another view.  The rusty red came from a pink rose petal.

Pinoakfabric3

Another view of the blue-black colour created by the iron filings.

Cotton-with-iron

Autumn Leaves on Paper and Cloth

I had the opportunity to collect leaves from a friend’s garden. She has the most wonderful collection of shrubs and trees, all good candidates for natural printing.  I made three separate bundles using paper from three different pre-steam soaks.

Pescia 300 gsm paper  was put in a brew of brown rain water and ivy branch and leaves which had collected in a rusty wheelbarrow. The paper was there for nearly three days. Secondly, and for the same amount of time, I placed Fabriano artistico 360 gsm paper, (synthetic) lining fabric and pre-used poplin cotton in another mordant – an alum and washing soda bath.

Thirdly, a piece of white paper was soaked in a rust bath.  As usual the planned method of preparation flew out the door when I then added a little of the rusty water from this water + vinegar and iron objects on to the lining fabric which was on top of the second soaking pile.

All the leaves were from the freezer. The full sheet of Pescia paper I folded to fit the steamer, as I wanted a large complete sheet for a project that is part of a forthcoming group show. Into the rolled paper and fabric from the alum bath, I put more of the same leaves and bound them up with unmordanted wide cotton bias binding at which point I introduced some dried harakeke roots (NZ flax plant, Phormium cultivars).  The image below shows these two  bundles in the steamer.

Darfield15

Below is the alum Fabriano paper on its cylindrical cardboard core again.  I make sure I roll the wet paper and leaves tightly when rolling up the bundle.  I do find the bias binding works well.

Darfield4

Unwinding this bundle.  It contained vine leaves, cotinus, acer, maple, sycamore and other deciduous leaves – I have to consult the owner about the more unusual plants…  The vine leaves were a glorious blend of reds, greys and black, so I was interested to see the quite stunning result – for me at least!

Darfield3

Another view of this bundle of two sheets of paper – it is the left hand side of the image above, the vine leaf removed.  Some of the vine leaf is still stuck to the paper.  It was removed when dry.

Darfield2

This is a further image of the still wet papers.

Darfield1

I particularly  like the shape of this leaf, which I think is from a tulip tree – Liriodendron.

Darfield6

Here is the lining fabric and the cotton bias binding from the rust paper print.  (If you sew, you will know what that is!)

Darfield5

All the above image are when the material was wet.   So today I photographed the dried and ironed fabric.  Immediately below is the lining fabric, and another image of the same piece.  When I iron the fabric I like to keep the embossing from the leaf veins.

Darfield7

Darfield8

The definition of the leaves is a lovely instance of chance – the darker areas behind the leaf giving the appearance of depth.

Finally, below is the cotton fabric from the alum and washing soda mordant bath: the leaf shapes not distinct.

Darfield9

The tannin bath print (two images below) was not so spectacular as the ones from the alum bath; but still quite subtle.  The definition on the printing paper – Pescia (56 x 76 cms | 22 x 30 inches) – is not so good, but I think there was not enough pressure on the package even though it was well weighted down.  I wonder if the one hour steam was too long, so I will experiment with a shorter one.  It is almost as if there is too much water accumulating between the sheets of paper.  I may have soaked the paper for too long as well.  I should try taking off the excess water by pressing between sheets of butchers paper before laying on the plant material (as you do when printing).  This image was taken when the paper was dry.

Darfield10

This is the ‘back’ below.  I do to know why it is so very mono-colour, but possibly the absence of the vine leaves explains this.  And the alum which always seems to give a yellow/green cast to the colour range.

Darfield11

Here are other papers from this steam.  This is the third bundle, bound with bias binding.  The outer paper was the rust print.

Darfield16

In the photo below, the paper with the oil based ink dry point (to the right)  was included in the tannin bath.  All papers are dry.

Darfield14

I have to say, my rust prints are very rusty.  For a couple of days nothing seems to happen, then there is more rust than I would like the next day.  This is what I mean.  This is the other side of the paper above – and the leaf print is very black!

Darfield13

The top sheet of paper here has some lovely, abstract detail.

Darfield12

This was an exciting outcome for me.  I just love this process.  Many thanks to Faye and Dave Marshall for providing the leaves.

Cotinus Dye Journey

Dye Pre history:

29 January 2013

Solar dye created with Cotinus coggygria and a small iron nail.

Cotonus-jar

Added pink silk and white cotton bundles containing honesty seed pods, aquilegia seeds and lupin seed pods.  Cotton fabric on top held under water with a cotinus twig.

2 February 2013

Bundles removed, inspected, and the silk returned as very little dye taken up in the centre of the bundle.  To brighten the colour I added some hypericum and hydrangea sola dye to the cotinus/iron brew.  The opened cotton bundle is below:

Cotinus-solar-cotton-bundle

ecoprint--cotton-continus

This is what happened to the silk bundle.

Cotinus-on-pink-silk-1

The ‘cotinus’ dye bath was not abandoned at this point but I put it in a larger jar to accommodate a linen bundle.

28 February 2013

Linen added.

Linen-cotinus-sequoia

Sequoiadendron giganteum cones, dark red prunus leaves and sequoia bark in a scarf length of white linen (mordanted previously in alum) and bound with linen and cotton thread, was next placed in the Cotinus leaf solar dye, but this left little colour, even after the linen and dye bath were simmered for one hour.  Even though the colour of the dye was dark perhaps I had exhausted the dye content.  I think it was worth the effort, the gentle colours – blue grey, pink and palest brown.

Cotinusdye-sequoiabundle

Steam and Solar Dyes – New Zealand Plants

In this post I collect together the New Zealand plants I have recently used in steam and solar dyeing.

Hebe species.  Steamed bundles

Hebe-plant

Hebe flowers and leaves were laid out on opposite sides of two silk bundles, with hebe twigs for the core. After steaming the leaves produced yellow and the flowers a mix of blue and a grey-pink-brown as is shown in the smaller bundle below.  Although as the silk used was already dyed a pale ‘salmon pink’, this background colour does not look very pink in the photograph…

Hebe small silk

Good colours, but not much definition of leaf or flower shape, and I still had the heat too high causing damage to the silk as you can see at the top the image above.  The photograph below shows part of the larger piece of dyed white silk.

Hebe-large-silk

Beech Leaves – Nothofagus species.  Solar dye

Nothofagus

I placed the leaves in water in a large jar.  No colour emerged, so  I decided to simmer the leaves, but unfortunately damaged them by letting the water in the pot dry out…

In 1849, when the British settlement of Canterbury started in earnest, the area named Oxford  by the early surveyors was covered by a large forest – Harewood Forest, which has been described as ‘the most magnificent stand of virgin bush in Canterbury and unique because of its variety.  It originally covered 56,000 acres [22,662.40  ha] and was the magnet which attracted the sawmilling community from which the present town grew’  (Oliver A Gillespie, Oxford, the first hundred years).  The forest  was logged for timber for the growing settlement around Christchurch and was nearly destroyed in 1898 by a fire which swept through the area, fanned by the strong winds that occur in Canterbury.  The last sawmill closed in 1912.

I will repeat the solar dye at some point, as I am lucky enough to have these trees growing in the garden.  There are still clumps of the forest remaining close by – and we find seeds from these oases arrive via the birds and grow well in the undisturbed parts of the garden.

Kapuka – Griselinia littoralis.  Solar dye

Griselinea

This tree is found in lowland and subalpine forest throughout New Zealand.  Griselinea has small flowers, which are green in the female and yellow in the male plants, and the berries are black when ripe.  For my test I used the green leaves which I cut up, and tied a knot in the alum pre-mordanted silk.  The berries are now on the trees, and ripen from March to June.

Griseliniesilksample

Wharariki, New Zealand Mountain or Coastal Flax Plant – Phormium cookianum.  

Steamed bundle and solar dye.

I think the flax plants in my garden are cultivars of P. cookianum.  The leaves have distinct colours – either green, yellow, pink and orange, or in combination, each plant being different.  The flowers are small and, characteristically for this plant, the seed pods hang downwards and are more or less twisted.  Our flax plants have not flowered yet this year so I wonder if they flower every year.  (See more details here :  <http://www.landcareresearch.co.nz/science/plants-animals-fungi/plants/ethnobotany/weaving-plants/information-sheets/harakeke-and-wharariki> )

This piece of silk started life as a steamed bundle containing a fallen Magnolia bud, but very little colour came from this (here the silk is still wet).  Taking this silk I  rolled up a new bundle containing just yellow flax leaf pieces and put it on to steam with the Hebe bundles mentioned above.  The vein down the centre of the flax leaf left a good red mark on the silk.

P1170291

P-cookianum-silk

Makomako or Wineberry – Aristotelia serrata.  Steamed bundle and solar dye

 The plant is found throughout New Zealand in lowland and subalpine forest, especially in clearings.  The solar dye liquid has a sweet, wine-like smell.

Aristotelia-serrata

Incorporated into a steam bundle of mixed flowers and leaves, were some Flax, Wineberry and Griselinea leaves, and Hebe flowers.  The Wineberry leaves gave a good imprint.  This is seen in the two images below.  The purple-grey marks are from the leaves which are thin and translucent.  (The pink in the background of the second  image below is from hollyhock flowers.)

wineberrybundle

Wineberry

The berries, which are edible, are red when mature and black when ripe.  I picked black berries and solar dyed the cotton shown below.  The colour of the dye is very strong.  This entry in my workbook is shared with a eucalyptus solar dye.

Wineberry-solar

The Eucalyptus (I think it is blue dollar gum) shown above, leads nicely into my next post which I intend to be about my other solar dyes.

For information on the plants I referred to NZ Flowers and Plants in Colour by J. T. Salmon, edition published in 1986.  Some of the plant nomenclature has changed since then, but I have used the current plant names.  All plants come from the garden.

Eco Printing on Paper

As part of a series of tests for printing plant colour on paper, I put paper and eucalyptus and hoheria leaves in between two pieces of paper in an ice cream tub, added water and laid a ceramic tile and stone on the top to submerge the contents.

Eucalyptus on paper

Tub and contents prior to soaking.Tub

(Mis)Adventures in Eucalyptus Eco Printing (2)

Testing eucalyptus on silk and cotton again.

Eucalyptus leaves

Last week I collected some more dried, fallen, eucalyptus leaves from the same tree as before.  You can see what beautiful colours these dried leaves have.  The green leaf on the left by the twig was a fresh leaf blown down by the recent north-west gales.  These leaves were placed on dampened, un-mordanted silk and rolled up in close contact with the cloth.  The eucalyptus twig formed the core of the bundle which was bound with cotton knitting yarn.

I made three more silk bundles with eucalyptus leaves, the smallest one was rolled up on itself with no eucalyptus twig in the centre. Two cotton bundles were also steamed.  I used some more of the cotton fabric as in the first tests, but this time it was mordanted with soy milk.  One of these cotton bundles contained only a small stem of daphne leaves and pink-red flower buds.

eco  bundles

I used the colander as a steamer basket with the pot lid to cover.  I steamed the bundles for one hour as this basket arrangement was not very air tight.  At one point the water nearly dried up, and I think the temperature in the pot became too hot as the silk fabric on the outer layer along one side of the largest bundle is stiff and ‘fused’ together.  One cotton bundle also showed signs of heat damage as well.

I finally managed to get more colour on the fabric pieces!  Still not what I would have expected, as is shown by the large silk bundle pictured below (left).

Lge silk bundle

This is the small silk bundle. Colour from the leaves and bark has been taken up by the silk quite well.

Silk e eucalyptus

This is the soy mordanted cotton fabric.  The bundle contents were daphne leaves and flower buds, and an eucalyptus twig core.  The cotton has absorbed quite a lot of colour.

Daphne on cotton

The following day I had another go… A post to come soon.

(Mis)Adventures with Eucalyptus eco prints

Plunging in with eucalyptus and silk.

In early December 2012, I started to try using eucaplytus leaves on silk and cotton fabric.  I went down the road to where a gum tree planted by Mrs White in the late 19th century towers above all other trees.  I collected dried, fallen leaves and fresh-when-cut leaves; see pods; bark; twigs from the prunings by the tree frog machine that took place a fortnight earlier.  Using India Flint’s method on page 264 of her book Second Skin, I rolled up in the silk the leaves etc around a bark covered twig for the core of the bundle of fabric.

First silk bundle

In a stainless steel pot I simmered the following for 30 minutes:

One bundle of leaves, bark twig, seed pods all tied up with a polyester piping cord.  An extra piece of eucalyptus bark; extra eucalyptus leaves; coil of aluminium wire 1 mm dia x 170 mm long; a piece of aluminium foil 80 mm x 200 mm; a used tea bag; tap water from kitchen, with a top up from laundry tap as necessary (untreated Oxford town bore water, no chlorine).

I was a bit nervous nothing would happen.  I was correct!  Well, something did happen, but not what I desired.  This is typical art progress!

After 30 minutes I turned off the heat and left it until the next day.  Without  removing all the cord, I had a peek to see what was happening when the bundle was cool.

First silk bundle

Apart from the resist created by the cord and plant material, very little colour came through from the eucalyptus, the whole piece being dominated by the dye water, as far as I understand.  I also wondered if this material was, in fact, silk.  I have had it for about twenty years and it was an old piece when I was given it.

Undaunted, you might say, and buoyed up by India Flint’s Eco Colour, I researched and read the internet – more very useful information from Alice Fox in the UK,  Wendy Feldberg in Canada and Cassandra Tondro in the USA  – thanks SO much for this.  I re-read the information to sort it all out in my mind into an ordered format so that I could at least intend experimenting in a reasoned fashion and record the tests in my workbook.  I made ash water from the wood burning stove ash, and then got jars of copper, alum, rhubarb and iron water underway.

The ash water had been strained through an old cotton pillow case, so I thought I would put this mordanted fabric in a hot dye and used the left-over silk bundle eucalyptus brew.  This still contained the leaves, aluminium foil and bark, and I also put in some Sequoiadendron giganteum bark from the garden as well (another tree planted early on in Oxford’s history) and a small dash of the rust & vinegar water I had used in my earlier paper experiments (just for good measure).

The cotton bundle contained an old rusty nail as core, lemon balm leaves and  one eucalyptus leaf at the end – all tied up with the cord previously used.

Eucalyptus cotton iron

I also put in a sheet of paper, concertina folded, enclosing another eucalyptus leaf, and held together with two rusting bulldog clips. Later I added another folded sheet of ordinary printing paper.

Euc thread Bond

Euc fold

As the experts will know, the water got very black!  I did not record how long I left the contents heating, but must have been about under an hour.

The results:  the cotton dyed fabric is above showing the black marks from the nail, and I think the eucalyptus leaf is showing at the top where I laid it across the hemmed fabric.  The two paper experiments are the smaller images – the bulldog clip marks are seen in the left hand image.