Dyes on Paper

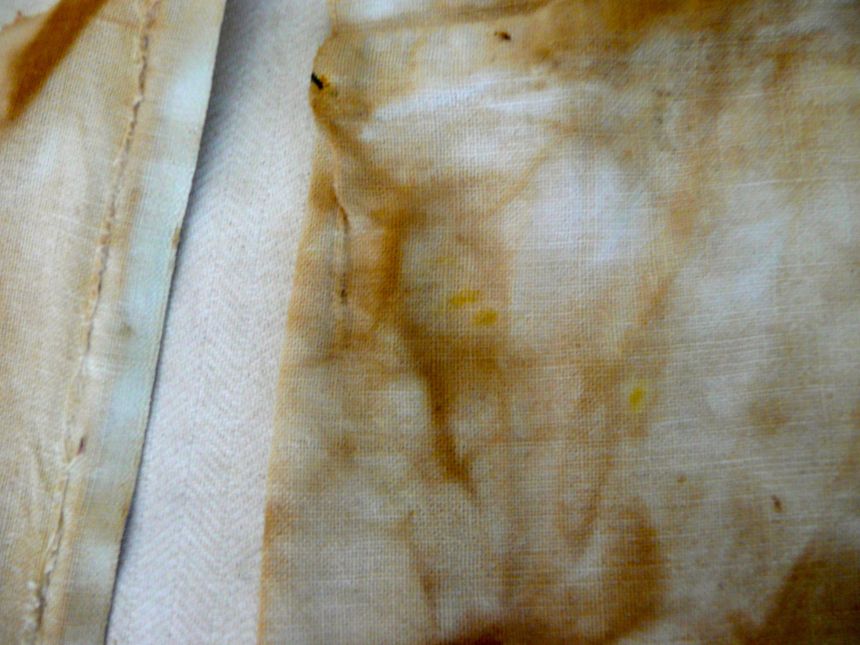
As the main purpose for starting solar dyeing with plants was to find more organic colours that I could use on paper, I record here some of my recent paper experiments.  This first one is on kozo (mulberry)  paper, and coloured by a pomegranite skin solar dye.  I squashed the folded paper into the jar, and really like the way the scrunched and twisted paper keeps its shape when dry.  I am not sure where the dark marks came from.

Kozo-pomegranite

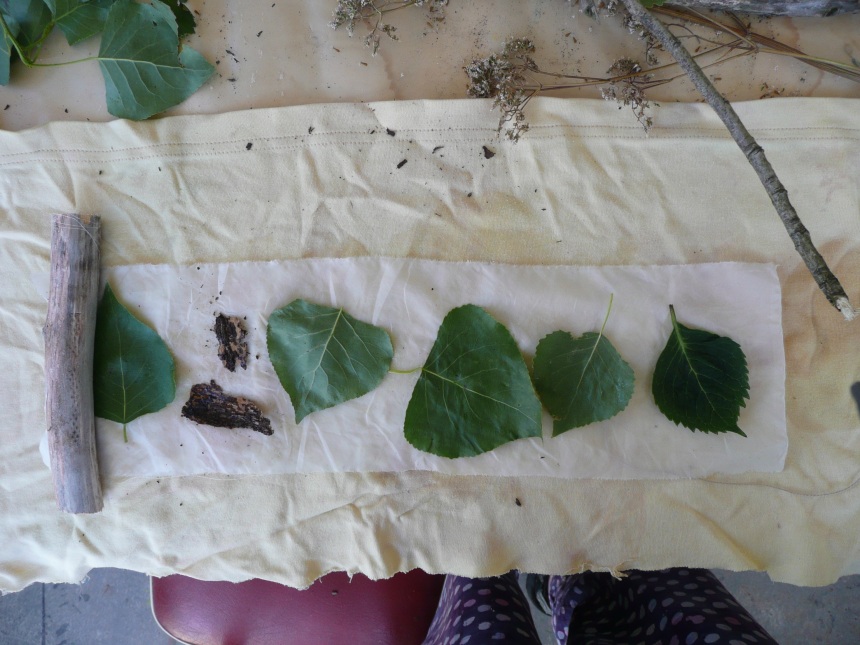
I have also experimented with Knotweed – Persicaria.   Knotweed grows in my veggie patch.  There are two varieties – one smaller than the other.  The smallest one, P. maculosa, has been used here.  It seems simpler just to scan my test book pages! – here they are:

Persicaria-paper-tests

This is the page for Privet berries.   They are poisonous, by the way.  The colour has lasted well in the solar dye jars, and each brew is different.  I have not achieved a blue which you can get with adding alum and salt.  One source said the berries had to be ripe in order to do this.  I collected two lots, the second one of which is this test.  The berries were round and plump, seemed to be very ripe, but apparently, perhaps, not…

Privet-berries-paper-test

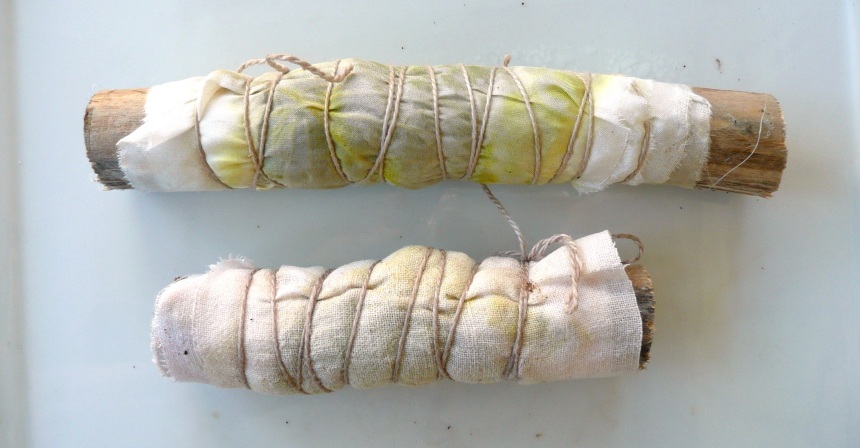
This next page is abut Viburnum tinus.  I solar dyed the drupes which are a beautiful steely blue.  It is interesting how the colours change according to type of paper or textile to which they are applied.

Viburnum-paper-tests

Autumn colours eco print

I have been trying to catch the autumn leaves before they all blow away!   This post was started a few weeks ago, and I have published others before getting round to finishing this one.

The leaves have been used for eco prints on paper and cloth. I have been using lots of different mordants to soak paper and cotton – alum, washing soda, copper, tannin, gelatine and acorns, both alone and in different combinations.

Here is a collage of the the result on various pieces of cotton fabric, pre soaked for a few days in tannin, alum and washing soda and iron water.  I added iron filings when I put the packages together – was a bit heavy handed – but which produced a beautiful result where they touched Cotinus coggygria leaves.  Leaves used were acer, cotinus, oak, acacia both fresh and frozen, and iris and rose petals.  The fabrics were folded or rolled and weighted down with ceramic tiles.

P1190719

A wood block depicting a pin oak leaf was printed on to Pescia cotton 300 gsm printmaking paper which was later soaked with the cotton fabric. I rolled this paper and some of the fabric in layers around a wood core, using Phormium tenax or harakeke roots in the final layer of cotton. The same leaves were used as in the cotton bundles above, except with the addition of iron filings, vinegar and some Hypericum solar dye bath to which had been added salt and vinegar for a wool and thread dye experiment. My usual over-enthusiasm…

I managed to cram all of this into the steamer – there is a new, larger setup now.

The Pescia paper print, overprinted with cotinus and iron filings at the top and various other leaves below, follows.

Pinoak-print

The reverse of this Pescia paper roll – showing an iris petal and rose petals still attached.

Pinoak-reverse

The winter flowering iris plant that grows in the garden.

Iris

Here the cotton has picked up the green of the iris petal.
Pinoakfabric1

I was delighted with the result on this pre-used cotton poplin type fabric.  A mixture of defined and watery images.  The bias binding has taken up the colour extremely well.  It is an unused, old roll and quite stiff, so I wonder if it is starched.

Pinoakfabric2

Here is another view.  The rusty red came from a pink rose petal.

Pinoakfabric3

Another view of the blue-black colour created by the iron filings.

Cotton-with-iron

Autumn Leaves on Paper and Cloth

I had the opportunity to collect leaves from a friend’s garden. She has the most wonderful collection of shrubs and trees, all good candidates for natural printing.  I made three separate bundles using paper from three different pre-steam soaks.

Pescia 300 gsm paper  was put in a brew of brown rain water and ivy branch and leaves which had collected in a rusty wheelbarrow. The paper was there for nearly three days. Secondly, and for the same amount of time, I placed Fabriano artistico 360 gsm paper, (synthetic) lining fabric and pre-used poplin cotton in another mordant – an alum and washing soda bath.

Thirdly, a piece of white paper was soaked in a rust bath.  As usual the planned method of preparation flew out the door when I then added a little of the rusty water from this water + vinegar and iron objects on to the lining fabric which was on top of the second soaking pile.

All the leaves were from the freezer. The full sheet of Pescia paper I folded to fit the steamer, as I wanted a large complete sheet for a project that is part of a forthcoming group show. Into the rolled paper and fabric from the alum bath, I put more of the same leaves and bound them up with unmordanted wide cotton bias binding at which point I introduced some dried harakeke roots (NZ flax plant, Phormium cultivars).  The image below shows these two  bundles in the steamer.

Darfield15

Below is the alum Fabriano paper on its cylindrical cardboard core again.  I make sure I roll the wet paper and leaves tightly when rolling up the bundle.  I do find the bias binding works well.

Darfield4

Unwinding this bundle.  It contained vine leaves, cotinus, acer, maple, sycamore and other deciduous leaves – I have to consult the owner about the more unusual plants…  The vine leaves were a glorious blend of reds, greys and black, so I was interested to see the quite stunning result – for me at least!

Darfield3

Another view of this bundle of two sheets of paper – it is the left hand side of the image above, the vine leaf removed.  Some of the vine leaf is still stuck to the paper.  It was removed when dry.

Darfield2

This is a further image of the still wet papers.

Darfield1

I particularly  like the shape of this leaf, which I think is from a tulip tree – Liriodendron.

Darfield6

Here is the lining fabric and the cotton bias binding from the rust paper print.  (If you sew, you will know what that is!)

Darfield5

All the above image are when the material was wet.   So today I photographed the dried and ironed fabric.  Immediately below is the lining fabric, and another image of the same piece.  When I iron the fabric I like to keep the embossing from the leaf veins.

Darfield7

Darfield8

The definition of the leaves is a lovely instance of chance – the darker areas behind the leaf giving the appearance of depth.

Finally, below is the cotton fabric from the alum and washing soda mordant bath: the leaf shapes not distinct.

Darfield9

The tannin bath print (two images below) was not so spectacular as the ones from the alum bath; but still quite subtle.  The definition on the printing paper – Pescia (56 x 76 cms | 22 x 30 inches) – is not so good, but I think there was not enough pressure on the package even though it was well weighted down.  I wonder if the one hour steam was too long, so I will experiment with a shorter one.  It is almost as if there is too much water accumulating between the sheets of paper.  I may have soaked the paper for too long as well.  I should try taking off the excess water by pressing between sheets of butchers paper before laying on the plant material (as you do when printing).  This image was taken when the paper was dry.

Darfield10

This is the ‘back’ below.  I do to know why it is so very mono-colour, but possibly the absence of the vine leaves explains this.  And the alum which always seems to give a yellow/green cast to the colour range.

Darfield11

Here are other papers from this steam.  This is the third bundle, bound with bias binding.  The outer paper was the rust print.

Darfield16

In the photo below, the paper with the oil based ink dry point (to the right)  was included in the tannin bath.  All papers are dry.

Darfield14

I have to say, my rust prints are very rusty.  For a couple of days nothing seems to happen, then there is more rust than I would like the next day.  This is what I mean.  This is the other side of the paper above – and the leaf print is very black!

Darfield13

The top sheet of paper here has some lovely, abstract detail.

Darfield12

This was an exciting outcome for me.  I just love this process.  Many thanks to Faye and Dave Marshall for providing the leaves.

Cotinus Dye Journey

Dye Pre history:

29 January 2013

Solar dye created with Cotinus coggygria and a small iron nail.

Cotonus-jar

Added pink silk and white cotton bundles containing honesty seed pods, aquilegia seeds and lupin seed pods.  Cotton fabric on top held under water with a cotinus twig.

2 February 2013

Bundles removed, inspected, and the silk returned as very little dye taken up in the centre of the bundle.  To brighten the colour I added some hypericum and hydrangea sola dye to the cotinus/iron brew.  The opened cotton bundle is below:

Cotinus-solar-cotton-bundle

ecoprint--cotton-continus

This is what happened to the silk bundle.

Cotinus-on-pink-silk-1

The ‘cotinus’ dye bath was not abandoned at this point but I put it in a larger jar to accommodate a linen bundle.

28 February 2013

Linen added.

Linen-cotinus-sequoia

Sequoiadendron giganteum cones, dark red prunus leaves and sequoia bark in a scarf length of white linen (mordanted previously in alum) and bound with linen and cotton thread, was next placed in the Cotinus leaf solar dye, but this left little colour, even after the linen and dye bath were simmered for one hour.  Even though the colour of the dye was dark perhaps I had exhausted the dye content.  I think it was worth the effort, the gentle colours – blue grey, pink and palest brown.

Cotinusdye-sequoiabundle

Eco Print Silk Bundles – Montbretia flowers

Another misadventure?  But with a happy outcome.

11Febsilksteam

In February, I used my last large piece of silk, to enclose montbretia flowers, hydrangea leaves, hypericum leaves, dock seeds on a stem x 4, and pink dahlia buds (broken up), and put on to steam for 30 minutes on a low heat (No 2 setting). Accompanying this bundle was a smaller one, containing the same material except without the dock seeds.  Put the lid on the pot and made sure the steam was not too fierce.

After a while, because of a strong blast of wind as the southerly front arrived, I had to concentrate on quickly picking up the cabbage tree leaves (Cordyline australis) off the back lawn.  I thought of the possible steam damage, and finding a new cabbage leaf (it’s supple) I had the idea of using that for an outer cover – which you can see above in the photo.  Wondered if it would transfer any colour as well.  A piece of bark, possibly Acacia melynoxilon, was also added on top.  The water seemed to have stopped steaming so I upped the temperature to 2.5 for the last ten minutes.

At this point the small bundle was taken out.  At both ends of the bundle I dropped on some red cabbage dye (turned blue by the action of some ash mordant) and then some wineberry dye in the middle.  It was left to dry on a piece of paper, but as a lot of the dye came out of the bundle, I put it back in the steam pot once that was turned off.

Montbretia-paper

The large bundle was next subjected to 30 more minutes of steaming as some of the pink colour inside was not transferring to the silk.  The montbretia petals dyed the silk a lovely golden yellow.  When that was done, I left both bundles on the rack overnight.  I decided to keep both bundles to mature for one month, which I did by leaving them in separate open snap lock bags, and untying them on 11 March.

Month-bundle3

This was the result!  A rather sorry looking object, mouldy and still damp in the middle.

Here is the opened large bundle!

Montbretia-large

The large leaf here is hypericum, leaving a red stain.  Lots of decayed plant material.

Montbretia-decay

And this is the cleaned, ironed bundle:

Montbretia-silk-lge

Montbretia-silk-lge2

The smaller silk bundle:

Montbretia-small

Steam and Solar Dyes – New Zealand Plants

In this post I collect together the New Zealand plants I have recently used in steam and solar dyeing.

Hebe species.  Steamed bundles

Hebe-plant

Hebe flowers and leaves were laid out on opposite sides of two silk bundles, with hebe twigs for the core. After steaming the leaves produced yellow and the flowers a mix of blue and a grey-pink-brown as is shown in the smaller bundle below.  Although as the silk used was already dyed a pale ‘salmon pink’, this background colour does not look very pink in the photograph…

Hebe small silk

Good colours, but not much definition of leaf or flower shape, and I still had the heat too high causing damage to the silk as you can see at the top the image above.  The photograph below shows part of the larger piece of dyed white silk.

Hebe-large-silk

Beech Leaves – Nothofagus species.  Solar dye

Nothofagus

I placed the leaves in water in a large jar.  No colour emerged, so  I decided to simmer the leaves, but unfortunately damaged them by letting the water in the pot dry out…

In 1849, when the British settlement of Canterbury started in earnest, the area named Oxford  by the early surveyors was covered by a large forest – Harewood Forest, which has been described as ‘the most magnificent stand of virgin bush in Canterbury and unique because of its variety.  It originally covered 56,000 acres [22,662.40  ha] and was the magnet which attracted the sawmilling community from which the present town grew’  (Oliver A Gillespie, Oxford, the first hundred years).  The forest  was logged for timber for the growing settlement around Christchurch and was nearly destroyed in 1898 by a fire which swept through the area, fanned by the strong winds that occur in Canterbury.  The last sawmill closed in 1912.

I will repeat the solar dye at some point, as I am lucky enough to have these trees growing in the garden.  There are still clumps of the forest remaining close by – and we find seeds from these oases arrive via the birds and grow well in the undisturbed parts of the garden.

Kapuka – Griselinia littoralis.  Solar dye

Griselinea

This tree is found in lowland and subalpine forest throughout New Zealand.  Griselinea has small flowers, which are green in the female and yellow in the male plants, and the berries are black when ripe.  For my test I used the green leaves which I cut up, and tied a knot in the alum pre-mordanted silk.  The berries are now on the trees, and ripen from March to June.

Griseliniesilksample

Wharariki, New Zealand Mountain or Coastal Flax Plant – Phormium cookianum.  

Steamed bundle and solar dye.

I think the flax plants in my garden are cultivars of P. cookianum.  The leaves have distinct colours – either green, yellow, pink and orange, or in combination, each plant being different.  The flowers are small and, characteristically for this plant, the seed pods hang downwards and are more or less twisted.  Our flax plants have not flowered yet this year so I wonder if they flower every year.  (See more details here :  <http://www.landcareresearch.co.nz/science/plants-animals-fungi/plants/ethnobotany/weaving-plants/information-sheets/harakeke-and-wharariki> )

This piece of silk started life as a steamed bundle containing a fallen Magnolia bud, but very little colour came from this (here the silk is still wet).  Taking this silk I  rolled up a new bundle containing just yellow flax leaf pieces and put it on to steam with the Hebe bundles mentioned above.  The vein down the centre of the flax leaf left a good red mark on the silk.

P1170291

P-cookianum-silk

Makomako or Wineberry – Aristotelia serrata.  Steamed bundle and solar dye

 The plant is found throughout New Zealand in lowland and subalpine forest, especially in clearings.  The solar dye liquid has a sweet, wine-like smell.

Aristotelia-serrata

Incorporated into a steam bundle of mixed flowers and leaves, were some Flax, Wineberry and Griselinea leaves, and Hebe flowers.  The Wineberry leaves gave a good imprint.  This is seen in the two images below.  The purple-grey marks are from the leaves which are thin and translucent.  (The pink in the background of the second  image below is from hollyhock flowers.)

wineberrybundle

Wineberry

The berries, which are edible, are red when mature and black when ripe.  I picked black berries and solar dyed the cotton shown below.  The colour of the dye is very strong.  This entry in my workbook is shared with a eucalyptus solar dye.

Wineberry-solar

The Eucalyptus (I think it is blue dollar gum) shown above, leads nicely into my next post which I intend to be about my other solar dyes.

For information on the plants I referred to NZ Flowers and Plants in Colour by J. T. Salmon, edition published in 1986.  Some of the plant nomenclature has changed since then, but I have used the current plant names.  All plants come from the garden.

Solar dyeing – Hypericum

For one of my first solar dyeing experiments, I used St Johns Wort, Hypericum, from the garden. My plant is one of the many varieties of Hypericum.

St Johns Wort flower

On 6 January I placed the buds, leaves and flowers separately in three glass jars, filled with tap water (Oxford bore) and placed a weight on the top to keep the unmordanted cotton cloths submerged.

The following image is the dyed, scrunched up cotton from the jar that contained buds and two stones, one of which must have had a generous amount of iron in it as it introduced a black colour.

Hypericum buds

The resulting green, blue and black was very nice to see.  The cotton from this and the next jar was removed on 17 January.

The jar with the chopped up hypericum leaves contained a Waimakariri river stone to weigh down the leaves and three folded and tied cotton bundles with different contents.  In the photograph below, the top scrap of cotton was folded on its own.  The lower scrap enclosed more hypericum leaves and some Acacia melanoxylon bark.  The leaves in this bundle came through as a pale green-yellow, just visible in the image.  The thin strip on the right is 300 gsm Fabriano paper, folded and placed in the jar with the bundles.

Hypericum leaves

The third bundle containing flower buds is below.  The yellow buds did not seem to change the colour; I do not know where the grey marks came from!  Interesting that the iron caused such a different colour to appear in the first jar.

Hypericum

The third jar containing hypericum flowers and a piece of wire that I thought was copper was left until 28 January when I removed the cotton.  Some brighter traces of yellow appear, perhaps through contact with the wire.

Hypericum copper

On 19 January I started to record my solar dyeing tests and to date I have 35 of them.  No wonder I have not had a chance  to sit down at the computer.  The weather has been hot and mostly dry for about three weeks,  even now at 5.51 pm it is 27 degrees C in the studio (built as a greenhouse).  I recorded 47 degrees C one day on the shelf by the windows were I place my solar dye jars.  The garden is full of flowers and I could certainly never need to go out further afield in search of material for dyeing. I hardly know where to start.  I would prefer to concentrate on New Zealand native plants and have solar dyed with Harakeke the New Zealand flax plant – Phormium cookianum; Griselinea littorals; Hebe; and Wineberry – Aristotelia serrata.

I have been reading Richard Mabey’s book Weeds; How Vagabond Plants Gatecrashed Civilisation and Changed the Way We Think About Nature, published in 2010.  Chance and serendipity are rife here at the moment – I found this book in the library by chance – and I was also concurrently very curious about a weed that was new to me.  I eventually found this plant on the internet by using the search terms ‘tiny white flower weed’.  The plant is called Galinsoga parviflora and has the common names of Gallant Soldier or Potato Weed.  Well, it is growing in the vegie patch and appeared last season – near the potatoes.  Then I discover from the Contents that Mabey’s book  has a chapter entitled Gallant-soldier!   It so happens that this plant, a member of the daisy family, arrived at Kew Gardens in 1793 from Peru and was named after the ‘splendidly ennobled’ Spanish botanist Don Mariano Martinez de Galinsoga.  This plant has the tiny-est flower I have ever seen.  It escaped Kew Gardens in the 1860s and eventually found its way to my garden.

Another serendipitous moment arrived when I read in this book that in 1748 ‘a celebrated [British agricultural] improver,  William Ellis, who farmed at Little Gaddesden in the Chilterns […] was experimenting with different methods of weed control and pasture management’.  Ellis used clover as an effective way of controlling weeds. This nitrogenous crop could be ploughed in so was also a great cost saver as hand weeding would not be required.  I expect my ancestors from Little Gaddesden took to straw-plaiting to supplement their incomes, no longer being required to weed the Corn (wheat) fields.  Actually, we have also used clover as a weed suppressant – we have a bricked area that we despaired of – after two years hand weeding between the  bricks we once tried the chemical way but not really wanting to do this gave that idea up pretty fast (and it didn’t work really for the weeds came back quickly).  We finally decided to just mow it!  It works wonderfully, and is a haven for the bees as the clover is taking over.

Much to my comfort, Mabey also talks about Hypericum perforatum.  “Each leaf is covered in tiny transparent dots (the perforations of the Latin name…) and held up against the sky the sun’s rays prick through, like dapple in a springtime wood.”  A good connection with embroidery there…

This is miles away from eco-print and solar dyeing… and the dye from Galinsoga is a pale straw colour.

(Mis)Adventures in Eco Print 3

At last I seem to be getting somewhere with this colour transfer…

For this experiment I decided to try some other plants from the garden. I noticed that a hydrangea leaf when soaked in hot water even for a short time produced a lovely yellow. I collected some poplar leaves and small branches as the recent gales tore off a large branch from one of the shelter trees. We had to spend some time cutting up the large branch, and tidying up our neighbours’ paddock. So I thought to commemorate this, I would try the poplar leaves and twigs in a steamed eco-print.

Poplar branches

I modified my steaming process by using folded chicken wire in the bottom of the pot, which meant the lid fitted properly and so prevented too much steam escaping. The bundles were cotton with rice and alum mordant enclosing a poplar twig, bark and leaf, and silk soaked in alum enclosing poplar twig, bark and leaves plus one hydrangea leaf.

P1170125

P1170124

P1170157
Yellow dye was visible on the silk once the steaming started, but very little on the cotton bundle, so that colour must not have come from the hydrangea leaf.

Here is the dyed silk cloth unwound.

P1170160

And a close up of the imprint.

Poplar print

The cotton bundle was a little disappointing, plenty of yellow and a pale tan colour plus some nice marks left by the (previously used) cotton thread for tying. I think the yellow must have come from the lichen on the bark. The poplar leaf is only just visible at the foot of the fabric, the green leaf point just to the left of the piece of cotton thread.

Poplar cotton

Eco Printing on Paper

As part of a series of tests for printing plant colour on paper, I put paper and eucalyptus and hoheria leaves in between two pieces of paper in an ice cream tub, added water and laid a ceramic tile and stone on the top to submerge the contents.

Eucalyptus on paper

Tub and contents prior to soaking.Tub

(Mis)Adventures in Eucalyptus Eco Printing (2)

Testing eucalyptus on silk and cotton again.

Eucalyptus leaves

Last week I collected some more dried, fallen, eucalyptus leaves from the same tree as before.  You can see what beautiful colours these dried leaves have.  The green leaf on the left by the twig was a fresh leaf blown down by the recent north-west gales.  These leaves were placed on dampened, un-mordanted silk and rolled up in close contact with the cloth.  The eucalyptus twig formed the core of the bundle which was bound with cotton knitting yarn.

I made three more silk bundles with eucalyptus leaves, the smallest one was rolled up on itself with no eucalyptus twig in the centre. Two cotton bundles were also steamed.  I used some more of the cotton fabric as in the first tests, but this time it was mordanted with soy milk.  One of these cotton bundles contained only a small stem of daphne leaves and pink-red flower buds.

eco  bundles

I used the colander as a steamer basket with the pot lid to cover.  I steamed the bundles for one hour as this basket arrangement was not very air tight.  At one point the water nearly dried up, and I think the temperature in the pot became too hot as the silk fabric on the outer layer along one side of the largest bundle is stiff and ‘fused’ together.  One cotton bundle also showed signs of heat damage as well.

I finally managed to get more colour on the fabric pieces!  Still not what I would have expected, as is shown by the large silk bundle pictured below (left).

Lge silk bundle

This is the small silk bundle. Colour from the leaves and bark has been taken up by the silk quite well.

Silk e eucalyptus

This is the soy mordanted cotton fabric.  The bundle contents were daphne leaves and flower buds, and an eucalyptus twig core.  The cotton has absorbed quite a lot of colour.

Daphne on cotton

The following day I had another go… A post to come soon.